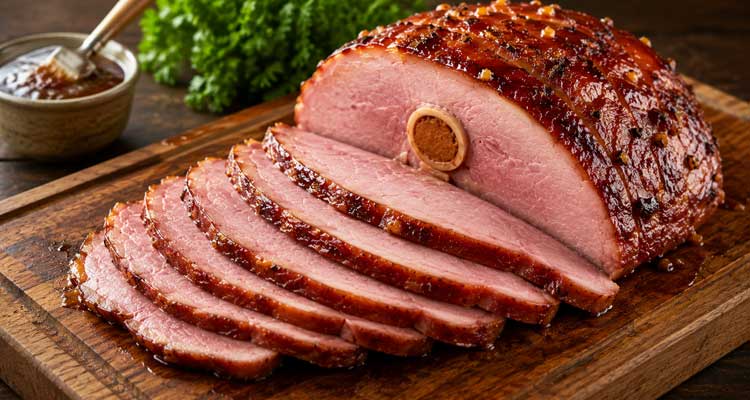
Cooking a large bone-in ham can feel like a high-stakes event, especially when guests are counting on a juicy holiday centerpiece. The fear of serving dry, tough ham is real, but the solution is straightforward. Success comes down to knowing what type of ham you have, using a reliable thermometer, and hitting the correct internal temperature.
This guide provides exact cooked bone in ham cooking time calculations per pound for both precooked and raw hams, complete with a detailed weight-based chart. You will also learn how to handle a spiral-cut ham, apply a glaze without burning it, and troubleshoot the most common cooking problems.
We’ll cover everything from selecting the right cut to carving the final product.
Quick Summary
- Ham Varieties — City hams are typically precooked and wet-cured, ideal for holiday meals, while country hams are dry-cured, aged, and require extensive preparation.
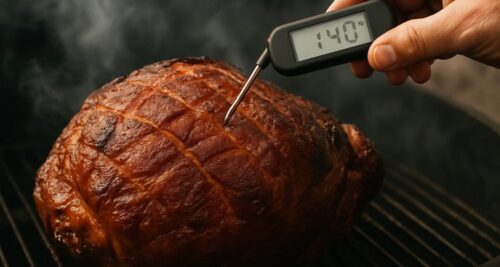
- Precooked vs. Raw — Always check the label. Precooked hams are reheated to 140°F, while raw hams must be cooked to 145°F. A digital meat thermometer is essential for accuracy.
- Cooking Process — Reheat precooked ham at 325°F for 15-18 minutes per pound, covered with foil. Apply glaze during the last 15-20 minutes at 400°F for a caramelized crust.
- Resting & Carving — Rest the ham for 15-20 minutes after cooking to ensure juiciness. Carve systematically around the bone for even slices.
Understanding Bone-In Ham Varieties
Before you can calculate cooking time, it helps to know what kind of bone-in ham you’re working with. The terms on the label, like “city” vs. “country” or “shank” vs. “butt,” indicate how the ham was cured and what part of the leg it comes from. These factors influence flavor, texture, and even how you’ll carve it.
City Ham vs. Country Ham
The vast majority of hams sold in supermarkets are city hams. These are wet-cured in a brine solution of salt, water, and seasonings, then lightly smoked and fully cooked. They are what most people picture for a holiday dinner and are the focus of this guide.
Country hams are dry-cured with salt, aged for months, and often heavily smoked. They are intensely salty, sold uncooked, and require soaking for hours or even days before a long, slow cooking process. They are a regional delicacy with a much stronger, funkier flavor.
Shank End vs. Butt End
A whole bone-in ham is often sold as two halves: the shank and the butt.
- Shank End: This is the lower portion of the leg. It has a classic tapered shape with one long, straight bone, making it easier to carve. The meat is slightly leaner and has a rich, traditional ham flavor.
- Butt End: This is the upper portion of the leg. It’s more rounded and contains a T-shaped pelvic bone, which can make carving more challenging. However, the meat is often more tender and fatty, yielding incredibly succulent slices.
Is Your Ham Precooked or Raw? Here’s How to Tell
Before calculating cooking time, you must identify what kind of ham you have. Misidentifying a raw ham as precooked can lead to undercooked, unsafe pork. Always check the packaging label first — it is the only reliable way to know.
Reading the Label
Precooked hams will state “cooked,” “fully cooked,” “cured,” or “hickory-smoked” on the label. These hams have been heated by the processor to a safe temperature and are safe to eat cold, but they taste best when reheated to a target internal temperature of 140°F[USDA].
Raw or fresh hams will say “fresh ham” or “uncooked.” These are not cured and must be cooked from raw to a safe internal temperature of 145°F[USDA]. They are essentially an unseasoned pork roast.
Partially cooked hams are less common but require additional cooking. The label will provide specific instructions. When in doubt, treat it as a raw ham and cook to 145°F for safety.
Step-by-Step Guide to Cooking a Perfect Bone-In Ham
This process focuses on the most common scenario: reheating a precooked bone-in ham. The goal is gentle, even heating that brings the ham to temperature without drying it out, finished with a caramelized glaze in the final stretch.
Equipment List
- Large roasting pan with a rack: A rack elevates the ham, allowing hot air to circulate for even cooking and preventing the bottom from steaming in its own juices.
- Digital instant-read meat thermometer: This is the single most important tool for avoiding dry ham.
A few tools that make cooking bone-in ham easier:
- ThermoMaven Professional Digital Meat Thermometer — reads internal temp instantly to hit the right doneness window
- Cuisinart 16-Inch Stainless Steel Roasting Pan with Rack — elevates the ham for even heat circulation
- Cutluxe Brisket Knife 12 Inch — long, sharp blade for carving bone-in ham at the table
It provides an accurate internal temperature reading in seconds.
- Heavy-duty aluminum foil: Tenting the ham with foil traps steam, keeping the meat moist during the long initial heating phase.
- Basting brush: Essential for applying a smooth, even layer of glaze. Silicone brushes are heat-resistant and easy to clean.
- Carving knife and fork: A long, sharp carving knife and a sturdy fork make slicing and serving much easier and safer.
Step 1: Preparation
Preheat your oven to 325°F. Remove the ham from its packaging and pat it dry with paper towels. Place it cut-side down on the rack in your roasting pan to protect the most exposed surface from drying out.
Pour about one cup of water, broth, or apple cider into the bottom of the pan. This creates a gentle steam that helps keep the ham moist. Cover the entire pan tightly with aluminum foil to trap that moisture.
Optional: Scoring the Fat Cap
If your ham has a thick layer of fat on top (the “fat cap”), scoring it can improve rendering and presentation. Use a sharp knife to make shallow, 1/4-inch deep cuts in a diamond pattern across the surface. This allows the glaze to penetrate deeper and creates a beautiful, textured crust.

Step 2: Cooking the Ham
Place the covered ham in the preheated oven and cook for 15-18 minutes per pound. Use the time chart below to estimate the total cooking time based on your ham’s weight.
The clock is only a guide. Start checking the internal temperature about 30-45 minutes before the estimated time is up. For a precooked ham, you’ll remove the foil when it reads 125-130°F so you can apply the glaze for the final stretch.

Step 3: Applying the Glaze
When the ham reaches 125-130°F, remove it from the oven and take off the foil. Increase the oven temperature to 400°F. Brush your glaze evenly over the entire surface of the ham, getting it into any scored cuts.
Return the ham to the oven uncovered for the final 15-20 minutes. The high heat caramelizes the sugar in the glaze quickly, creating a sticky, lacquered crust. The ham’s internal temperature should reach the target of 140°F by the time the glaze is set.
Glaze Recipes and Tips
A great glaze adds a sweet or tangy counterpoint to the salty ham. Apply it only during the last 15-20 minutes of cooking to prevent the sugars from burning during the long, slow heating process.
Classic Brown Sugar-Mustard Glaze
- 1 cup packed brown sugar
- 1/4 cup Dijon mustard
- 2 tablespoons pineapple juice or apple cider vinegar
Whisk all ingredients together until smooth. This classic glaze delivers a perfect balance of sweet and tangy notes that complement the savory pork.
Maple-Bourbon Glaze
- 1/2 cup pure maple syrup
- 1/4 cup bourbon
- 1/4 cup brown sugar
- 1 tablespoon Dijon mustard
Combine ingredients in a small saucepan and simmer for 5 minutes until slightly thickened. The alcohol will cook off, leaving a rich, smoky sweetness.
Step 4: Resting the Ham
Once the ham reaches its target internal temperature, transfer it to a cutting board and tent loosely with foil. Let it rest for at least 15-20 minutes before carving. This step is critical for a juicy result.
Resting the ham allows the muscle fibers, which tensed up during cooking, to relax and reabsorb the juices. Carving immediately sends those flavorful juices running onto the board instead of staying in each slice. During this rest, carryover cooking will also cause the internal temperature to rise another 5-10 degrees.
Bone-In Ham Cooking Time Chart (by Weight)
Use this chart to estimate total cooking time for your bone-in ham, whether it’s precooked or raw. Remember that these times are a guideline, as factors like ham shape, bone size, and oven calibration can cause variations. Always trust a digital meat thermometer over the clock for perfect results.
| Ham Weight | Precooked (15-18 min/lb at 325°F) | Raw/Fresh (22-26 min/lb at 350°F) |
|---|---|---|
| 5 lbs | 1 hr 15 min – 1 hr 30 min | 1 hr 50 min – 2 hr 10 min |
| 8 lbs | 2 hr – 2 hr 24 min | 2 hr 56 min – 3 hr 28 min |
| 10 lbs | 2 hr 30 min – 3 hr | 3 hr 40 min – 4 hr 20 min |
| 12 lbs | 3 hr – 3 hr 36 min | 4 hr 24 min – 5 hr 12 min |
| 15 lbs | 3 hr 45 min – 4 hr 30 min | 5 hr 30 min – 6 hr 30 min |
How to Carve a Bone-In Ham
Carving a bone-in ham can seem intimidating, but a systematic approach makes it simple. Let the ham rest first, then use a sharp knife and a carving fork to hold it steady on a large cutting board, preferably one with a trench to catch juices.
- Position the Ham: Place the ham on the board with the largest meaty section facing up. Use the carving fork to secure it firmly.
- Cut Around the Bone: Make a long, deep cut horizontally along the side of the bone to create a base. Then, make vertical slices down to the bone, perpendicular to your first cut.
- Release the Slices: Run your knife along the bone again (following your first horizontal cut) to release all the vertical slices at once.
- Carve the Remaining Meat: Turn the ham onto the flat surface you just created and carve the remaining large sections of meat away from the bone. Once removed, you can place these sections cut-side down and slice them to your desired thickness.
Adjusting Cooking Times for a Spiral-Cut Ham
A spiral-cut ham is always precooked and pre-sliced for convenience. The cuts expose more surface area, which means the ham heats through faster but also loses moisture more easily. Careful foil coverage and liquid in the pan are essential to prevent it from drying out.
Heat a spiral-cut ham for 10-12 minutes per pound at 325°F. Keep it tightly covered with foil and add liquid to the pan throughout the cook. The target internal temperature is still 140°F, and it’s crucial not to overshoot it.
Apply any glaze during the last 15-20 minutes only. Many spiral-cut hams come with a glaze packet — save it for the final stretch to prevent the sugar from burning during the longer initial heating phase.
Troubleshooting Common Ham Problems
Even with careful planning, issues can arise when cooking a large cut of meat. Most bone-in ham problems trace back to temperature control or glaze timing. Here are simple fixes for the most common issues.
My Ham Turned Out Dry
Overcooking is the number one cause. This happens when the ham stays in the oven too long or the oven runs hotter than indicated. Always use a meat thermometer and pull the ham as soon as it hits 140°F (precooked) or 145°F (raw).
Covering with foil and keeping liquid in the pan also helps retain moisture. If your ham is already dry, slice it thin and serve with warm pan juices, extra glaze, or a gravy to add moisture back.
The Glaze Burned
Applying a sugary glaze too early exposes it to heat for too long, causing it to burn before the ham is heated through. Wait until the last 15-20 minutes of cooking to apply the glaze.
Increasing oven temperature to 400°F during the glaze phase caramelizes the surface quickly. If the glaze darkens too fast even in that short window, tent the ham loosely with foil.
The Ham Cooked Unevenly
The bone acts as an insulator, so meat closest to it cooks slower than the outer portions. This is normal for a bone-in ham and is why thermometer placement is key. Insert the probe into the thickest part of the meat, ensuring it does not touch the bone.
Resting the ham for 15-20 minutes after cooking also helps the internal temperature equalize throughout the cut, a process known as carryover cooking. This ensures a more uniformly heated final product.
My Ham is Cooking Too Fast (or Slow)
Oven temperatures can vary. If your ham is heating much faster than the per-pound estimate, your oven may run hot. Tent with foil to slow down browning and consider reducing the temperature by 25°F.
If it’s cooking too slowly, ensure your oven is fully preheated and check the thermometer for accuracy in boiling water.
The Benefits of a Bone-In Ham
Despite the longer cook time, many chefs and home cooks prefer a bone-in ham. The bone and surrounding connective tissues add a richer, deeper pork flavor as the ham cooks. They release savory compounds that you simply don’t get from a boneless ham.
The bone also helps the ham retain more moisture by regulating the cooking speed, producing a juicier result. This slower cooking process is why a bone-in ham generally takes longer per pound to cook than a boneless ham, but the payoff in taste and texture is significant.
Take Home Message
Cooking a perfect bone-in ham is achievable with careful attention to ham type, internal temperature, and proper glazing techniques. By following this guide, you can confidently prepare a juicy, flavorful centerpiece that will impress your guests every time. Remember to always use a reliable meat thermometer and allow adequate resting time for the best results.
Frequently Asked Questions
How long should I cook a 10 lb bone-in ham?
For a precooked 10 lb bone-in ham, cook at 325°F for 2.5-3 hours until the internal temperature reaches 140°F. For a raw 10 lb ham, cook at 350°F for about 3 hours 40 minutes – 4 hours 20 minutes until it hits 145°F. Always verify with a thermometer.
Where is the best place to insert a meat thermometer?
Insert the thermometer probe into the thickest part of the ham, avoiding contact with the bone. The bone conducts heat differently than the meat and will give you an inaccurate, usually higher, temperature reading. Check in a couple of spots if you’re unsure.
Why is it important to let the ham rest after cooking?
Resting allows muscle fibers to relax and reabsorb juices that were pushed toward the surface during heating. If you carve immediately, those juices run out onto the cutting board. A 15-20 minute rest makes a noticeable difference in moisture and flavor in every slice.
Can I cook a ham from frozen?
It is not recommended. A frozen ham cooks unevenly — the exterior overcooks and dries out before the interior reaches a safe temperature. Thaw it completely in the refrigerator first, allowing 4-6 hours per pound.
A large bone-in ham may need 2-3 days to thaw fully.
What are some classic side dishes for ham?
Ham pairs well with a wide variety of sides. Classic choices include scalloped or mashed potatoes, roasted asparagus, glazed carrots, green bean casserole, and soft dinner rolls. For a tangy contrast, consider a pineapple or apple sauce.
How should I store leftover ham?
Wrap leftover ham tightly in plastic wrap or foil, or place it in an airtight container. According to USDA guidelines, refrigerated ham lasts 3 to 4 days[USDA]. For longer storage, freeze for up to 2 months.
Save the ham bone for making soups and stocks — it adds incredible depth of flavor to beans, split pea soup, or collard greens.
Classic Glazed Bone-In Ham
Equipment
- Large roasting pan with a rack Elevates the ham for even cooking.
- Digital instant-read meat thermometer Crucial for ensuring the ham reaches the correct temperature without overcooking.
- Heavy-duty aluminum foil Used for tenting the ham to keep it moist.
- Basting Brush For applying an even layer of glaze.
- Carving knife and fork For safe and easy slicing.
Ingredients
For the Ham
- 1 (8-10 lb) precooked, bone-in city ham Shank or butt end.
- 1 cup water, broth, or apple cider
For the Classic Brown Sugar-Mustard Glaze
- 1 cup packed brown sugar
- 1/4 cup Dijon mustard
- 2 tablespoons pineapple juice or apple cider vinegar
Instructions
- Preheat your oven to 325°F. Remove the ham from its packaging and pat it dry with paper towels. If desired, score the fat cap in a diamond pattern with shallow, 1/4-inch deep cuts.
- Place the ham cut-side down on a rack in a large roasting pan. Pour one cup of water, broth, or apple cider into the bottom of the pan. Cover the entire pan tightly with heavy-duty aluminum foil.
- Place the covered ham in the preheated oven. Cook for 15-18 minutes per pound, or until a digital meat thermometer inserted into the thickest part (not touching bone) reads 125-130°F.
- While the ham cooks, prepare the glaze. In a small bowl, whisk together the brown sugar, Dijon mustard, and pineapple juice until smooth.
- When the ham reaches 125-130°F, remove it from the oven and carefully remove the foil. Increase the oven temperature to 400°F.
- Brush the glaze evenly over the entire surface of the ham. Return the ham to the oven, uncovered, and cook for another 15-20 minutes, or until the glaze is bubbly and caramelized and the internal temperature reaches 140°F.
- Transfer the ham to a cutting board and tent loosely with foil. Let it rest for 15-20 minutes before carving. This allows the juices to redistribute for a moist result.
Notes
Contents
- Quick Summary
- Understanding Bone-In Ham Varieties
- Is Your Ham Precooked or Raw? Here’s How to Tell
- Step-by-Step Guide to Cooking a Perfect Bone-In Ham
- Bone-In Ham Cooking Time Chart (by Weight)
- How to Carve a Bone-In Ham
- Adjusting Cooking Times for a Spiral-Cut Ham
- Troubleshooting Common Ham Problems
- The Benefits of a Bone-In Ham
- Take Home Message
- Frequently Asked Questions
- Classic Glazed Bone-In Ham