Grill cleaning and regular maintenance are crucial yet often overlooked aspects of the grilling experience. A clean grill not only looks better but also performs better, lasts longer, and produces tastier, safer food. In this comprehensive guide, we’ll cover everything you need to know about how to clean a gas grill, from quick post-cooking cleanups to deep seasonal scrubs.
Why Cleaning Your Grill is Important
Regular grill maintenance can more than double the lifespan of your grill. Proper care prevents rust and corrosion, extends your grill’s life, and ensures it heats evenly and efficiently. A clean grill prevents off-flavors and produces better-tasting food while reducing the risk of flare-ups and grease fires. Not to mention, a well-maintained grill looks more inviting and professional on your patio.
Neglecting grill cleaning can lead to decreased performance and uneven heating, increased risk of food contamination, shorter lifespan of grill components, potential safety hazards from grease buildup, and unpleasant flavors in your food. Old grease buildup—similar to a neglected grease trap—can negatively impact grill performance and pose health risks.
Grill Cleaning Schedule
The frequency of cleaning depends on how often you use your grill and which components you’re cleaning. Use this schedule as a guide:
| Frequency | Time | Components | Tasks |
|---|---|---|---|
| After Every Use | 10-15 min | Grates, exterior | Brush grates, wipe exterior, empty grease tray if full |
| Every 5-10 Uses | 30-60 min | Grates, heat shields, grease system | Soak and scrub grates, clean flavorizer bars, replace grease tray liner |
| Monthly | 45-60 min | Burners, firebox, lid interior | Clear burner ports, scrape firebox, clean lid carbonization |
| Seasonally | 1-2 hours | Full grill disassembly | Deep clean all components, inspect for wear, re-season grates |
| Before Storage | 2+ hours | Everything | Full deep clean, oil all metal surfaces, cover and store properly |
For optimal performance, aim to clean your grill with a quick clean after each use and a deeper clean at least monthly during grilling season. If you’re a frequent griller, you may need to increase the frequency of your deep cleans.
Helpful gear for this cook:
- Temperature control: Grill Armor extra-long heat-resistant gloves protects your hands around hot grates, pans, and smoker parts.
- Handling: ThermoMaven bristle-free grill brush cleans grates without leaving wire bristles behind.
- Prep: AMMZO digital meat thermometer checks doneness without guessing.
- Brush option: ThermoMaven bristle-free grill brush cleans grates without loose wire-bristle risk.
- Heat protection: Grill Heat Aid BBQ gloves help when cleaning warm grates or handling hot parts.
Essential Grill Cleaning Tools
Before you start, gather these tools:
| Category | Tools | Purpose |
|---|---|---|
| Scrubbing | Wire brush, bristle-free brush, grill stone, scrub pads | Remove carbonized food and grease from grates and surfaces |
| Scraping | Putty knife, grill scraper, pipe cleaners | Remove stubborn buildup from firebox, clear burner ports |
| Cleaning Solutions | Dish soap, white vinegar, baking soda, stainless steel cleaner | Cut grease, remove stains, polish exterior surfaces |
| Protection | Heavy-duty gloves, safety glasses | Protect hands from chemicals, heat, and sharp edges |
| Wiping | Microfiber cloths, paper towels, sponges | Wipe surfaces, dry components, apply oil |
| Optional | Shop vacuum, buckets, aluminum foil | Remove loose debris, soak components, line grease trays |
Having these tools on hand will make the cleaning process much more efficient and effective. If you’re looking for a comprehensive solution, consider investing in a complete grill cleaning kit that includes all the essential tools you need in one package. For brush recommendations, see our guide to the best grill brushes.
Pre-Cleaning Preparation
Before diving into the cleaning process, it’s crucial to prepare both your grill and the surrounding area. This ensures a safe and efficient cleaning session.
- Clear the Area: Remove any flammable materials, such as leaves or branches, from around your grill. This reduces the risk of accidental fires.
- Remove Debris: Clear any food debris or ash from the grill grates and grease pan. This initial step makes the detailed cleaning process more manageable.
- Turn Off the Gas: Make sure to turn off the propane tank and allow the grill to cool down completely. For charcoal grills, extinguish the coals and let the grill cool.
- Gather Your Tools: Assemble all necessary cleaning tools, including a grill brush, wire brush, dish soap, and paper towels. Having everything within reach will streamline the cleaning process.
Quick Clean: After Every Use
Performing a quick clean after each grilling session prevents buildup and makes deep cleaning easier. Here’s a step-by-step guide:
- Turn off the gas and disconnect the propane tank.
- While the grill is still warm (not hot), scrape the grates with a grill brush.
- Wipe down the exterior with a damp cloth.
- Empty the grease tray if necessary.
- Brush off the burner protectors or heat tents.
- Cover the grill once it’s completely cool.
This quick routine should take no more than 10-15 minutes and will significantly reduce the effort required for deep cleaning.
Deep Clean: Step-by-Step Guide
1. Prepare Your Grill
Remove and set aside the propane tank. Take a picture of the interior for reassembly reference. This step is crucial to ensure you put everything back in its proper place.
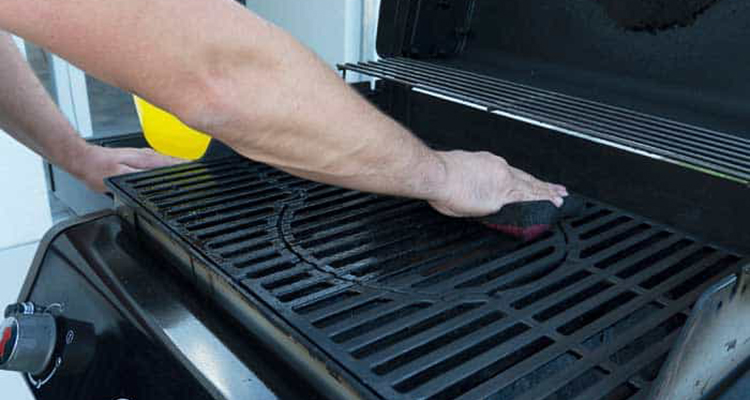
2. Remove and Clean the Grates
Soak grates in hot, soapy water for 30 minutes. Scrub with a wire brush or scour pad. For stubborn residue, use a paste made from baking soda and water. Rinse thoroughly and dry.
For cast iron grates, remember to re-season after cleaning. Apply a light coating of vegetable oil to the grates after cleaning to protect them and ensure better performance during cooking.
3. Clean the Burner Tubes and Heat Shields
Remove burner tubes and heat shields. Clean with a wire brush, moving along the tubes, not across. Clear any clogged holes with a toothpick or pipe cleaner. This step is crucial for ensuring even heat distribution and preventing flare-ups.
4. Clean the Firebox
Use a shop vac to remove loose debris. Scrape stubborn residue with a putty knife. Wipe down with soapy water and rinse. Dry thoroughly to prevent rust. Pay special attention to corners and crevices where grease can accumulate.
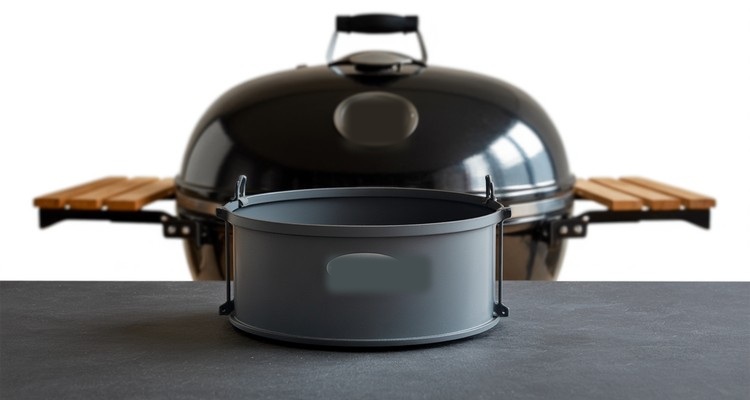
5. Clean the Grease Management System
Remove the grease tray and cup. Dispose of grease properly (never down the drain). Wash with hot, soapy water. Line with aluminum foil for easier future cleaning. A clean grease management system is essential for preventing grease fires.
6. Clean the Lid
Scrub the interior of the lid to remove carbonized grease. Use a mixture of baking soda and water for tough spots. Wipe down the exterior with appropriate cleaner. Don’t forget to clean the thermometer if your grill has one.
7. Reassemble and Test
Put all components back in place. Reconnect the propane tank. Run the grill on high for 15 minutes to burn off any cleaning residue. This also helps you check that everything is working correctly after cleaning.
Cleaning by Grate Type
Different grate materials require different cleaning approaches. Use the wrong method and you could damage your grates or strip their protective coating.
| Grate Type | Cleaning Method | Avoid | After Cleaning |
|---|---|---|---|
| Cast Iron | Wire brush while warm, mild soap if needed | Soaking, harsh chemicals, dishwasher | Dry immediately, re-season with vegetable oil |
| Stainless Steel | Wire brush, soak in soapy water, scrub pads | Steel wool (causes scratches), bleach | Dry thoroughly, light oil coating optional |
| Porcelain-Coated | Brass brush or nylon brush, soapy water | Wire brushes, metal scrapers, abrasives | Inspect for chips, dry completely |
| Chrome-Plated | Brass brush, warm soapy water, soft cloth | Wire brushes, abrasive pads, harsh chemicals | Dry immediately to prevent rust underneath |
Cleaning Specific Grill Parts
Burners
Clean ports with a wire brush or pipe cleaner. Check for even flame distribution after cleaning. Replace if there are large holes or significant rust. Properly functioning burners are crucial for even cooking and grill performance.
Heat Deflector and Flavorizer Bars
The heat deflector and flavorizer bars are essential components that help distribute heat evenly and enhance the flavor of your food. Regular cleaning of these parts is vital to maintain optimal grill performance.
Remove the components carefully. Use warm water and a grease-cutting dish soap to wash them. Employ a soft-bristled brush to scrub away any stubborn food debris or residue. Rinse thoroughly with clean water and dry completely with a paper towel to prevent rust. For gas grills, make it a habit to clean these parts regularly to avoid grease buildup and potential flare-ups.
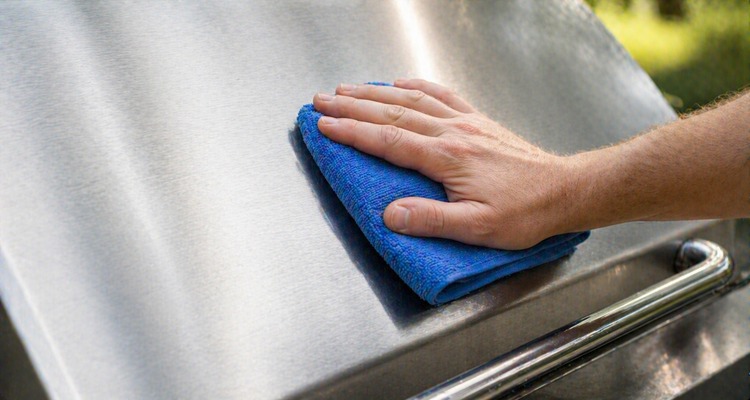
Exterior
Use warm, soapy water for painted surfaces. For stainless steel, use a specialized cleaner and wipe with the grain. Avoid abrasive materials that can scratch the surface. A clean exterior not only looks better but also helps prevent rust and corrosion.
Natural Cleaning Solutions
For those who prefer eco-friendly options, these natural solutions work just as well as commercial cleaners and are safer for the environment.
| Method | Recipe/How To | Best For |
|---|---|---|
| Vinegar Spray | Mix equal parts water and white vinegar in spray bottle | General degreasing, quick wipe-downs, exterior surfaces |
| Baking Soda Paste | Mix 3 parts baking soda with 1 part water to form paste | Stubborn buildup, carbonized grease, rust spots |
| Lemon Scrub | Cut lemon in half, dip cut side in baking soda, scrub | Light grease, adds fresh scent, stainless steel |
| Onion Method | Cut onion in half, rub on hot grates with long fork | Quick grate cleaning while grill is still hot |
| Coffee Soak | Brew strong pot of coffee, soak grates for 1 hour | Heavy buildup, breaking down carbonized residue |
Maintenance Tips to Keep Your Grill Clean Longer
- Use a grill cover when not in use, especially in harsh weather.
- Preheat the grill before each use to burn off residue.
- Oil the grates before cooking to prevent sticking.
- Clean the grease tray regularly to prevent overflow.
- Brush grates while still warm after cooking.
- Keep a spray bottle of vinegar-water solution nearby for quick wipe-downs.
- Regularly inspect burners and tubes for clogs or damage.
Implementing these maintenance tips will make your deep cleaning sessions easier and less frequent.
Storage and Protection
Proper storage and protection of your grill are key to extending its lifespan and maintaining its performance.
- Store in a Dry Area: When not in use, store your grill in a dry, covered area like a garage or shed. This protects it from the elements and prevents rust.
- Use a Grill Cover: Invest in a high-quality grill cover to shield your grill from rain, snow, and sun exposure. This simple step can significantly prolong the life of your grill.
- Anchor in High Winds: If you live in a windy area, consider anchoring your grill to the ground to prevent it from tipping over.
- Regular Inspections: Periodically inspect your grill for any signs of damage or wear and tear. Address any issues promptly to avoid more significant problems down the line.
Troubleshooting Common Grill Cleaning Issues
| Problem | Likely Cause | Solution |
|---|---|---|
| Light rust on grates | Moisture exposure, lack of seasoning | Scrub with wire brush, apply cooking oil, re-season |
| Heavy rust | Prolonged moisture, damaged coating | Soak in vinegar overnight, scrub, or replace grates |
| Uneven flames | Clogged burner ports | Clear ports with pipe cleaner or toothpick, check for spider webs |
| Yellow/orange flames | Dirty burners, improper air mix | Clean burner tubes thoroughly, check venturi tubes for blockage |
| Excessive flare-ups | Grease buildup on heat shields/firebox | Deep clean flavorizer bars, empty grease tray, scrape firebox |
| Food sticking to grates | Residue buildup, unseasoned grates | Deep clean grates, re-season, oil before each cook |
| Off-flavors in food | Old grease, carbonized residue | Full deep clean of all components, burn off at high heat |
Safety Precautions When Cleaning Your Grill
- Always disconnect the propane tank before deep cleaning.
- Wear gloves to protect your hands from chemicals and sharp edges.
- Clean in a well-ventilated area, especially when using chemical cleaners.
- Allow the grill to cool completely before applying any water-based cleaners.
- Never use oven cleaner on your grill—it’s too harsh and can be dangerous.
Gas Grill vs Charcoal Grill Cleaning
If you’re contemplating a switch from a charcoal grill to a gas grill, it’s essential to understand the key differences:
| Factor | Gas Grill | Charcoal Grill |
|---|---|---|
| Ease of Cleaning | Easier—no ash, removable parts | More work—ash disposal, more buildup |
| Cleaning Time | Quick clean: 10-15 min | Quick clean: 15-20 min (ash removal) |
| Convenience | High—turn on and ready to grill | Lower—lighting and managing coals |
| Upfront Cost | Higher | Lower |
| Flavor | Good—can add smoke boxes | Traditional smoky flavor many prefer |
Ultimately, the choice between a gas grill and a charcoal grill depends on your personal preferences and grilling needs.
Frequently Asked Questions
Can you use oven cleaner on a grill?
It’s not recommended. Oven cleaners contain harsh chemicals that can damage grill components and leave harmful residues.
How do you clean a rusty grill?
For light rust, use a wire brush and cooking oil. For heavy rust, soak in vinegar overnight then scrub. If rust persists, you may need to replace the affected parts.
Is it safe to power wash a grill?
While effective, power washing can damage electrical components. It’s best to clean by hand unless you’re very careful.
How do you clean grill grates without a wire brush?
Use a crumpled ball of aluminum foil, a nylon scrubber, or a grill stone cleaning block.
Can I put my grill grates in the dishwasher?
It’s not recommended. The harsh detergents can strip seasoning and potentially damage the grates.
How often should I replace my grill brush?
Replace your grill brush at least once a season or sooner if you notice worn or loose bristles.
Conclusion
Regular cleaning and maintenance are key to keeping your gas grill in top condition. By following these expert tips and making cleaning a part of your grilling routine, you’ll ensure your grill performs at its best, lasts longer, and continues to produce delicious meals for years to come.
Remember, a clean grill is a happy grill—and it makes for happier grillers and diners too. Happy grilling, and here’s to many seasons of perfectly grilled meals on your clean and well-maintained grill!
Contents
- Why Cleaning Your Grill is Important
- Grill Cleaning Schedule
- Essential Grill Cleaning Tools
- Pre-Cleaning Preparation
- Quick Clean: After Every Use
- Deep Clean: Step-by-Step Guide
- Cleaning by Grate Type
- Cleaning Specific Grill Parts
- Natural Cleaning Solutions
- Maintenance Tips to Keep Your Grill Clean Longer
- Storage and Protection
- Troubleshooting Common Grill Cleaning Issues
- Safety Precautions When Cleaning Your Grill
- Gas Grill vs Charcoal Grill Cleaning
- Frequently Asked Questions
- Conclusion