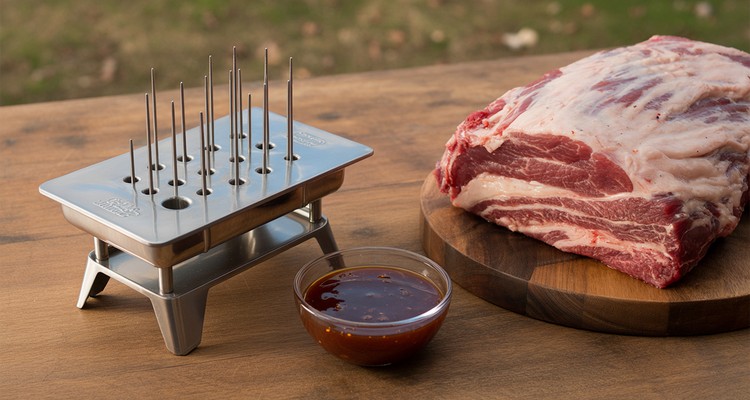
You’ve got a 14-pound packer brisket on the cutting board. It’s cold, it’s beautiful, and it’s covered in a thick slab of white fat. Now what? Trimming your brisket is the most important thing you do before the meat ever sees smoke – and most backyard cooks rush it or skip it entirely. This guide walks you through every cut, step by step, for trimming brisket the right way.
What Is Brisket and Why Does Trimming Matter?
Beef brisket comes from the lower chest of the steer and is made up of two muscles: the flat (a lean, rectangular slab) and the point (a thicker, fattier muscle that sits on top of the flat). Together, they make up the whole packer brisket. Between and around these muscles is fat – a lot of it. Some of that fat is your best friend. Some of it is dead weight that will ruin your cook if you leave it on. Here’s why trimming matters:
- Bark formation – Rub adheres to meat, not fat. Thick fat caps prevent your seasoning from ever reaching the surface.
- Smoke penetration – Smoke can’t penetrate fat the way it penetrates meat. Heavy fat deposits block smoke from reaching the muscle underneath.
- Even cooking – Untrimmed fat creates hot spots and uneven rendering, leading to parts of your brisket that cook faster or slower than others.
The key distinction every pitmaster needs to know: hard fat vs. soft fat. Hard fat is dense, waxy, and bright white – it does not render at any temperature. Soft fat is pliable, slightly yellowish, and yields under pressure – it renders during the cook and adds moisture. Remove all hard fat. Leave soft fat at ¼ inch.
Keep Your Brisket Cold While Trimming
Cold fat is firm fat. Firm fat cuts cleanly. This sounds simple, but it’s the single most underrated tip in brisket trimming. Take your brisket straight from the refrigerator (35-40°F) to the cutting board. If you’re working on a large brisket, trim in sections and return the meat to the fridge if it warms up. Warm fat tears, smears, and slides under the knife instead of slicing cleanly. Set yourself up with a non-slip cutting board, good lighting, and a sharp blade before you start.
Helpful gear for this cook:
- Temperature control: Bryco Goods pink butcher paper wraps barbecue without trapping as much steam as foil.
- Handling: AMMZO digital meat thermometer checks doneness without guessing.
- Prep: Cutluxe butcher knife handles trimming and slicing jobs cleanly.
Tools You Need to Trim a Brisket
You don’t need much, but what you have matters:
- Boning knife or fillet knife (6-7 inch) – The flexible blade follows the curve of the flat and gets under fat deposits at a low angle. This is the right tool for the job.
- Large cutting board (minimum 16×24 inches) – A full packer brisket needs room. A small board creates awkward angles that lead to bad cuts.
- Nitrile gloves – Optional, but they keep your hands clean and improve grip on a slippery cold brisket.
- Paper towels – For wiping the blade and keeping the board clean as fat accumulates.
| Knife Type | Pros | Cons | Verdict |
|---|---|---|---|
| Boning Knife (6-7″) | Flexible, precise, ideal for fat cap sweeps and underside work | Shorter blade requires more passes on fat cap | Best choice |
| Fillet Knife (6-8″) | Very flexible, excellent for silver skin removal | Too flexible for aggressive hard fat removal | Good second option |
| Chef’s Knife (8-10″) | Long blade covers fat cap quickly | Too stiff to get under deposits; awkward on underside | Not recommended |
Fat Cap Up or Down?
When you’re trimming, orient your brisket fat-cap-side up so you can see exactly how much you’re removing. You need to watch the depth as you work. When you’re smoking, that’s a different decision. On an offset smoker where heat comes from the side and bottom, fat cap down acts as a heat shield for the flat. On a pellet grill with indirect heat, fat cap up or down is less critical – either works. Settle it before trimming so you know which side to be most careful on.
How to Trim a Brisket: Step-by-Step
Step 1: Start with the Underside

Flip your brisket meat-side up. The underside of a packer brisket has the heaviest concentration of hard fat – that dense, waxy white material that won’t render no matter how long your cook runs. Work across the underside with your boning knife held almost flat against the meat. Remove the large hard fat deposits by sliding the blade underneath at a low angle. You’re not trying to expose raw meat – you’re removing the waxy white chunks while leaving the surface relatively intact. Pay particular attention to the channel where the flat and point meet. There’s often a thick seam of hard fat running along this junction.
Step 2: Remove the Hard Fat Deposit (Deckle)
Between the flat and the point, buried under the surface, is the deckle – a dense mass of hard fat and connective tissue. This is the most important removal of the entire trim. Partially separate the point from the flat to access the deckle pocket. You don’t need to fully separate the two muscles – just lift the point enough to get your knife into the gap. Work out as much of that hard, waxy fat as you can reach. It will not render during the cook, and leaving it in creates a greasy, unpleasant texture in the finished brisket. Take your time here. This step makes more difference than anything else in the trim.
Step 3: Trim the Silver Skin
With the meat side still facing up, look for the silver skin – a thin, pearlescent membrane stretched across the flat. It’s shiny and tight against the muscle. Silver skin does not render and blocks rub from adhering to the meat surface. Use the tip of your boning knife at a very low angle to get under the edge of the silver skin. Once you have a tab started, slide the blade along underneath in long, flat passes. You don’t need to remove every trace – focus on the thick, intact patches. Small remnants are fine and won’t affect the final result.
Step 4: Trim the Fat Cap to ¼ Inch

Flip your brisket fat-cap-side up. The goal is a uniform ¼ inch of soft fat across the entire surface. Use your thumbnail as a depth gauge – ¼ inch is roughly the thickness of your thumbnail. Hold the knife almost flat and work in long, sweeping passes. Identify the highest points first and take those down, then blend the surrounding area to match. Common mistake: cutting the center too thin while leaving thick edges. Work the whole surface, not just the obvious peaks. Any patches of hard fat on the fat cap surface – dense, white, waxy material – should be removed entirely rather than trimmed to ¼ inch. Hard fat doesn’t belong on the finished brisket at any depth.
Step 5: Square the Edges and Round the Corners
The thin edges of the flat – particularly the thin end – will burn or dry out during a long smoke if left as-is. Trim any edges thinner than ½ inch. Round the corners rather than leaving sharp points, which cook unevenly and produce hard, over-rendered tips. Remove any thin flaps of meat hanging off the edges. These small pieces will dry out completely and create a misleading “done” signal on your probe thermometer if you accidentally probe them instead of the thick end. A tidy, uniform shape makes for an even cook from start to finish.
Step 6: Shape the Point
The point is irregularly shaped and naturally fattier than the flat. Trim the surface fat on the point down to the same ¼ inch standard as the flat. Remove any large pockets of hard fat that are accessible from the surface without digging into the muscle. Round the edges of the point as you did with the flat. The point doesn’t need to be perfectly uniform – its irregular shape is part of what makes it interesting – but the fat coverage should be consistent.
Step 7: Final Inspection
Hold your brisket up and look across the fat cap from a low angle. You’re looking for peaks that catch the light – any high spots you missed will show up clearly this way. Trim them down. Run your hand across the fat cap surface. It should feel relatively consistent, with no sudden thick ridges or thin spots where you can feel muscle. Check the edges and corners one more time. A well-trimmed 14-pound packer brisket typically loses 2-4 pounds during this process. That’s normal.
How Much Fat Should You Leave on a Brisket?
The ¼ inch standard exists because it works. Enough fat to baste the meat during the cook, protect the surface from drying out, and add flavor – without blocking smoke penetration or preventing bark from forming. That said, there are legitimate reasons to go thinner or thicker:
- Aggressive trim (⅛ inch or less) – Competition-style, designed for maximum bark coverage and uniform presentation. Riskier on the flat, which can dry out without fat protection on long cooks.
- Conservative trim (⅜-½ inch) – More forgiving for backyard cooks. Provides extra protection on an offset smoker or any cooker with hot spots. Results in slightly less bark on the fat cap side.
- Pellet grill vs. offset – Pellet grill cooks can get away with a slightly thinner trim since the indirect, even heat is gentler on the meat. Offset smoker cooks should lean conservative, especially if the hot spot is near the flat.
The one rule with no exceptions: once you cut too deep, you can’t put the fat back. Err conservative on your first few briskets.
Backyard Trim vs. Competition Trim
Most backyard cooks don’t need to trim like a competition pitmaster – and trying to can hurt more than help. Backyard trim prioritizes meat yield and a forgiving cook. You’re removing enough fat to get great bark and smoke penetration, but you’re not sculpting the brisket for a turn-in box. Leave a bit more fat where you’re unsure. Trim time is 10-15 minutes. This is what you should be doing. Competition trim is aggressive, precise, and designed to produce a uniformly shaped brisket with maximum bark coverage and visual impact for judges. Every edge is sharp and deliberate. The flat is trimmed very thin. This takes experienced hands 20-30 minutes and can ruin a brisket in the hands of someone still developing their technique. If you’ve never trimmed a brisket before, do a backyard trim. You’ll get great results and you’ll still have a full flat to eat at the end of the cook.
What to Do With Brisket Trimmings
Don’t throw away the fat you trimmed – brisket trimmings are genuinely useful.
- Beef tallow – The best use of brisket fat. Render it slow in a pan over low heat, strain out the solids, and store in a jar. Use it to slather your brisket when you wrap it at the stall. Adds flavor and keeps the bark from steaming out.
- Brisket burgers – Grind trimmed pieces of meat with the fat for rich, deeply flavored burgers.
- Brisket beans – Drop raw trimmings into a pot of pinto beans. The fat renders into the liquid and infuses the whole pot with beefy, smoky flavor.
- Smoked sausage – Mix brisket trimmings with pork shoulder for a blended smoked sausage with great fat content.
Frequently Asked Questions
How much fat should you leave on a brisket?
Leave approximately ¼ inch of fat on the fat cap. This is the most widely accepted standard among competition pitmasters and backyard cooks. It’s enough fat to baste the meat during the cook without blocking smoke or preventing the rub from forming a proper bark. If you’re using a pellet grill or a tighter smoke environment, you can go slightly thinner – ⅛ to 3/16 inch. The flat is more forgiving with a little extra fat; trim the point aggressively since it has enough intramuscular fat to keep it moist regardless.
What is the best knife for trimming brisket?
A 6-7 inch boning knife with a flexible blade is the best trimming knife for brisket. The flexibility lets you follow the curve of the flat and get under fat deposits at a low angle. A stiff boning knife or chef’s knife is too rigid for the long sweeping passes needed on the fat cap. Keep your knife sharp – dull knives tear fat rather than slicing cleanly, which makes it nearly impossible to maintain consistent depth across the surface.
Should you trim brisket fat cap up or down?
Trim with the fat cap facing up so you can see exactly how much you’re removing and maintain an even ¼ inch depth. During smoking, fat placement depends on your cooker: fat cap down on offset smokers where heat comes from the side and bottom – the fat acts as a heat shield for the flat. Fat cap up on most pellet grills where heat is indirect and even. The trimming orientation and the smoking orientation are separate decisions.
Do you have to trim a brisket before smoking?
Technically no, but you should. An untrimmed brisket will smoke and be edible, but the thick fat cap prevents rub from adhering to the meat, blocks smoke penetration, and produces uneven bark. The flat will be unevenly cooked. Hard fat deposits between the flat and point will not render no matter how long your cook runs, leaving a greasy, unpleasant texture in every slice. Trimming is a 15-minute investment that dramatically improves the finished product.
What is the difference between hard fat and soft fat on brisket?
Hard fat is dense, waxy, and bright white. Press it with your finger – it doesn’t give. It does not render during smoking regardless of temperature or time. Remove all hard fat. Soft fat is pliable, slightly yellowish, and yields when you press it. Soft fat renders during the cook, adding moisture and flavor to the meat underneath. Leave soft fat at ¼ inch on the fat cap. The deckle pocket between the flat and point is almost entirely hard fat – dig it all out.
How much weight do you lose when trimming a brisket?
A typical 14-pound packer brisket loses 2-4 pounds during trimming, depending on how aggressively you trim and how much hard fat the cut carries. That’s roughly 15-20% of total weight. Competition-style trimming can push that higher. Plan on your post-trim weight when estimating yield – a 14-pound packer trims down to roughly 10-12 pounds of cookable brisket. After the cook, you’ll lose another 30-40% to moisture and fat rendering. A 14-pound raw brisket typically produces 7-9 pounds of cooked meat.
How do you avoid over-trimming a brisket?
Work slowly and trim in thin passes rather than large cuts – you can always remove more but you can’t put it back. Use your thumbnail as a depth gauge (¼ inch is roughly thumbnail thickness) and check your depth frequently across the whole surface. Focus your aggressive passes on obvious peaks and hard fat deposits; feather the surrounding areas down to meet them. If you’re not sure, leave it. A slightly thicker fat cap produces a slightly less aggressive bark but a more forgiving cook. Experience is the only real cure for over-trimming.
What can you do with brisket trimmings?
The best use is rendering beef tallow: slow-melt brisket fat in a pan over low heat, strain out the solids, and store in a mason jar. Use it to slather your brisket when you wrap it at the stall – it keeps the bark from going soft while adding rich beef flavor. Trimmings also work well ground into brisket burgers for a rich, smoky patty, added raw to a pot of pinto beans for deep flavor, or mixed with pork shoulder for blended smoked brisket sausage.
Contents
- What Is Brisket and Why Does Trimming Matter?
- Keep Your Brisket Cold While Trimming
- Tools You Need to Trim a Brisket
- Fat Cap Up or Down?
- How to Trim a Brisket: Step-by-Step
- How Much Fat Should You Leave on a Brisket?
- Backyard Trim vs. Competition Trim
- What to Do With Brisket Trimmings
- Frequently Asked Questions