Injecting a brisket delivers flavor and moisture deep into the muscle where surface rubs cannot reach. A quality injection keeps the flat juicy through a 10-14 hour smoke at 225-250°F on your smoker or pellet grill. This guide covers injection liquids, a proven technique, and timing to help you achieve tender, flavorful results.
Helpful gear for this cook:
- ThermoMaven wireless meat thermometer — tracks long cooks without opening the smoker
- Traeger Signature Blend pellets — adds a balanced smoke profile for backyard cooks
- Western BBQ smoking wood chips variety pack — adds wood-smoke flavor on charcoal or gas grills
Why Inject a Brisket?
Injecting a brisket pushes seasoned liquid directly into the muscle fibers, compensating for the 30-40% moisture loss that occurs during a long low-and-slow smoke. The technique is especially critical for the lean flat, which dries out faster than the fattier point section.
The brisket cut from a cow is a dense cut that requires 10-14 hours at 225-250°F to break down collagen and become tender. During this process, the meat loses significant moisture through evaporation. Surface seasoning only penetrates about 1/4 inch, leaving the deep interior without added flavor. An injection works in two ways. First, it introduces moisture directly into the beef, helping to offset what is lost to evaporation. Second, the salt in the injection recipe acts as a brine, altering the muscle proteins and helping them retain more of their natural moisture during the cook. The flat benefits most from injection because it contains less intramuscular fat than the point. A properly injected brisket with a quality rub maintains juicier texture from edge to edge, with dissolved seasonings adding savory depth throughout.
What Should I Inject My Brisket With?
The three most popular brisket injection bases are beef broth, melted beef tallow, and commercial blends. Beef broth provides a savory foundation, tallow adds rich moisture to lean cuts, and commercial products offer convenience with pre-balanced seasoning profiles for consistent BBQ results.
Beef Broth Brisket Injection
Beef broth is the standard base for a simple brisket injection recipe. It enhances the natural beef flavor without overpowering the meat. Use low-sodium broth so you control the final salt level, and consider a high-quality beef bone broth for added collagen and a richer mouthfeel.

Inject Brisket with Tallow
Melted beef tallow creates a rich, buttery injection that adds internal fat to leaner cuts. Keep homemade beef tallow warm at 110-120°F during injection so it stays liquid and flows through the needle. This method is especially effective for USDA Select or Choice grade briskets with less marbling.
Commercial vs. Homemade Injection Liquids
Commercial blends like Meat Church and Butcher BBQ offer convenience with pre-measured seasoning ratios. Many contain phosphates, which help the meat retain moisture but can sometimes result in a slightly different texture. Homemade injections give you complete control over ingredients and flavor intensity.
Simple Brisket Injection Recipe
A proven homemade brisket injection combines 2 cups low-sodium beef broth, 2 tablespoons Worcestershire sauce, 1 tablespoon melted butter, and 1 teaspoon each of garlic powder and onion powder. Heat to dissolve seasonings, then cool to room temperature before injecting.
| Base Liquid | Flavor Profile | Best For | Prep Difficulty |
|---|---|---|---|
| Beef Broth | Savory, natural beef | All brisket cuts | Easy |
| Beef Tallow | Rich, buttery | Lean flats, Select grade | Moderate |
| Butter and Broth | Creamy, balanced | Competition brisket | Easy |
| Apple Juice and Broth | Sweet, tangy | Sweet rub pairings | Easy |
| Commercial Blend | Pre-balanced, consistent | Quick prep, competition | None |
Combine all ingredients in a saucepan and heat until butter melts and seasonings dissolve. Strain through a fine mesh sieve to remove particles that could clog the needle. Cool to room temperature before use.
Brisket Injection Amounts by Size
Use the lower end of the range for well-marbled Prime briskets and the higher end for lean flats or Select-grade packers. Stop early if liquid starts pooling under the meat or rushing back out of the same injection site.
| Raw Brisket Size | Suggested Injection | Best Focus Area | Rest Time |
|---|---|---|---|
| 5-7 lb flat | 6-10 oz | Entire flat | 4-8 hours |
| 8-10 lb trimmed packer | 10-16 oz | Flat first, point second | 6-10 hours |
| 11-14 lb whole packer | 14-24 oz | 60% flat, 40% point | 8-12 hours |
Injection Recipe Variations
Once you master the basic recipe, you can experiment with other flavor profiles. For a spicy kick, add 1 teaspoon of your favorite hot sauce or 1/4 teaspoon of cayenne pepper. For a sweeter, tangier flavor, substitute 1/2 cup of the beef broth with apple juice and add 1 tablespoon of apple cider vinegar.
Helpful gear for this cook:
- TempPro TP20 500FT Wireless Meat Thermometer with Dual Meat — helps verify doneness without guessing
- MEATER Plus: Smart Bluetooth Wireless Meat Thermometer Digital — helps verify doneness without guessing
- Alpha Grillers Meat Thermometer Digital Instant Read Food Thermometer — helps verify doneness without guessing
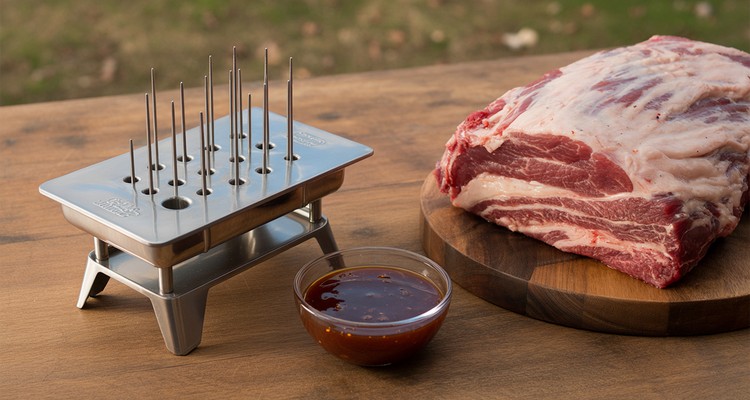
Choosing the Right Meat Injector
A reliable meat injector is essential for a successful brisket injection. Look for models made from stainless steel, as they are more durable and easier to sanitize than plastic versions. Plastic injectors can retain odors and are more prone to cracking under pressure. Needle selection is also important. Look for an injector kit that includes multiple needles. A needle with several side ports is ideal for thin liquids like beef broth, as it distributes the injection more evenly as you withdraw. For thicker injections with tallow or fine spices, a wider needle with a single, larger opening at the end is better to prevent clogs. Proper cleaning is crucial for food safety and the longevity of your tool. After each use, disassemble the injector completely and wash all parts in hot, soapy water. Use a small brush to clean the inside of the barrel and needles to ensure no residue is left behind.
How to Inject Brisket: Step-by-Step Guide
Injecting brisket requires a clean meat injector, cooled liquid, and a fully trimmed brisket. Use a 1-inch grid pattern across the meat, inserting the needle at a slight angle while slowly depressing the plunger and withdrawing to distribute liquid evenly throughout the muscle fibers.
Step 1: Prep the Meat and Liquid
Trim your brisket before injecting. Remove excess hard fat and trim the fat cap to about 1/4 inch. Place the brisket in a large aluminum pan or on a rimmed baking sheet to catch any runoff. Ensure the injection liquid has cooled if it was heated, or stays warm enough (110-120°F) if using tallow.
Step 2: The Grid Technique
Mentally divide the brisket into a 1-inch grid. Insert the needle at each point at a slight angle, which helps prevent the liquid from immediately seeping back out. Push the plunger slowly while pulling the needle out.

This distributes liquid along the entire needle track rather than pooling in one spot. Inject about 1-2 ounces per grid point. Some liquid will seep back out through the needle holes, which is normal. Work systematically from one end of the brisket to the other for even coverage.
Step 3: Focus on the Flat
Use approximately 60% of your injection liquid on the flat and 40% on the point. The flat is leaner and dries out faster during long cooks. Insert the needle with the grain so liquid flows naturally between the muscle fibers, maximizing distribution and moisture retention.
Troubleshooting Common Injection Problems
Even with a good technique, you might encounter clogs, leaking, or uneven pockets when you inject a brisket. Most problems come from coarse seasonings, injecting too fast, or pushing too much liquid into one spot. Strain the liquid, work slowly, and adjust needle size before cooking.
- Clogged Needle: This usually happens when the spices in your injection recipe are not fully dissolved or are too coarse. Always strain your liquid through a fine mesh sieve. If clogs persist, switch to a wider-gauge needle.
- Liquid Pockets: If you inject too much liquid in one spot, it can create a pocket that results in a mushy texture. To avoid this, depress the plunger slowly and steadily while withdrawing the needle. This ensures the liquid is distributed along a channel, not a single point.
- Excessive Leaking: Some leakage is unavoidable, but a large amount means you are injecting too quickly. Slow down your pace. After injecting, let the brisket rest for a few minutes, then pat the surface dry with paper towels before applying your rub.
Timing Your Injection and Rub
Inject your brisket 4-12 hours before cooking for optimal flavor absorption, and always inject before applying the rub. The injection process causes liquid to seep across the surface, which would wash off any previously applied seasoning.
Should You Rub or Inject First?
Always inject first, then apply your rub. Liquid seeps from needle holes across the surface during injection. If you applied the rub first, this seeping would dissolve and wash away your seasoning. After injecting, pat the brisket dry with paper towels. Apply your binder (mustard or olive oil), then your BBQ rub. This ensures both the internal injection and external seasoning work together.
Brisket Injection Day Checklist
- Trim first: Shape the brisket and reduce the fat cap before any liquid goes into the meat.
- Strain the liquid: Remove coarse spices so the injector needle does not clog halfway through the flat.
- Inject in a pan: Use a rimmed pan to catch runoff and keep the prep area easier to sanitize.
- Pat dry before rub: Dry the surface after injection so binder and seasoning stick evenly.
- Rest cold: Hold the injected brisket in the refrigerator at 40°F or below until it is time to smoke.
How Long Before Cooking Should I Inject Brisket?
Inject 4-12 hours before placing the brisket on the smoker or pellet grill. This window allows the liquid to distribute through muscle fibers and salt to season the meat from the inside. Refrigerate the injected brisket at 40°F or below during this rest[USDA].
Do Pitmasters Inject Brisket?
Many competition pitmasters inject their briskets to guarantee consistent moisture and flavor for judging. While traditional Central Texas BBQ relies on salt, pepper, and smoke alone, modern competitors use custom injection recipes to ensure the flat stays juicy through long cooks on the smoker.
In competition, judges evaluate a single slice. Injection helps ensure every bite delivers maximum juiciness and a complex flavor profile. This practice has become popular with backyard cooks as well, especially when smoking Select or Choice grade briskets with less marbling than Prime.
Frequently Asked Questions
Can I inject a brisket right before smoking?
Yes, injecting right before cooking still adds moisture and flavor to the meat. A 4-12 hour refrigerated rest gives liquid time to distribute more evenly through the muscle fibers. If short on time, injecting immediately before smoking is better than skipping it entirely.
How much injection liquid do I need per pound of brisket?
Plan for 1-2 ounces of injection liquid per pound of raw brisket. A 12-pound whole packer needs roughly 12-24 ounces total. Start with the lower amount if you are new to injecting to avoid over-saturating the meat.
Can you over-inject a brisket?
Yes, over-injecting creates liquid pockets that produce a mushy, waterlogged texture. If large amounts of liquid pool on the surface at one injection site, you have used too much. Move to the next grid point and reduce the amount per site.
What size needle works best for brisket injection?
A needle 3-5 inches long with multiple side ports distributes liquid laterally as you withdraw, creating more even coverage than a single end-hole design. Use a wider gauge needle for injections containing dissolved spices or melted tallow.
Does injecting brisket affect the smoke ring?
Injection does not negatively affect smoke ring formation. The smoke ring develops from a chemical reaction between nitrogen dioxide and myoglobin at the meat surface. Since injection liquid penetrates the interior, it does not interfere with this surface-level process.
Can I inject a frozen brisket?
No, always thaw your brisket completely before injecting. Frozen muscle tissue will not absorb the liquid properly, and the needle has difficulty penetrating frozen meat. Thaw in the refrigerator at 40°F or below for 24-48 hours per 5 pounds[USDA].
Is brisket safe for people watching cholesterol?
Brisket is a fatty cut of beef, particularly the point section. While it provides protein, iron, and B vitamins, it is high in saturated fat. People managing cholesterol should enjoy brisket in moderation and consider trimming excess fat before and after cooking.
Should I inject both the flat and the point?
Inject both sections, but concentrate more liquid on the flat. The flat is leaner and dries out faster during long cooks. Allocate roughly 60% of your injection liquid to the flat and 40% to the fattier point for balanced moisture.
Contents