Starting your barbecue smoking journey requires understanding fundamental equipment, techniques, and safety practices that form the foundation of successful outdoor cooking. This comprehensive guide equips beginners with essential knowledge for selecting their first smoker, mastering temperature control, and achieving restaurant-quality results at home.
The transition from basic grilling to smoking represents a significant evolution in outdoor cooking skills, requiring patience, practice, and proper equipment selection. Modern smokers range from simple kettle grills with smoking capabilities to sophisticated pellet systems with digital controls, each offering unique advantages for different skill levels and cooking styles.
Success in smoking depends on mastering four critical elements: consistent temperature control, proper smoke production, accurate internal temperature monitoring, and understanding how different proteins respond to low-and-slow cooking. These fundamentals apply regardless of equipment choice, forming the basis for developing advanced techniques over time.
Quick Roundup List
- Best Overall: Weber Smokey Mountain 18.5″ – Best Overall
- Best Budget: Char-Broil Bullet Charcoal Smoker – Best Budget
- Best Electric: Masterbuilt 30″ Digital Electric – Best Electric
- Best Pellet: Traeger Pro 575 – Best Pellet
- Best Kamado: Char-Griller Akorn Jr – Best Kamado
- Best Propane: Cuisinart Vertical Propane – Best Propane
- Best Portable: Weber Smokey Joe – Best Portable
Understanding Smoker Fundamentals
How Smokers Create Flavor
Smokers generate flavor through controlled combustion of wood, creating smoke compounds that penetrate meat surfaces during extended cooking periods. The smoke ring, a pink layer beneath the meat’s surface, forms when nitrogen dioxide from combustion reacts with myoglobin in the meat, creating a visual indicator of proper smoking technique. This chemical reaction occurs most effectively during the first few hours of cooking when meat surfaces remain moist and temperatures stay below 140°F.
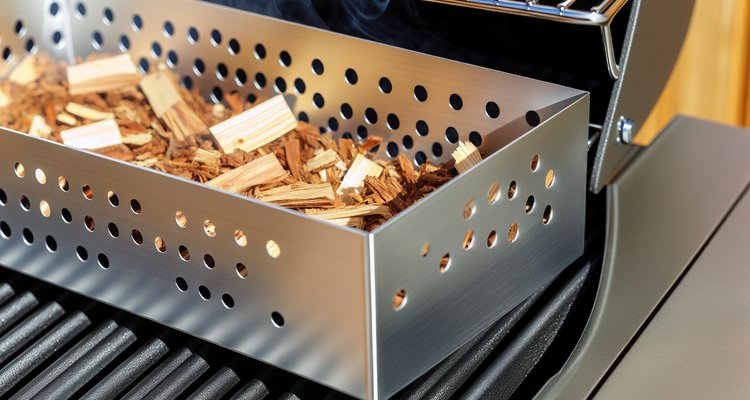
Different wood species produce distinct flavor profiles through varying concentrations of lignin, cellulose, and hemicellulose compounds. Hardwoods like oak and hickory create robust, intense flavors suitable for beef and pork, while fruitwoods produce milder, sweeter notes ideal for poultry and fish. Understanding wood selection and smoke production enables beginners to customize flavors based on protein type and personal preferences.
Essential Components Every Smoker Needs
All functional smokers share five critical components that work together to create the controlled environment necessary for successful smoking. The firebox or heat source generates combustion, while the cooking chamber maintains consistent temperatures through insulation and airflow management. Intake and exhaust vents regulate oxygen flow, controlling both temperature and smoke production intensity.
Water pans serve dual purposes: maintaining humidity levels that keep meat surfaces moist for smoke absorption and acting as heat sinks that stabilize temperature fluctuations. Cooking grates must position food at optimal distances from heat sources, typically 12-18 inches for indirect cooking. Understanding how these components interact helps beginners troubleshoot problems and optimize performance regardless of smoker type.
The Science of Low and Slow Cooking
Low-temperature smoking between 225-275°F breaks down tough connective tissues through enzymatic processes and collagen conversion, transforming inexpensive cuts into tender, flavorful meals. Collagen begins converting to gelatin around 160°F, but the process accelerates significantly at traditional smoking temperatures, requiring several hours for complete transformation in larger cuts.
This extended cooking time allows smoke compounds to penetrate deeply while moisture slowly evaporates from meat surfaces, concentrating flavors through reduction. The Maillard reaction, responsible for browning and complex flavor development, occurs even at these low temperatures, though more slowly than during high-heat grilling. Understanding these processes helps beginners recognize why patience produces superior results compared to rushing with higher temperatures.
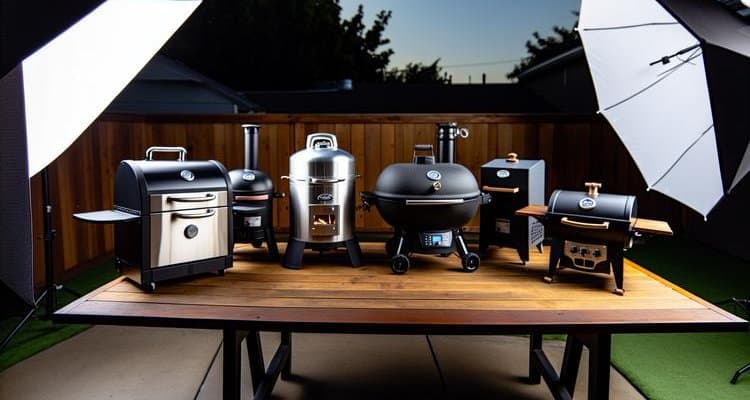
Types of Smokers Explained
Charcoal Smokers
Charcoal smokers provide authentic smoke flavor through direct wood combustion, offering complete control over temperature and smoke intensity. Vertical water smokers like the Weber Smokey Mountain maintain stable temperatures through efficient design, while offset smokers provide larger capacity and traditional smoking experiences. Charcoal requires active fire management but rewards attention with superior smoke penetration and bark development.
Temperature control in charcoal smokers depends on managing airflow through intake and exhaust vents, with small adjustments creating significant temperature changes. The learning curve initially seems steep, but mastering charcoal smoking provides foundational skills applicable to all smoking methods. Most competition pitmasters prefer charcoal for its flavor complexity and complete control over the cooking process.
Electric Smokers
Electric smokers simplify temperature management through automated heating elements, making them ideal for beginners seeking consistency without constant monitoring. Digital controllers maintain precise temperatures within 5°F variations, while automatic wood chip feeders provide steady smoke production. These units excel at overnight cooks and cold smoking applications where precise temperature control matters most.
The trade-off for convenience involves reduced smoke flavor intensity compared to combustion-based systems, though wood chip selection and placement optimization can improve results. Electric smokers work well in apartments or areas with fire restrictions, providing smoking capabilities where traditional methods aren’t feasible. Many experienced pitmasters keep electric units as secondary smokers for vegetables, cheese, and delicate proteins.
Pellet Grills
Pellet grills combine wood-fired flavor with digital convenience, automatically feeding compressed wood pellets to maintain set temperatures. Advanced models feature WiFi connectivity for remote monitoring and adjustment, making them popular among busy cooks seeking quality results with minimal intervention. The consistent burn rate of manufactured pellets provides predictable smoke production and temperature stability.
These versatile units function as smokers, grills, and outdoor ovens, justifying higher initial investments through multi-functionality. Pellet consumption averages 1-2 pounds per hour at smoking temperatures, with premium hardwood pellets costing $15-20 per 20-pound bag. While lacking the intense smoke flavor of traditional offset smokers, pellet grills deliver consistent results that satisfy most barbecue enthusiasts.
Propane Smokers
Propane smokers offer rapid startup and precise temperature control through adjustable gas valves, eliminating charcoal management and ash cleanup. Vertical cabinet designs maximize cooking capacity in minimal footprint, while cast iron wood chip boxes provide smoke generation. These units excel at maintaining steady temperatures regardless of weather conditions, making them reliable year-round options.
The primary limitation involves wood chip consumption and replacement frequency, requiring attention every 30-45 minutes for continuous smoke production. Propane costs remain predictable, with standard 20-pound tanks providing 15-20 hours of smoking time. Many users appreciate the clean-burning characteristics that allow pure wood smoke flavors without charcoal undertones.
Kamado Grills
Ceramic kamado grills retain heat exceptionally well through thick insulated walls, maintaining temperatures for 12+ hours on single charcoal loads. Their versatility enables smoking, grilling, roasting, and baking, with temperature ranges from 200-700°F. The efficient design uses less fuel than traditional smokers while producing excellent smoke flavor through controlled airflow.
The weight and cost of ceramic construction represent significant considerations, with quality models starting around $300 for compact units. Learning proper vent control prevents temperature spikes that can damage ceramics or overcook food. Once mastered, kamados provide unmatched fuel efficiency and temperature stability for both beginners and experienced pitmasters.
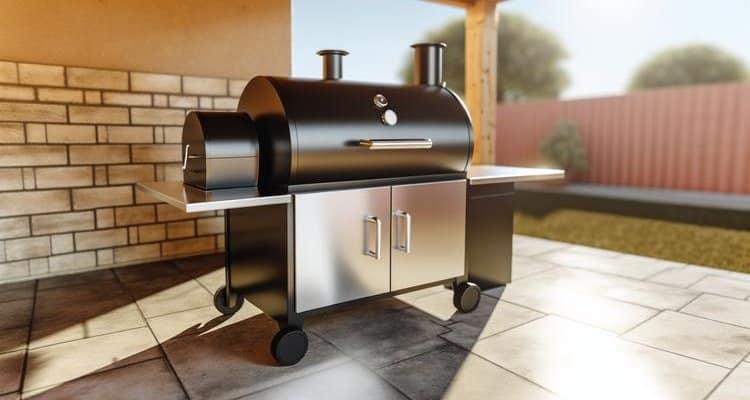
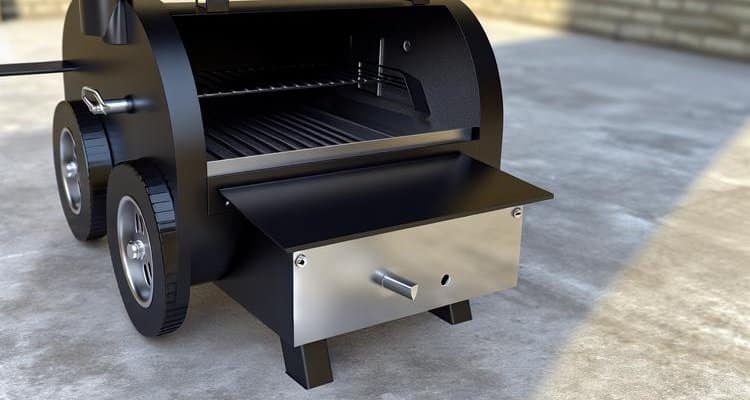
Offset Smokers
Traditional offset smokers feature separate fireboxes that generate smoke and heat flowing through horizontal cooking chambers. This design enables pure wood fires and massive cooking capacity, making them favorites among competition teams and serious enthusiasts. The learning curve requires understanding fire management, smoke quality, and temperature consistency across cooking surfaces.
Quality construction matters significantly, with thicker steel providing better heat retention and more stable temperatures. Entry-level offsets often struggle with temperature control and smoke leakage, frustrating beginners expecting professional results. Successful offset smoking demands attention and practice but delivers authentic barbecue flavors unmatched by convenience-oriented alternatives.
| Type | Temperature Control | Ease of Use | Flavor Intensity | Best For |
|---|---|---|---|---|
| Charcoal | Manual | Moderate | High | Flavor enthusiasts |
| Electric | Digital | Very Easy | Moderate | Beginners |
| Pellet | Automated | Very Easy | Moderate-High | Convenience seekers |
| Propane | Valve Control | Easy | Moderate | Quick starts |
| Kamado | Vent Control | Moderate | High | Versatility |
| Offset | Fire Management | Difficult | Very High | Traditionalists |
Essential Equipment and Tools
Must-Have Accessories for Beginners
Quality thermometers represent the most critical investment after the smoker itself, with instant-read models for spot-checking and leave-in probes for continuous monitoring. Digital dual-probe thermometers allow simultaneous tracking of meat and chamber temperatures, eliminating guesswork from the cooking process. Budget $50-100 for reliable thermometry that ensures food safety and consistent results.
Heat-resistant gloves rated to 500°F protect hands during coal management and meat handling, while long-handled tongs and spatulas prevent burns from reaching across hot surfaces. A sturdy wire brush maintains clean grates that prevent sticking and off-flavors, while chimney starters eliminate lighter fluid tastes when using charcoal. These basic tools cost under $100 total but significantly improve safety and convenience.
Temperature Monitoring Solutions

Modern wireless thermometers transmit real-time temperature data to smartphones, enabling monitoring from inside homes or while running errands. Multi-probe systems track various positions within large cuts or monitor multiple items simultaneously, particularly useful for mixed cooks involving different proteins. App integration provides temperature graphs, predictions, and alerts that help beginners understand cooking progression patterns.
Proper probe placement determines accuracy: insert into thickest portions avoiding fat deposits or bone contact that skew readings. Ambient temperature probes should position at grate level where food cooks, not near smoker walls where temperatures vary significantly. Calibrating thermometers in boiling water (212°F at sea level) ensures accuracy, with adjustments necessary for altitude variations.
Wood Selection Guide
Wood selection dramatically impacts final flavor profiles, with each species contributing unique characteristics suited to specific proteins. Mild fruitwoods complement poultry and seafood without overpowering delicate flavors, while robust hickory and mesquite stand up to beef’s intensity. Blending woods creates custom profiles: apple-cherry for sweetness, oak-hickory for balanced intensity.
Properly seasoned wood with 15-20% moisture content produces clean blue smoke ideal for flavoring, while green or wet wood creates bitter white smoke that ruins food. Wood chunks work best in charcoal smokers, providing longer burn times than chips, while pellet smokers require manufactured pellets meeting their specifications. Store wood in dry, ventilated areas preventing mold growth that creates off-flavors and potential health hazards.
Product Reviews
Weber Smokey Mountain 18.5″ – Best Overall

The Weber Smokey Mountain sets the standard for beginner-friendly charcoal smoking, combining bulletproof construction with intuitive operation. The vertical water smoker design maintains rock-solid temperatures for 10+ hours on single fuel loads, while the porcelain-enameled bowl and lid resist rust and simplify cleaning. Two 18.5″ cooking grates provide 481 square inches of space, enough for two pork butts or three racks of ribs.
Temperature control through bottom vents proves remarkably precise once you understand the relationship between airflow and heat. The built-in thermometer reads accurately enough for general monitoring, though we recommend adding digital probes for precision. After five years of regular use, our test unit shows minimal wear, validating Weber’s reputation for durability. The included water pan effectively stabilizes temperatures and adds humidity for moist results.
Highlights
- Maintains steady 225-250°F for 10+ hours without refueling
- Two-tier cooking system maximizes capacity in compact footprint
- Proven design refined over decades of production
- Extensive online community provides unlimited learning resources
- Silicone temperature grommet accommodates multiple probe wires
Specifications
- Cooking Area: 481 square inches across two grates
- Fuel Type: Charcoal with wood chunks for smoke
- Dimensions: 19″ W x 19″ D x 41″ H
- Weight: 39 pounds
- Warranty: 10 years on bowl and lid, 5 years on grates
Customer Reviews
- “Perfect first smoker – forgiving enough for beginners but capable of competition-quality results”
- “The temperature stability amazes me – set it and forget it for hours”
- “Five years later, still my go-to smoker despite owning more expensive options”
Char-Broil Bullet Charcoal Smoker – Best Budget

The Char-Broil Bullet delivers surprising performance, offering genuine smoking capability for beginners exploring the hobby. While construction quality doesn’t match premium models, the basic design principles work effectively when properly managed. The compact 16″ diameter suits small patios or apartment balconies where space constraints limit options.
Temperature control requires more attention than expensive alternatives, with thinner steel construction causing faster heat loss in wind or cold weather. However, modifications like gasket tape and water pan upgrades significantly improve performance for minimal additional investment. At this price point, it’s an excellent learning platform that produces legitimate barbecue while you decide whether smoking justifies larger investments.
Highlights
- Genuine smoking capability at entry-level pricing
- Compact design fits small outdoor spaces
- Simple construction minimizes potential failure points
- Modification-friendly for performance improvements
- Includes temperature gauge and access door
Specifications
- Cooking Area: 370 square inches
- Fuel Type: Charcoal and wood chunks
- Dimensions: 17″ W x 17″ D x 34″ H
- Weight: 20 pounds
- Warranty: 1-year limited
Customer Reviews
- “Great starter smoker – learned the basics without breaking the bank”
- “Requires more babysitting than expensive models but produces real barbecue”
- “Added door gaskets and better thermometer – now it works great”
Masterbuilt 30″ Digital Electric – Best Electric

The Masterbuilt Digital Electric removes complexity from smoking, delivering consistent results through push-button simplicity. Digital controls maintain temperatures within 1-2 degrees of settings, while the side-loading wood chip tray adds smoke without opening doors. Four chrome-coated racks provide 730 square inches of cooking space, accommodating large batches or multiple proteins simultaneously.
The insulated construction maintains efficiency even in cold weather, using standard household outlets without special wiring requirements. While smoke flavor intensity doesn’t match wood-burning units, the convenience factor makes this ideal for weeknight cooking or those intimidated by fire management. The viewing window lets you monitor progress without heat loss, though it requires regular cleaning to remain useful.
Highlights
- Precise digital temperature control eliminates guesswork
- Side-loading wood chip tray maintains temperature stability
- 730 square inches accommodates large cooks
- Fully insulated body improves efficiency
- Operates on standard 120V household power
Specifications
- Cooking Area: 730 square inches across 4 racks
- Power: 800 watts, 120V standard outlet
- Dimensions: 20.47″ W x 19.88″ D x 33.26″ H
- Weight: 45 pounds
- Warranty: 90-day limited
Customer Reviews
- “Set-and-forget convenience perfect for busy schedules”
- “Great for overnight brisket cooks – maintains temperature perfectly”
- “Less smoke flavor than charcoal but so much easier to use”
Traeger Pro 575 – Best Pellet

The Traeger Pro 575 revolutionizes convenience smoking through WiFIRE technology, enabling complete temperature control and monitoring from anywhere via smartphone. The D2 drivetrain maintains precise temperatures while the 575 square inches of grilling space handles family meals or small gatherings. Pellet consumption averages 1.5 pounds per hour at 250°F, providing 10+ hours per hopper load.
Versatility sets this unit apart: smoke at 165°F, bake at 350°F, or sear at 500°F using the same equipment. The learning curve proves minimal thanks to the automated feed system and digital controller handling all combustion management. While lacking the intense smoke flavor of offset smokers, the consistency and convenience justify the investment for those prioritizing ease over tradition.
Highlights
- WiFIRE connectivity enables remote monitoring and control
- Maintains temperature within 5°F across entire cook
- Multi-cooking capability: smoke, grill, bake, roast, braise
- 18-pound hopper provides all-day cooking capacity
- Meat probe included for internal temperature monitoring
Specifications
- Cooking Area: 575 square inches
- Temperature Range: 165°F to 500°F
- Hopper Capacity: 18 pounds
- Dimensions: 41″ W x 27″ D x 53″ H
- Warranty: 3-year limited
Customer Reviews
- “WiFi control changes everything – monitor cooks from work or bed”
- “Consistent results every time – takes guesswork out of smoking”
- “More like an outdoor oven than traditional smoker but incredibly versatile”
Char-Griller Akorn Jr – Best Kamado

The Char-Griller Akorn Jr delivers ceramic-style cooking performance using triple-walled insulated steel construction at a fraction of traditional kamado prices. The 155 square inch cooking surface suits couples or small families, while exceptional heat retention enables 8-hour smokes on minimal charcoal. Temperature ranges from 200°F for smoking to 700°F for pizza, demonstrating remarkable versatility.
Portability distinguishes this compact kamado, with 37-pound weight allowing tailgating or camping adventures impossible with ceramic alternatives. The learning curve for temperature control proves steeper than standard smokers, as the efficient design responds dramatically to small vent adjustments. Once mastered, fuel efficiency and temperature stability exceed most entry-level smokers.
Highlights
- Triple-walled steel provides ceramic-like heat retention
- Portable 37-pound weight enables mobility
- Temperature range spans 200-700°F
- Cast iron cooking grate enhances heat retention
- Exceptional fuel efficiency reduces operating costs
Specifications
- Cooking Area: 155 square inches
- Fuel Type: Charcoal
- Dimensions: 22″ W x 25″ D x 28″ H
- Weight: 37 pounds
- Warranty: 2-year limited
Customer Reviews
- “Perfect apartment balcony smoker – efficient and compact”
- “Amazing heat retention – uses half the charcoal of my old smoker”
- “Takes practice to control temperature but incredibly versatile once learned”
Cuisinart Vertical Propane – Best Propane

The Cuisinart Vertical Propane Smoker combines gas convenience with legitimate smoking capability, starting up in minutes without charcoal mess. Four stainless steel racks provide 784 square inches across the vertical cabinet design, maximizing cooking capacity while minimizing footprint. The adjustable gas control valve maintains steady temperatures from 100-400°F regardless of outdoor conditions.
Two doors allow upper rack access without losing heat from the entire chamber, improving efficiency during long cooks. The porcelain-enamel water bowl and wood chip tray resist corrosion while simplifying cleanup. Temperature consistency proves excellent once you understand the relationship between gas flow and vent positioning, though wood chip consumption requires hourly attention for continuous smoke.
Highlights
- Quick startup without charcoal preparation
- 784 square inches of vertical cooking space
- Dual door design improves heat retention
- Stainless steel construction ensures durability
- Wide temperature range enables cold smoking
Specifications
- Cooking Area: 784 square inches
- Fuel Type: Propane with wood chips
- Dimensions: 24″ W x 16″ D x 45″ H
- Weight: 50 pounds
- Warranty: 3-year limited
Customer Reviews
- “Love the quick startup – smoking dinner after work is actually possible”
- “Vertical design fits perfectly on my small patio”
- “Consistent temperatures make it very beginner-friendly”
Weber Smokey Joe – Best Portable
While primarily designed as a portable grill, the Weber Smokey Joe transforms into a capable mini-smoker with simple modifications. The 147 square inch cooking area handles two chicken breasts or a small pork tenderloin, perfect for learning smoking techniques without large investments. Adding a disposable aluminum pan creates a two-zone setup enabling indirect cooking essential for smoking.
Temperature control through bottom vent manipulation works identically to larger Weber models, providing excellent training for temperature management fundamentals. The porcelain-enameled bowl and lid match the durability of full-size Webers while the locking lid and carry handle enable true portability. For apartment dwellers or those testing smoking interest, it’s an ideal entry point under traditional smoker pricing.
Highlights
- Dual-function design: grilling and smoking capability
- True portability with locking lid and handle
- Weber build quality at entry-level pricing
- Perfect for learning temperature control basics
- Minimal storage space requirements
Specifications
- Cooking Area: 147 square inches
- Fuel Type: Charcoal
- Dimensions: 14.5″ W x 14.5″ D x 17″ H
- Weight: 10 pounds
- Warranty: 10 years on bowl and lid
Customer Reviews
- “Learned to smoke on this before upgrading – perfect trainer”
- “Amazing what this little grill can do with practice”
- “Great for camping trips when I want real barbecue flavor”
Getting Started: Your First Smoke
Initial Setup and Seasoning
New smokers require seasoning to burn off manufacturing residues and create protective coating on interior surfaces. Start by coating cooking grates with high-heat cooking oil, then run the empty smoker at 275°F for 2-3 hours with mild wood smoke. This process polymerizes oils into a non-stick surface while eliminating chemical odors that could taint food.
During seasoning, practice temperature control techniques specific to your smoker type. Charcoal users should experiment with vent adjustments, while pellet grill owners familiarize themselves with controller interfaces. Document vent positions and resulting temperatures for future reference, as every smoker behaves slightly differently based on construction variations and environmental factors.
Choosing Your First Cook
Select forgiving proteins for initial smoking attempts, avoiding expensive cuts until skills develop. Pork shoulder (Boston butt) proves ideal: the high fat content prevents drying, while the long cook time provides temperature control practice. Chicken thighs offer quicker results with similar forgiveness, reaching safe temperatures in 2-3 hours versus 8-12 for pork shoulder.
Avoid brisket, ribs, or whole turkeys initially, as these require precise technique to achieve optimal results. Plan your first cook for weekends when time pressure won’t force shortcuts, allowing natural progression through temperature stalls and proper rest periods. Start early morning to ensure completion before dinner, remembering that smoking always takes longer than expected.
Step-by-Step First Smoke Process
Begin preparation the night before by trimming excess fat, applying dry rub, and refrigerating meat uncovered to develop pellicle (tacky surface layer) that attracts smoke. Soak wood chunks if using chips, though chunks generally perform better without soaking. Prepare extra fuel and wood, as running out mid-cook creates temperature management challenges.
Start your fire 30-45 minutes before cooking, allowing temperatures to stabilize before adding meat. Place protein fat-side up to self-baste during cooking, positioning thicker portions toward heat sources. Insert temperature probes into thickest areas, avoiding fat pockets or bone contact. Maintain target temperature ranges rather than exact numbers: 225-250°F works for most smoking applications.
Monitor both meat and chamber temperatures hourly, adjusting vents or settings as needed. Resist opening the smoker frequently; “if you’re looking, you’re not cooking” remains valuable advice. When meat reaches target internal temperature, remove and rest wrapped in foil for 30-60 minutes, allowing juices to redistribute throughout the protein.
Temperature Management Mastery
Understanding Your Smoker’s Hot Spots
Every smoker exhibits temperature variations across cooking surfaces, with differences of 25-50°F common between positions. Map these variations using the biscuit test: place canned biscuits across the grate and observe browning patterns after 15 minutes at 350°F. Darker biscuits indicate hotter zones typically closer to heat sources or exhaust paths.
Understanding temperature gradients enables strategic food placement, positioning thicker portions in hotter zones while delicate items cook in cooler areas. Rotate items during long cooks to ensure even exposure, particularly in offset smokers where temperatures vary dramatically between firebox proximity. Digital multi-probe thermometers help monitor different zones simultaneously, eliminating guesswork from position management.
The Minion Method for Charcoal
The Minion Method revolutionizes charcoal smoking by providing 12+ hour burn times without refueling. Fill the charcoal chamber with unlit briquettes, then add 15-20 lit coals on top. The lit coals slowly ignite adjacent briquettes, creating consistent heat over extended periods. Wood chunks placed throughout unlit charcoal provide steady smoke as fire progresses.
This technique works particularly well in vertical water smokers and kettle grills, eliminating temperature spikes associated with adding cold fuel. Adjust burn rate through bottom vent control: wider openings accelerate combustion for higher temperatures, while restricted airflow slows burning for lower heat. Practice reveals optimal configurations for maintaining specific temperature ranges in your equipment.
Managing Temperature Stalls
Temperature stalls occur when evaporative cooling from moisture loss equals heat input, causing internal temperatures to plateau for hours. This phenomenon typically happens around 150-170°F, frustrating beginners who expect linear temperature progression. Understanding stalls as natural processes rather than problems prevents unnecessary adjustments that destabilize cooking conditions.
The Texas Crutch technique accelerates cooking through stalls by wrapping meat in foil with liquid, creating a braising environment that powers through plateaus. While effective for time management, wrapping softens bark (exterior crust) that many consider essential to proper barbecue. Alternatively, maintaining patience and consistent temperature eventually overcomes stalls while preserving bark integrity. Higher cooking temperatures (275°F versus 225°F) reduce stall duration without wrapping.
Common Beginner Mistakes to Avoid
Over-Smoking Your Food
Excessive smoke creates bitter, acrid flavors that overpower meat’s natural taste, representing the most common beginner error. White billowing smoke indicates incomplete combustion producing creosote, while ideal “thin blue smoke” barely visible against sky delivers clean flavors. Less smoke over longer periods produces better results than heavy smoke for short durations.
Limit wood additions to the first 3-4 hours when meat surfaces remain moist and below 140°F, the optimal range for smoke absorption. After this point, meat develops sufficient smoke flavor and additional wood primarily maintains heat rather than flavoring. Start conservatively with wood amounts; you can always add smoke flavor in future cooks but cannot remove excessive bitterness once absorbed.
Temperature Control Errors
Frequent lid opening for checking progress releases heat and smoke, extending cooking times while producing inconsistent results. Trust thermometers rather than visual inspection, remembering that properly positioned probes provide continuous monitoring without disturbing cooking environments. Each lid opening adds 15-30 minutes to total cooking time through heat loss and recovery periods.
Chasing exact temperatures proves counterproductive, as 25-degree variations produce negligible difference in final results. Maintain ranges rather than specific numbers: 225-250°F for traditional barbecue, 275-300°F for crispy skin poultry. Large temperature swings indicate improper vent management or fuel issues requiring attention, but minor fluctuations remain normal and acceptable.
Rushing the Process
Attempting to accelerate cooking through higher temperatures fundamentally misunderstands smoking’s purpose: enzymatic tenderization and collagen conversion require time regardless of heat levels. Raising temperatures to 350°F doesn’t create barbecue faster; it produces tough, dry meat lacking proper smoke flavor. Plan sufficient time including 30% buffer for unexpected delays.
Cutting meat immediately after cooking allows juices to escape, resulting in dry texture despite proper cooking. Rest periods of 30-60 minutes wrapped in foil enable moisture redistribution throughout proteins, dramatically improving final texture. Large cuts like brisket benefit from extended resting up to two hours in insulated containers (faux Cambro technique), maintaining serving temperature while improving tenderness.
Safety Guidelines and Best Practices
Food Safety Temperatures
Understanding safe internal temperatures prevents foodborne illness while achieving optimal texture. Poultry requires 165°F throughout for safety, though dark meat benefits from 175-180°F for improved texture. Ground meats need 160°F regardless of species, while whole muscle beef and pork safely cook to 145°F with three-minute rest periods.
Competition-style barbecue often exceeds safety minimums for texture optimization: brisket at 203°F, pulled pork at 205°F, ribs at 195°F. These higher temperatures ensure complete collagen conversion creating signature tenderness. Use instant-read thermometers to verify temperatures in multiple locations, particularly near bones or thick sections where heating lags. Document cooking times and temperatures for future reference and consistency.
Fire Safety Considerations
Position smokers on level, non-flammable surfaces minimum 10 feet from structures, overhangs, or combustible materials. Never operate smokers in garages, covered patios, or enclosed spaces where carbon monoxide accumulates to dangerous levels. Keep fire extinguishers rated for grease fires readily accessible, understanding that water worsens grease fires.
Maintain clean equipment to prevent grease fires, regularly emptying drip pans and cleaning accumulated residue. Inspect gas connections using soap solution to detect leaks, never using open flames for testing. Store pellets and charcoal in dry locations preventing spontaneous combustion from moisture exposure. Dispose of ashes only after complete cooling in metal containers, as hidden embers can reignite days later.
Proper Meat Handling
Maintain cold chain integrity by minimizing room temperature exposure, especially for poultry and ground meats harboring higher bacterial loads. Use separate cutting boards and utensils for raw and cooked products, preventing cross-contamination that causes illness. Wash hands thoroughly after handling raw meat and before touching other surfaces or foods.
Apply rubs and injections using clean equipment, discarding any remaining mixtures contacting raw meat. Never reuse marinades without boiling first to eliminate pathogens. Hold cooked meats above 140°F or below 40°F, avoiding the “danger zone” where bacteria multiply rapidly. When serving buffet-style, replace platters rather than adding fresh food to existing displays, maintaining proper temperatures throughout service.
Building Your Smoking Skills
Developing Your Palate
Training your palate to recognize quality barbecue involves systematic tasting and analysis of different techniques and flavors. Sample various restaurants and competition barbecue to understand regional styles and preferences. Note differences in smoke intensity, seasoning profiles, texture, and moisture levels, developing vocabulary to describe preferences and guide future cooking decisions.
Keep detailed cooking logs documenting rubs, woods, temperatures, and timing alongside tasting notes for each cook. This record reveals patterns in successful outcomes while identifying areas needing improvement. Share food with others gathering feedback, as different palates perceive flavors uniquely. Join online communities where members exchange samples and critiques, accelerating learning through collective experience.
Advanced Techniques to Master
After mastering basic smoking, explore advanced techniques expanding your capabilities. Injection adds moisture and flavor to lean cuts, while complex rub layering creates depth through multiple seasoning applications. Cold smoking below 90°F imparts flavor without cooking, perfect for cheese, salt, or cured meats requiring specialized equipment or techniques.
Reverse searing combines smoking with high-heat finishing, producing edge-to-edge doneness with crispy exteriors on steaks and roasts. The snake method arranges charcoal in continuous chains providing precise burn times for kettle grill smoking. Understanding when each technique applies enables customization based on desired outcomes rather than following rigid recipes.
Competition Smoking Basics
Competition barbecue represents the pinnacle of smoking skills, where minute details determine placement among dozens of skilled competitors. KCBS (Kansas City Barbeque Society) sanctions most competitions, judging chicken, ribs, pork, and brisket on appearance, taste, and tenderness. Understanding scoring criteria helps improve everyday cooking even without competition aspirations.
Competition techniques emphasize visual presentation through careful trimming, precise cooking, and strategic saucing or glazing. Flavor profiles tend toward balanced sweet-savory combinations appealing to broad palates rather than regional extremes. Box building (arrangement for judging) teaches portion control and presentation skills valuable for home entertaining. Consider attending competitions as spectator to observe techniques and sample various styles before entering.
Maintenance and Long-Term Care
Cleaning Schedules and Methods
Regular cleaning extends equipment life while preventing off-flavors from accumulated residue. After each cook, brush grates while warm to remove food particles, then wipe with oiled paper towels preventing rust. Empty ash and grease collection systems preventing overflow that attracts pests or creates fire hazards.
Deep clean monthly during heavy use seasons, disassembling removable components for thorough degreasing. Avoid harsh chemicals that leave residues or damage protective coatings; warm water with mild dish soap handles most cleaning needs. Season cast iron grates after cleaning to maintain non-stick properties, while stainless steel benefits from specialized polishes removing discoloration.
Seasonal Storage Tips
Proper off-season storage prevents weather damage and extends smoker lifespan significantly. Clean thoroughly before storage, removing all ash, grease, and food residue that attracts moisture and pests. Apply thin coating of cooking oil to bare metal surfaces preventing rust formation during storage periods.
Store smokers in dry locations avoiding temperature extremes that cause metal expansion and contraction damaging welds or seals. Use breathable covers preventing moisture accumulation that promotes rust, avoiding plastic tarps that trap condensation. Remove electronic components like digital controllers for indoor storage, protecting sensitive circuits from humidity and temperature variations.
When to Upgrade Equipment
Recognize when equipment limitations hinder progress, justifying upgrades to more capable units. Consistent temperature control problems despite proper technique indicate construction quality issues requiring better insulation or thicker steel. Capacity constraints forcing multiple cooks for gatherings suggest larger smokers would improve efficiency.
Consider versatility needs as skills expand: dedicated smokers excel at low-and-slow cooking but lack high-heat grilling capability. Multi-functional units like kamados or pellet grills might better serve evolved cooking styles. Budget for quality improvements rather than lateral moves; significant upgrades justify expense through improved results and extended lifespan versus marginal improvements offering minimal benefit.
Troubleshooting Common Problems
Dealing with Temperature Fluctuations
Identify root causes of temperature instability through systematic evaluation of potential issues. Check door and lid seals for gaps allowing heat escape, using high-temperature gaskets to improve retention. Verify thermometer accuracy through boiling water calibration, as faulty readings cause unnecessary adjustments creating actual instability.
Wind significantly impacts temperature control, particularly in lightweight or uninsulated smokers. Position units to minimize exposure using windbreaks or rotating orientation relative to prevailing winds. Add thermal mass through water pans, fire bricks, or sand helping stabilize temperatures against environmental variations. Consider welding blankets or insulated covers for cooking in extreme cold, dramatically improving efficiency and stability.
Fixing Dry or Tough Results
Analyze moisture loss causes starting with temperature verification, as excessive heat accelerates dehydration producing tough, dry results. Confirm accurate thermometer readings and proper probe placement avoiding false readings causing premature removal. Increase humidity through water pans, spritzing, or foil boats containing liquid beneath cooking grates.
Select appropriate cuts for smoking methods: lean cuts require different approaches than fatty alternatives. Consider brining or injecting lean proteins adding moisture and seasoning throughout rather than surface treatment alone. Evaluate wood quantities ensuring smoke enhancement rather than overwhelming desiccation. Rest periods remain critical for moisture redistribution; rushing service guarantees suboptimal texture regardless of cooking perfection.
Smoke Production Issues
Diagnose smoke problems by evaluating fuel quality, airflow patterns, and combustion completeness. Wet or green wood produces white acrid smoke requiring properly seasoned alternatives with appropriate moisture content. Insufficient airflow causes incomplete combustion; verify vents remain unobstructed and properly adjusted for adequate oxygen supply.
Excessive smoke often results from oversized wood additions or smoldering rather than clean burning. Use smaller pieces achieving complete combustion, adding wood gradually rather than large quantities simultaneously. Pellet smokers experiencing weak smoke might benefit from smoke tubes providing supplementary smoke during cooking. Understanding your equipment’s optimal configuration for smoke production prevents both under and over-smoking issues.
Recipes and Techniques for Success
Essential Rubs and Marinades
Master basic barbecue rubs providing foundation for countless variations. Start with equal parts salt and pepper (Texas-style) for beef, adding paprika and garlic powder for all-purpose applications. Build complexity through brown sugar for caramelization, cayenne for heat, and dried herbs for aromatic depth. Document successful combinations and ratios for consistency across cooks.
Marinades serve dual purposes: flavoring and tenderizing through acid action on protein structures. Balance acid (vinegar, citrus), oil (carrying fat-soluble flavors), and seasonings based on protein characteristics and desired outcomes. Limit marinating times preventing mushy texture from over-tenderizing: 2-4 hours for seafood, 4-8 hours for poultry, up to 24 hours for tough beef cuts.
Beginner-Friendly Proteins
Start with forgiving cuts building confidence before attempting challenging proteins. Pork shoulder’s high fat content and collagen provide insurance against overcooking, while bone-in chicken thighs offer quick results with similar forgiveness. Beef chuck roast transforms into “poor man’s brisket” using identical techniques with lower cost and difficulty.
Salmon introduces seafood smoking using shorter cooking times and lower temperatures, developing skills for delicate proteins. Pork tenderloin teaches temperature precision requirements for lean cuts, while baby back ribs provide rib experience without spare ribs’ longer cooking times. Progress systematically through increasing difficulty levels, mastering fundamentals before attempting brisket or whole animals.
Simple Smoking Projects
Expand beyond traditional proteins exploring smoking’s versatility across various foods. Smoked vegetables develop complex flavors impossible through other cooking methods: peppers for salsas, tomatoes for sauces, onions for enhanced sweetness. Cheese cold-smoking requires temperatures below 90°F, imparting smoke without melting using ice pans or cold smoke generators.
Salt smoking creates gourmet finishing salts absorbing smoke flavors for later use. Nuts benefit from light smoking enhancing natural flavors without overwhelming delicate profiles. Reverse-seared steaks combine smoking with high-heat finishing producing restaurant-quality results. These projects provide practice opportunities between major cooks while expanding repertoire beyond traditional barbecue.
Budget Considerations
Initial Investment Breakdown
Budget realistically for complete setup including essential accessories beyond basic smoker purchase. Entry-level smokers range from basic models to mid-range units offering better construction and features. Allocate funds for quality thermometers ensuring food safety and consistent results. Factor in fuel costs: charcoal and wood for traditional smokers, pellets for pellet grills, propane for gas units.
Essential tools including gloves, tongs, chimney starters, and cleaning supplies add modest but necessary expenses. Quality storage solutions protect investments from weather damage, justifying cover expenses through extended equipment life. Consider ongoing consumables: rubs, sauces, wood varieties, and replacement parts maintaining optimal performance.
Ongoing Operating Costs
Calculate per-cook expenses understanding true barbecue costs beyond initial investment. Charcoal consumption averages 5-10 pounds per session, with lump charcoal costing more than briquettes but burning cleaner. Wood chunks add $5-10 per cook depending on quantity and species selected. Pellet grills consume 1-2 pounds hourly at smoking temperatures.
Electricity costs for electric smokers remain minimal, typically under $2 for 8-hour cooks at residential rates. Propane offers predictable expenses with 20-pound tanks providing 15-20 hours smoking time. Include food costs recognizing that smoking transforms inexpensive cuts into premium meals, offsetting restaurant dining while developing valuable skills.
Value vs Premium Options
Evaluate feature importance against budget constraints identifying necessary versus desirable capabilities. Construction quality significantly impacts longevity and performance: thicker steel, better insulation, and superior components justify higher prices through extended lifespan and improved results. Premium features like WiFi connectivity, automatic feed systems, or expanded capacity enhance convenience but don’t guarantee better food.
Consider used equipment from upgrading enthusiasts, potentially acquiring quality smokers at significant discounts. Modify basic smokers with gaskets, thermometers, and deflectors achieving near-premium performance economically. Recognize that skill development matters more than equipment quality; experienced pitmasters produce excellent results with basic equipment while beginners struggle despite premium gear.
Community and Resources
Online Communities and Forums
Join established barbecue communities accelerating learning through collective knowledge sharing. r/smoking subreddit provides friendly beginner support with extensive archives addressing common questions. BBQ Brethren forums offer deeper technical discussions and regional style expertise from experienced pitmasters. Facebook groups organize around specific equipment brands or local regions facilitating meetups and equipment sales.
YouTube channels like HowToBBQRight, Mad Scientist BBQ, and Cooking With Ry provide visual learning for technique development. Follow competition teams sharing advanced techniques and behind-scenes insights into professional barbecue. Instagram hashtags connect global barbecue community sharing daily cooks, inspiring creativity and technique refinement. Engage actively asking questions and sharing experiences, as community members eagerly help newcomers avoid common mistakes.
Local BBQ Groups
Seek local barbecue clubs organizing regular meetups, competitions, and educational events. Many regions host informal gatherings where members share techniques, equipment, and samples. Competition teams often welcome volunteers helping during events, providing hands-on learning opportunities with experienced pitmasters. Local butchers and specialty stores serve as community hubs connecting enthusiasts and sharing regional knowledge.
Attend barbecue festivals experiencing various styles while networking with passionate practitioners. Many restaurants host pit tours or classes teaching signature techniques and recipes. Farmers markets connect with local wood suppliers and specialty meat producers enhancing ingredient quality. Building local connections provides mentorship opportunities accelerating skill development beyond solitary practice.
Recommended Learning Resources
Invest in foundational barbecue books providing comprehensive technical knowledge and recipes. “Franklin Barbecue: A Meat-Smoking Manifesto” delivers competition-level brisket techniques from renowned pitmaster Aaron Franklin. “Meathead: The Science of Great Barbecue and Grilling” by Meathead Goldwyn explains scientific principles underlying successful smoking. “Weber’s Smoke” offers accessible introduction to various smoking methods and equipment types.
Subscribe to specialized magazines like “Barbecue News” covering competition circuit and advanced techniques. Podcasts including “Barbecue Nation” and “The BBQ Central Show” feature interviews with pitmasters and industry professionals. Consider hands-on classes at culinary schools or barbecue restaurants providing structured learning with immediate feedback. Document personal journey through cooking logs, photos, and notes creating personalized reference guide for continuous improvement.
Conclusion
Beginning your smoking journey opens doors to a rich culinary tradition combining science, art, and patience into deeply satisfying results. Success comes through understanding fundamental principles rather than memorizing recipes, as every smoker behaves differently and preferences vary widely. Start with appropriate equipment matching your commitment level, budget, and available space, remembering that skilled pitmasters produce excellent food with basic tools.
Focus initially on temperature control and smoke management, the twin foundations supporting all advanced techniques. Choose forgiving cuts building confidence while developing palate recognition for quality barbecue. Document experiences creating personal reference guides more valuable than any cookbook. Embrace the learning process understanding that mistakes teach lessons leading to mastery.
The barbecue community welcomes newcomers with enthusiasm, sharing knowledge accumulated over generations of practice. Whether pursuing backyard excellence or competition glory, smoking provides lifelong learning opportunities and deep satisfaction from creating memorable meals. For more guidance on getting started with outdoor cooking, check out our complete BBQ beginner’s guide. Trust the process, maintain patience, and soon you’ll produce barbecue rivaling established restaurants while developing skills passed to future generations.
Contents
- Quick Roundup List
- Understanding Smoker Fundamentals
- Types of Smokers Explained
- Essential Equipment and Tools
- Product Reviews
- Getting Started: Your First Smoke
- Temperature Management Mastery
- Common Beginner Mistakes to Avoid
- Safety Guidelines and Best Practices
- Building Your Smoking Skills
- Maintenance and Long-Term Care
- Troubleshooting Common Problems
- Recipes and Techniques for Success
- Budget Considerations
- Community and Resources
- Conclusion