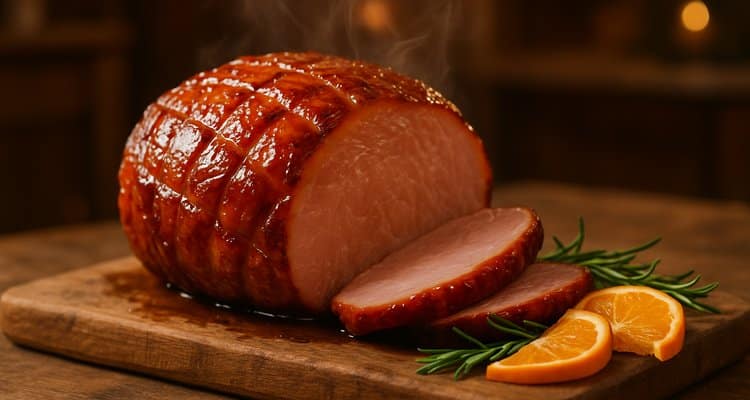
An uncooked ham — also called a fresh ham — is a completely different experience from the pre-cooked, spiral-sliced hams that dominate grocery store shelves. It is raw pork that you roast from scratch, producing crispy, crackling skin and an incredibly juicy interior that no reheated ham can match. This is pork in its purest form, a true centerpiece roast.
This guide walks you through every step: selecting the right cut, brining for deep flavor and seasoning, scoring the fat cap, slow-roasting at 325°F, and building a caramelized glaze. The process takes time, but the technique is straightforward and the results are worth every minute. Prepare to create a holiday meal your guests will remember for years.
Quick Summary
- Fresh Ham Basics — An uncooked ham is raw, uncured pork from the leg, requiring full cooking to 145°F. It offers a pure, rich pork flavor and crispy skin, unlike pre-cooked, cured hams.
- Brining & Roasting — Brining for 24-48 hours is highly recommended for juiciness. Slow-roast at 325°F, aiming for 130°F internal temperature before glazing.
- Glazing & Resting — Apply a brown sugar glaze during the final 30-45 minutes of cooking until the ham reaches 145°F. Rest for 15-20 minutes before carving to ensure maximum juiciness.
What Is an Uncooked Ham?
An uncooked ham, most often called a fresh ham, is a raw, uncured leg of pork. Unlike the familiar pink, cured, and often pre-cooked hams, a fresh ham is essentially a large pork roast. It must be cooked from scratch to a safe internal temperature before eating, just like any other raw cut of meat.
Fresh Ham vs. Cured Ham: The Key Difference
A fresh ham is raw pork that has not been cured, smoked, or cooked in any way. It has the pale pink color and mild flavor of a raw pork roast and must be cooked thoroughly to 145°F before serving. Its taste is pure, rich pork.
A cured ham has been treated with a mixture of salt, nitrates, and sometimes sugar. This curing process preserves the meat, turns it a characteristic pinkish-red, and imparts the salty, savory flavor we typically associate with the word “ham.” Cured hams can be sold uncooked or fully cooked, but this article focuses exclusively on the fresh, uncooked ham.
Common Cuts: Fresh Ham Leg vs. Picnic Shoulder
The fresh ham leg comes from the rear leg of the pig and is the premium cut for a classic roasted ham. It can be sold bone-in or boneless, is generally leaner than the shoulder, and has a thick fat cap ideal for scoring and creating crispy skin. This is the cut you want for impressive, sliceable holiday roasts.
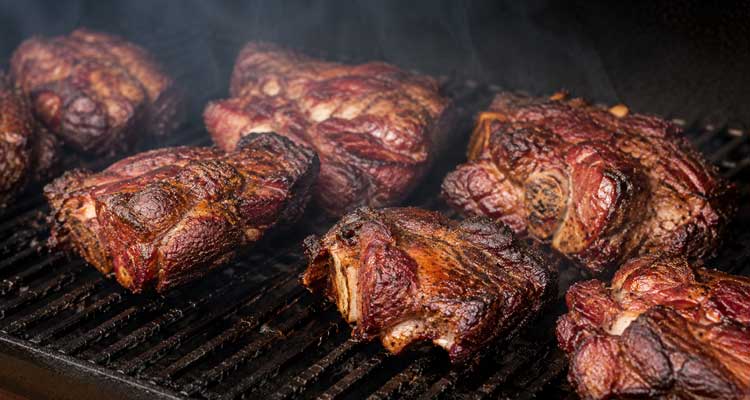
The picnic shoulder (or picnic ham) comes from the lower part of the front shoulder and is technically not a true ham. It contains more connective tissue and intramuscular fat.
This higher collagen content makes it better suited for low-and-slow cooking methods like smoking or braising, which break down the tissue into gelatin, making it perfect for pulled pork.
Choosing Your Fresh Ham: What to Look For
When selecting your fresh ham, look for one with pale pink, firm flesh and a clean, white fat cap. For this recipe, a bone-in, skin-on ham is highly recommended. The bone adds flavor and helps regulate cooking, while the skin is essential for achieving that coveted crispy crackling.
You will likely need to order a fresh ham from a local butcher shop, as they are not commonly stocked in most large grocery chains. Plan ahead and order it at least a week in advance, especially around the holidays. Specify that you want a skin-on, bone-in fresh ham from the rear leg.
Why You Must Cook a Fresh Ham to a Safe Temperature
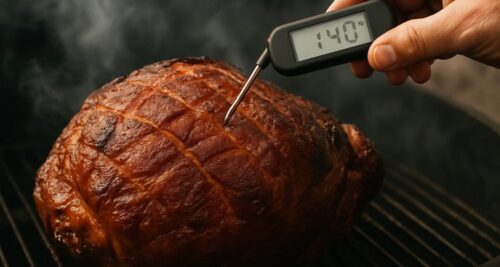
Cooking a fresh ham to a safe internal temperature is critical to destroy harmful bacteria and parasites that can be present in raw pork. While modern farming has made pork much safer, the risk is not zero. A reliable meat thermometer is the only way to guarantee doneness without overcooking.
The USDA Guideline for Pork
The USDA recommends cooking fresh pork, including an uncooked ham, to a minimum internal temperature of 145°F[USDA]. After removing the ham from heat, it must rest for at least 3 minutes before carving. This rest period is a crucial part of the food safety process.
This rest period is not optional — it allows residual heat to finish the job and gives juices time to redistribute throughout the meat for a more tender result. The combination of reaching 145°F and a proper resting period ensures a safe and delicious final product.
Essential Tools for Temperature Accuracy
An instant-read digital meat thermometer is non-negotiable for this recipe.
A few tools that make roasting a fresh ham easier:
- ThermoMaven Professional Digital Meat Thermometer — confirms internal temp hits 145F for a safe, juicy result
- Cuisinart 16-Inch Stainless Steel Roasting Pan with Rack — rack elevates the ham for even heat and proper fat rendering
- SYOKAMI Brisket Slicing Knife 12 Inch — long, sharp blade for carving a bone-in fresh ham cleanly
For a long roast like this, a leave-in probe thermometer with an alarm is even better, as it allows you to monitor progress without opening the oven door. Insert the probe into the thickest part of the ham, making sure it does not touch bone.
Bone conducts heat faster than meat and will give a falsely high reading.

The Step-by-Step Recipe for Perfect Roasted Fresh Ham
This recipe guides you through roasting a fresh, uncooked ham to perfection. We’ll cover an optional but highly recommended brining step for juiciness, a slow-roasting method for tender meat, and a simple brown sugar glaze for a caramelized, crispy finish. A meat thermometer is essential for getting the internal temperature just right.
Equipment List
- Large container, food-grade bucket, or brining bag (for brining)
- Large roasting pan with a rack
- Instant-read meat thermometer or leave-in probe thermometer
- Sharp carving knife and fork
- Small saucepan (for glaze)
- Basting brush
Ingredients
For the ham:
- 1 (10-12 pound) bone-in, skin-on fresh ham
For the brine (optional but recommended):
- 2 gallons cold water
- 2 cups kosher salt
- 1 cup brown sugar
- 1 head garlic, halved
- 1 tablespoon black peppercorns
- A few bay leaves
For the glaze:
- 1 cup brown sugar
- 1/2 cup Dijon mustard
- 1/4 cup apple cider vinegar
- 1/2 teaspoon ground cloves
Step 1: Brining Your Fresh Ham (Optional but Recommended)
Brining a fresh ham involves soaking it in a saltwater solution for 24-48 hours before cooking. Through osmosis, the brine seasons the meat from the inside out and helps muscle proteins retain moisture. This process pushes flavor deep into the meat and provides excellent insurance against drying out during the long roast.
It is the single biggest improvement you can make to the final result.
Simple Ham Brine Recipe
In a large pot, combine 1 gallon of water with the salt, brown sugar, garlic, peppercorns, and bay leaves. Bring to a simmer, stirring until the salt and sugar dissolve completely. Remove from heat, add the remaining gallon of cold water to cool it down, and then refrigerate until fully chilled (below 40°F).
How to Brine
- Place the fresh ham in a large, food-safe container or brining bag.
- Pour the chilled brine over the ham, ensuring it is fully submerged. You may need to weigh it down with a plate.
- Refrigerate for 24-48 hours.[USDA] A 24-hour brine is good; 48 hours is even better for a large ham.
- Remove the ham, discard the brine, and rinse the ham thoroughly under cold water. Pat it completely dry with paper towels.
Brine Variations
Feel free to customize your brine. You can add other aromatics to infuse subtle flavors into the meat. Consider adding sliced oranges, whole cloves, star anise, fresh rosemary sprigs, or a splash of apple cider to the basic brine recipe.
Step 2: Preparing and Roasting the Ham
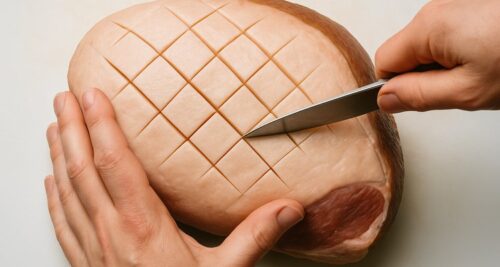
With the ham brined and dried, the next step is preparing the surface for roasting. Scoring the fat cap is a crucial technique that serves multiple purposes: it helps the thick layer of fat render down, creates more surface area for browning and crisping, and gives the glaze channels to penetrate into the surface.
Scoring the Fat Cap
Using a very sharp knife, make shallow diagonal cuts about 1/4-inch deep and 1 inch apart across the entire surface of the skin and fat. Be careful not to cut into the meat itself. Then rotate the ham 90 degrees and repeat the cuts to create a classic crosshatch or diamond pattern.
This scoring is functional for rendering and flavor, not just decorative.

Roasting Instructions
Preheat your oven to 325°F. Place the scored ham fat-side up on a sturdy rack set inside a large roasting pan. The rack is essential for allowing hot air to circulate around the entire ham.
Add 1 cup of water to the bottom of the pan to prevent drippings from burning and to create a slightly humid environment.
Roast the uncooked ham uncovered for approximately 22-28 minutes per pound. Start checking the internal temperature with your meat thermometer after about 2.5 hours. You are looking for the ham to reach an internal temperature of 130°F before you pull it out to apply the first layer of glaze.
Roasting Time Chart
| Ham Weight | Estimated Roasting Time (at 325°F) | Target Temp Before Glazing |
|---|---|---|
| 8-10 lbs | 3-4 hours | 130°F |
| 10-12 lbs | 3.5-5 hours | 130°F |
| 12-15 lbs | 4.5-6 hours | 130°F |
| 15-18 lbs | 5.5-7.5 hours | 130°F |
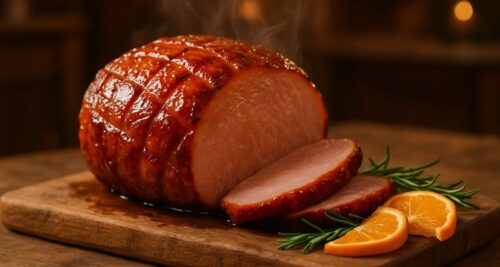
Step 3: Applying the Glaze
Apply the glaze during the final 30-45 minutes of cooking, once the ham reaches an internal temperature of 130-135°F. Applying it too early is a common mistake; the high sugar content will cause the glaze to burn and turn bitter long before the ham finishes cooking. Applying multiple thin layers builds a thick, beautifully caramelized crust.
Easy Brown Sugar and Mustard Glaze Recipe
In a small saucepan, combine the brown sugar, Dijon mustard, apple cider vinegar, and ground cloves. Heat over medium-low, stirring constantly until the sugar dissolves completely and the glaze is smooth and slightly thickened. Do not allow the mixture to boil.
Glazing Technique
- When the ham’s internal temperature reaches 130°F, carefully remove it from the oven.
- Using a basting brush, apply a generous, even layer of the warm glaze over the entire scored surface.
- Return the ham to the oven. Continue roasting, brushing on another layer of glaze every 15 minutes, until the internal temperature reaches 145°F and the glaze is bubbly and deeply caramelized.
Glaze Variations
This simple glaze is a classic, but you can easily adapt it. For a touch of warmth, try a Maple-Bourbon Glaze by swapping the brown sugar for maple syrup and adding a shot of bourbon. For a fruity tang, a Pineapple-Ginger Glaze using pineapple juice and fresh grated ginger is an excellent choice.
Step 4: Resting and Carving Your Ham
Once the ham reaches a final internal temperature of 145°F, remove it from the oven and transfer it to a large cutting board. Tent it loosely with foil and let it rest for at least 15-20 minutes before carving. The internal temperature will continue to rise a few degrees due to carryover cooking during this time.
The Importance of Resting
Resting is non-negotiable for a juicy result. During cooking, the muscle fibers in the meat tighten and push moisture toward the center.
Resting allows those fibers to relax and reabsorb the juices. Carving immediately sends those flavorful juices running onto the cutting board instead of staying in each slice.
How to Carve a Bone-In Ham
Carving a bone-in ham can seem intimidating, but a systematic approach makes it simple. Follow these steps for clean, beautiful slices.
- Create a Stable Base: Place the ham on a large cutting board with a channel to catch juices. Cut a few thin slices from the thinner side of the ham, parallel to the bone.
- Position the Ham: Turn the ham to rest on the flat surface you just created. This prevents it from rolling around while you carve.
- Slice Down to the Bone: Starting at the narrower end, make perpendicular slices down to the main bone. Space your slices as thick or thin as you prefer.
- Release the Slices: Once you’ve made all your vertical cuts, insert your knife parallel to the bone and make one long, sweeping cut along the bone’s contour. This will release all the slices you just made.
- Carve the Other Side: Turn the ham over and repeat the process on the other side of the bone. Arrange the slices on a platter and serve immediately.
Don’t discard the ham bone after carving! It makes an outstanding, flavorful base for split pea soup, bean soup, collard greens, or a rich pork stock.
Troubleshooting Common Ham Problems
Even with a great recipe, challenges like soft skin or a burnt glaze can arise. This section provides clear solutions for the most common problems when cooking a fresh ham, ensuring your roast turns out perfectly.
- My skin isn’t crispy. This is usually a moisture issue. Ensure the ham is patted completely dry after brining and, if possible, air-chilled in the fridge. If the skin is still soft near the end, you can briefly increase the oven temperature to 400°F for the last 10-15 minutes, watching carefully to ensure the glaze doesn’t burn.
- My glaze is burning. You likely applied the glaze too early. Remember to wait until the ham reaches 130°F. If it starts to get too dark, tent the ham loosely with foil for the remainder of the cook time.
- My ham is dry. The two main culprits are skipping the brine and overcooking. Brining is your best defense. Always, always use a reliable meat thermometer and pull the ham from the oven the moment it hits 145°F. A proper rest also helps retain juices.
Serving, Storing, and Using Leftovers
A great ham is the gift that keeps on giving long after the main event. For the holiday meal, serve thick, juicy slices with classic sides like roasted potatoes and green beans. The value continues for days with delicious leftovers perfect for hearty sandwiches, flavorful soups, and savory breakfast dishes.
Store leftover ham in an airtight container in the refrigerator for 3-4 days.[USDA] For longer storage, wrap it tightly and freeze for up to 2 months. The ham bone can also be frozen for later use in soups and stocks.
Use leftover ham in sandwiches, diced into omelets, or as a base for a hearty casserole.
Take Home Message
Roasting an uncooked fresh ham from scratch is a rewarding culinary experience that delivers a superior holiday centerpiece compared to pre-cooked options.
By following the steps of brining, slow-roasting to 145°F, and applying a caramelized glaze, you can achieve incredibly juicy meat with crispy, crackling skin. Don’t forget the crucial resting period to lock in those flavors and juices for a truly memorable meal.
Frequently Asked Questions
How do you cook an uncooked ham from start to finish?
The full process involves several key stages. First, brine the fresh ham for 24-48 hours for optimal moisture and flavor. Next, pat it dry, score the skin, and roast it at 325°F for about 22-28 minutes per pound.
When the internal temperature hits 130°F, begin applying your glaze every 15 minutes. Continue cooking until the internal temperature reaches a food-safe 145°F. Finally, let the ham rest for 15-20 minutes before carving and serving.
What is the safe minimum internal temperature for an uncooked ham?
The USDA-recommended safe minimum internal temperature is 145°F. This must be measured with a meat thermometer inserted into the thickest part of the meat, avoiding contact with the bone. After the ham reaches 145°F, it must rest for at least 3 minutes before serving.
This rest period is part of the official safety guideline.
How long does it take to cook a fresh ham per pound in the oven?
At an oven temperature of 325°F, you should estimate 22-28 minutes per pound for a bone-in fresh ham. However, this is only an estimate. The exact time can vary based on your oven’s calibration and the specific shape of the ham.
Always rely on an accurate internal temperature reading of 145°F to determine doneness, not the clock.
Is it necessary to brine a fresh ham before cooking it?
While not strictly required, brining is highly recommended for a fresh ham. The lean nature of the cut makes it susceptible to drying out during a long roast. Brining adds significant moisture and seasons the meat deeply from the inside out, resulting in a much juicier and more flavorful final product.
What is an uncooked ham called?
An uncooked ham is most commonly called a “fresh ham.” This term distinguishes it from the cured, smoked, or pre-cooked hams that are more common in grocery stores. When you ask a butcher for a fresh ham, you are specifically requesting a large, raw pork roast from the leg that requires complete cooking from scratch.
Can I cook a fresh ham from frozen?
No, you should never attempt to cook a fresh ham from a frozen or partially frozen state. A large roast like this will cook too unevenly, with the outside overcooking and drying out long before the inside reaches a safe internal temperature. Always ensure your fresh ham is fully thawed in the refrigerator before you begin the cooking process.
Should I choose a bone-in or boneless fresh ham?
For improved flavor and moisture, a bone-in fresh ham is the recommended choice. The bone helps to regulate the cooking temperature and adds a deeper, richer pork flavor to the meat.
While a boneless ham is slightly easier to carve, the improvement in taste and texture from a bone-in cut is well worth the minimal extra effort at the cutting board.
Roasted Fresh Uncooked Ham
Equipment
- Large container or brining bag For brining the ham
- Large roasting pan with a rack To allow even air circulation during roasting
- Instant-read meat thermometer Essential for checking doneness
- Carving knife and fork For slicing the finished ham
- Small saucepan For making the glaze
- Basting Brush For applying the glaze
Ingredients
For the ham
- 1 (10-12 pound) bone-in, skin-on fresh ham
For the brine (optional but recommended)
- 2 gallons cold water divided
- 2 cups kosher salt
- 1 cup brown sugar
- 1 head garlic halved
- 1 tablespoon black peppercorns
- 1 few bay leaves
For the glaze
- 1 cup brown sugar
- 1/2 cup Dijon mustard
- 1/4 cup apple cider vinegar
- 1/2 teaspoon ground cloves
Instructions
- Make the brine: In a large pot, combine 1 gallon of water with the salt, brown sugar, garlic, peppercorns, and bay leaves. Bring to a simmer, stirring until dissolved. Remove from heat, add the remaining gallon of cold water, and chill completely.
- Brine the ham: Place the ham in a large, food-safe container or brining bag. Pour the chilled brine over the ham, ensuring it is fully submerged, and refrigerate for 24-48 hours.
- Prep for roasting: Remove the ham from the brine, rinse thoroughly under cold water, and pat completely dry with paper towels. For extra crispy skin, let it air-dry uncovered in the refrigerator on a rack for a few hours.
- Preheat oven and score: Preheat your oven to 325°F. With a sharp knife, score the fat cap in a 1-inch diamond pattern, cutting through the skin and fat but not into the meat.
- Roast the ham: Place the ham fat-side up on a rack in a large roasting pan and add 1 cup of water to the bottom. Roast for approximately 22-28 minutes per pound, or until an instant-read thermometer inserted into the thickest part (not touching bone) reads 130°F.
- Make the glaze: While the ham roasts, combine brown sugar, Dijon mustard, apple cider vinegar, and ground cloves in a small saucepan. Heat over medium-low, stirring until the sugar dissolves and the glaze is smooth.
- Glaze the ham: Once the ham reaches an internal temperature of 130°F, remove it from the oven. Brush a generous layer of glaze over the entire scored surface.
- Finish cooking: Return the ham to the oven. Continue to roast, brushing with more glaze every 15 minutes, until the internal temperature reaches a minimum of 145°F and the glaze is bubbly and caramelized.
- Rest and carve: Remove the ham from the oven, tent loosely with foil, and let it rest for at least 15 minutes before carving and serving. This allows the juices to redistribute for a more tender result.
Notes
Contents
- Quick Summary
- What Is an Uncooked Ham?
- Why You Must Cook a Fresh Ham to a Safe Temperature
- The Step-by-Step Recipe for Perfect Roasted Fresh Ham
- Step 1: Brining Your Fresh Ham (Optional but Recommended)
- Step 2: Preparing and Roasting the Ham
- Step 3: Applying the Glaze
- Step 4: Resting and Carving Your Ham
- Troubleshooting Common Ham Problems
- Serving, Storing, and Using Leftovers
- Take Home Message
- Frequently Asked Questions
- Roasted Fresh Uncooked Ham