If you’ve ever cut into a beautifully seared steak only to find a gray band of overcooked meat around a tiny pink center, you know the frustration of traditional cooking methods. The reverse sear technique has revolutionized how serious cooks prepare thick-cut steaks, delivering edge-to-edge perfection that was once only possible in high-end steakhouses.
Reverse searing flips the conventional searing method on its head, starting with low heat and finishing with high heat. The result? Exceptional tenderness, precise temperature control, and a golden-brown crust that rivals any professional kitchen. Whether you’re using an oven, grill, or smoker, this guide will teach you everything you need to know about this game-changing technique.
In this comprehensive guide, you’ll learn the science behind why reverse searing works, the exact equipment you need, step-by-step instructions for foolproof results, and pro tips to elevate your steak game. Let’s transform the way you cook steak forever.
What is Reverse Searing?
Reverse searing is a two-phase cooking technique that fundamentally changes how you approach thick-cut steaks. Instead of the traditional method of searing first and then finishing in the oven, reverse searing does exactly what the name suggests: it reverses the order.
The basic principle is simple: Start by cooking your steak slowly at low temperature (usually 225-275°F) until it reaches about 25-30°F below your target doneness. Then finish with an intense, high-heat sear in a smoking-hot cast iron skillet or over direct flames. This creates that coveted golden-brown Maillard crust while maintaining perfect edge-to-edge doneness throughout the interior.
The technique emerged from the modernist cooking movement and gained popularity through culinary innovators like J. Kenji López-Alt and Cook’s Illustrated. Professional chefs had long known that slow-roasting before searing produced superior results, but reverse searing made this approach accessible to home cooks with standard kitchen equipment.
Compared to traditional searing methods, reverse searing offers three major advantages: superior temperature control (you pull the steak at exactly the right temperature), enhanced tenderness (slow heating activates tenderizing enzymes), and better crust development (the low-heat phase dries the surface, enabling a more intense Maillard reaction during the final sear).
Why It’s Called “Reverse” Searing
Traditional steak cooking starts with a high-heat sear to develop crust, then moves to lower heat to cook the interior. This often results in overcooked outer layers and uneven doneness. Reverse searing literally reverses this sequence, cooking the interior first at low heat, then applying high heat last for the perfect crust. The result is dramatically more even cooking and better texture throughout.
The Science Behind Reverse Searing
Understanding why reverse searing works helps you execute the technique with confidence. Several scientific principles combine to make this method superior to traditional approaches.
Heat Penetration and Temperature Gradient
When you cook meat, heat gradually penetrates from the outside toward the center, creating a temperature gradient. High-heat cooking creates a steep gradient—the outside gets very hot while the center remains cool, resulting in that gray band of overcooked meat around a rare center.
Reverse searing uses gentle, even heat that penetrates slowly and uniformly. By the time the center reaches your target temperature, the outer layers are only slightly warmer. This produces remarkable edge-to-edge doneness with minimal gray banding. The temperature difference between the surface and center might be just 5-10°F, compared to 30-40°F with traditional methods.
Enzyme Activity and Tenderness
One of reverse searing’s hidden benefits occurs at the molecular level. Cathepsin enzymes, naturally present in muscle tissue, become highly active below 122°F and help break down proteins that make meat tough. The extended time your steak spends in this temperature zone during the low-heat phase allows these enzymes to work their magic, resulting in noticeably more tender meat.
Traditional high-heat searing blasts through this beneficial temperature range too quickly for significant enzyme activity. Reverse searing, by contrast, keeps your steak in the “tenderizing zone” for 30-60 minutes, depending on thickness.
Moisture Retention and Surface Drying
During the low-heat phase, your steak’s surface gradually dries out while the interior retains moisture. This might seem counterintuitive, but it’s actually ideal. A dry surface is essential for developing a proper crust during searing—wet surfaces steam instead of browning.
The gentle heat evaporates surface moisture without squeezing out the interior juices. When you finally apply high heat for searing, you get immediate browning instead of steaming, creating a superior crust while keeping the interior juicy.
The Maillard Reaction
The golden-brown crust on a perfectly seared steak comes from the Maillard reaction, a complex interaction between amino acids and reducing sugars that occurs at temperatures between 285°F and 350°F. This isn’t caramelization (which involves only sugars)—it’s a far more complex process that creates hundreds of flavor compounds.
For the Maillard reaction to proceed rapidly, you need three things: high heat, a dry surface, and adequate time. Reverse searing optimizes all three. The low-heat phase dries the surface, and the final sear applies intense heat to a surface primed for rapid browning. The result is a deeply flavored, crispy crust that traditional methods struggle to match.
Best Cuts for Reverse Searing
Reverse searing works best with thick, well-marbled cuts. The technique requires time for the low-heat phase to work its magic, so steaks at least 1.5 inches thick are ideal. Anything thinner cooks too quickly and doesn’t benefit from the extended gentle heating that makes reverse searing special.
| Cut | Minimum Thickness | Fat Content | Approx. Cooking Time | Best For |
|---|---|---|---|---|
| Ribeye | 1.5-2 inches | High marbling | 45-60 minutes | Most forgiving option |
| New York Strip | 1.5-2 inches | Moderate marbling | 40-55 minutes | Classic balance |
| Filet Mignon | 2-3 inches | Very lean | 35-50 minutes | Ultra-tender texture |
| Porterhouse/T-Bone | 1.5-2 inches | Moderate to high | 50-65 minutes | Two cuts in one |
| Top Sirloin | 1.5-2 inches | Lean to moderate | 40-55 minutes | Budget-friendly |
| Tomahawk Ribeye | 2+ inches | High marbling | 60-90 minutes | Impressive presentation |
Why Thickness Matters
Steaks under 1.5 inches thick simply don’t have enough mass to benefit from reverse searing. They’ll cook through during the low-heat phase before the surface has time to dry properly, and you’ll struggle to develop a good crust without overcooking the interior. For optimal results, look for cuts between 1.5 and 2.5 inches thick.
Thicker isn’t always better, though. Steaks over 3 inches thick require extended cooking times (sometimes 90+ minutes) and can dry out if you’re not careful with temperature management. The sweet spot for most home cooks is 1.75 to 2 inches—thick enough to benefit from the technique, but not so thick that timing becomes challenging.
Understanding Cut Characteristics
Marbling (intramuscular fat) significantly affects your results. Well-marbled cuts like ribeye are more forgiving because fat bastes the meat from within as it melts. Leaner cuts like filet mignon or sirloin require more attention to temperature—pull them 5°F earlier than you would a ribeye to avoid overcooking.
Bone-in cuts take longer to cook than boneless because bone is an insulator. A 2-inch bone-in ribeye might need 10-15 minutes longer than a boneless ribeye of the same thickness. The bone also affects heat distribution slightly, so expect minor temperature variations on either side of the bone.
When selecting quality cuts, look for USDA Choice or Prime grades. Prime offers the most marbling and forgiveness, while Choice provides excellent results at a lower price. Select grade can work but offers less marbling and requires more precise temperature control.
Cuts That Don’t Work Well
Avoid reverse searing on thin steaks (under 1 inch), very lean cuts like flank or skirt steak, or already-tender cuts like hangar steak. These cuts either cook too quickly to benefit from the low-heat phase or become overly tender to the point of mushiness. For thin cuts, traditional high-heat grilling or pan-searing delivers better results.
Equipment Needed for Reverse Searing
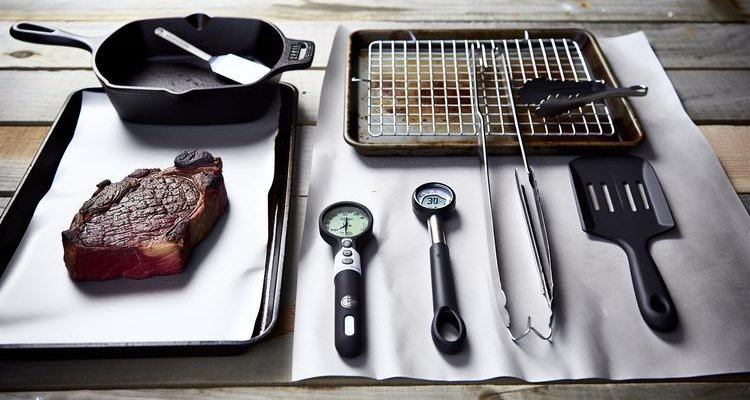
One of reverse searing’s biggest advantages is that it requires minimal specialized equipment. Most home cooks already own everything needed, though a few items make the process easier and more precise.
| Equipment | Essential/Optional | Purpose | Alternative |
|---|---|---|---|
| Oven, grill, or smoker | Essential | Low-heat cooking phase | Any heat source capable of 225-275°F |
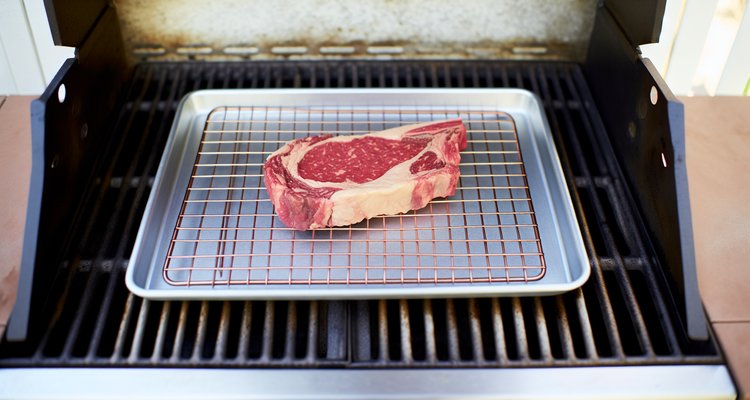
| Wire cooling rack | Essential | Elevates steak for even airflow | Oven-safe grill grate |
| Rimmed baking sheet | Essential | Catches drippings under wire rack | Any oven-safe pan |
| Meat thermometer | Essential | Accurate temperature monitoring | None—guessing doneness fails |
| Cast iron skillet (10-12″) | Essential | High-heat searing | Heavy stainless steel pan |
| Long-handled tongs | Essential | Flipping and maneuvering steak | Metal spatula (less ideal) |
| Leave-in probe thermometer | Optional | Continuous monitoring | Instant-read with periodic checks |
| High smoke-point oil | Optional | Prevents sticking, aids browning | Butter (lower smoke point) |
Pro Tip: Invest in a Quality Thermometer
A reliable meat thermometer is the single most important tool for reverse searing success. Instant-read thermometers like the ThermoWorks ThermoPop or Thermapen provide readings in 2-3 seconds, while leave-in probe thermometers let you monitor temperature without opening your oven or grill. Temperature accuracy is everything with this technique—a $30 thermometer will transform your results more than any other investment.
For the searing phase, cast iron is ideal because it retains heat exceptionally well. When you add a cold steak, a thin pan drops in temperature and fails to achieve proper browning. A heavy cast iron skillet maintains its heat, ensuring that Maillard reaction happens immediately. If you don’t have cast iron, a thick stainless steel or carbon steel pan works well—just avoid nonstick pans, which can’t handle the high temperatures needed for searing.
Step-by-Step Reverse Searing Process
Now that you understand the science and have the right equipment, let’s walk through the complete reverse searing process from start to finish. This method works for oven, grill, or smoker—we’ll cover variations for each heat source.
Preparation Phase (2-24 Hours Before Cooking)
Start by patting your steak completely dry with paper towels. Any surface moisture will hinder crust development later. Season generously on all sides with coarse salt and freshly ground black pepper. Don’t be shy—thick steaks need substantial seasoning to flavor the interior.
For best results, place the seasoned steak uncovered on a wire rack over a plate in your refrigerator for 2-24 hours. This dry-aging effect allows the salt to penetrate deep into the meat while the cold air further dries the surface. If you’re short on time, even 30 minutes of air-drying at room temperature helps, though overnight refrigeration is ideal.
Food Safety Note
When dry-aging in the refrigerator, ensure your fridge maintains 34-40°F. Don’t leave seasoned steak at room temperature for more than 2 hours. The low-heat cooking phase will safely pasteurize the surface, but proper refrigeration prevents bacterial growth during the preparation phase.
Phase 1: Low-Heat Cooking (45-90 Minutes)
Oven Method: Preheat your oven to 225-275°F (225°F for maximum tenderness, 275°F if you’re in a hurry). Place the steak on a wire rack set over a rimmed baking sheet. Position the rack in the center of the oven for even heat circulation.
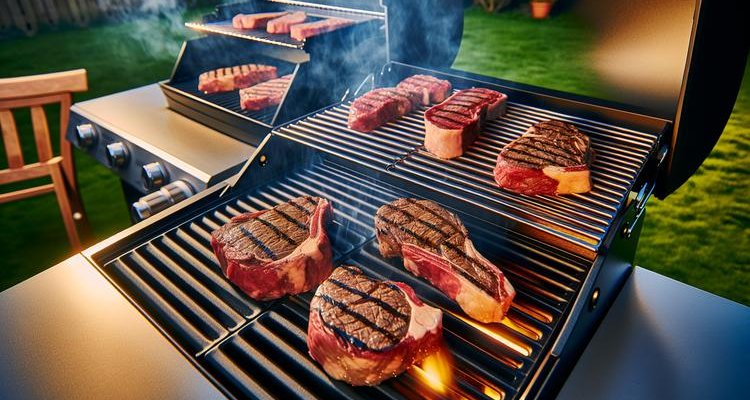
Grill Method: Set up a two-zone fire with all coals or burners on one side. Place the steak on the cool side (indirect heat zone), close the lid, and adjust vents to maintain 225-275°F.
Smoker Method: Preheat your pellet grill or offset smoker to 225°F. Use mild wood like oak or pecan—heavy smoke can overpower the steak’s flavor. Place the steak on the grate away from direct heat.
If using a leave-in probe thermometer, insert it into the thickest part of the steak now, avoiding fat and bone. Otherwise, check temperature every 15-20 minutes with an instant-read thermometer.
Target pull temperatures by desired doneness:
- Rare: Pull at 110-115°F
- Medium-rare: Pull at 120-125°F (recommended)
- Medium: Pull at 130-135°F
- Medium-well: Pull at 140-145°F
Timing varies significantly based on thickness and starting temperature. A 1.5-inch steak from the refrigerator typically needs 40-50 minutes at 250°F, while a 2-inch steak might require 60-75 minutes. Always rely on temperature, not time—every steak is different.
Optional Resting Period (5-10 Minutes)
Some cooks rest the steak briefly after the low-heat phase, allowing the surface to cool slightly before searing. This can help prevent overcooking during the sear, especially for thinner steaks. For steaks 2 inches or thicker, you can skip this rest and proceed directly to searing.
Phase 2: High-Heat Searing (2-4 Minutes Total)
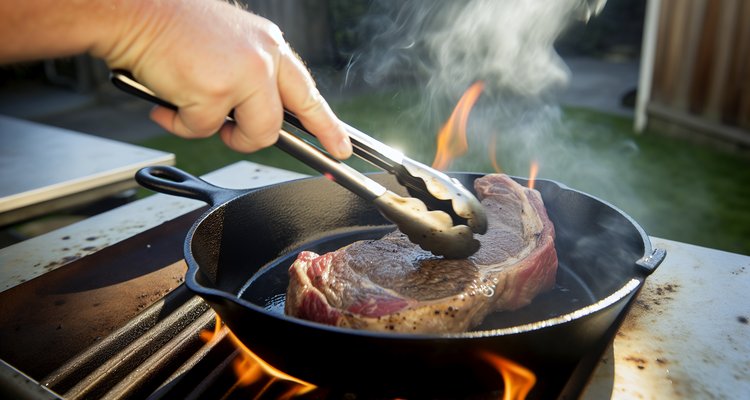
While your steak is in the oven (or during the optional rest), preheat a cast iron skillet over high heat until it’s smoking hot—this takes 5-7 minutes. You want the pan hot enough that a drop of water instantly vaporizes.
Add 1-2 tablespoons of high smoke-point oil (avocado oil, grapeseed oil, or clarified butter) and swirl to coat. The oil should shimmer and just begin to smoke.
Using tongs, carefully place your steak in the skillet. It should sizzle aggressively—if it doesn’t, your pan isn’t hot enough. Sear the first side for 60-90 seconds without moving it. Resist the urge to peek; let the crust develop undisturbed.
Flip and sear the second side for 60-90 seconds. For steaks with a thick fat cap (like ribeye), use your tongs to hold the steak on its edge, searing the fat until it’s golden and rendered.
During the final 30-45 seconds, add 2 tablespoons of butter, 2 smashed garlic cloves, and fresh thyme or rosemary sprigs. Tilt the pan and continuously spoon the foaming butter over the steak (this is called arroser or basting). This adds incredible flavor and helps the crust darken beautifully.
Check the internal temperature one final time. You’re looking for:
- Rare: 120-125°F after sear
- Medium-rare: 130-135°F after sear
- Medium: 135-145°F after sear
- Medium-well: 145-155°F after sear
The searing phase typically adds 5-10°F to your steak’s internal temperature. If you’re under your target, flip and sear for another 30 seconds. If you’re over, you pulled too late from the oven—next time, reduce your pull temperature by 5°F.
Final Rest (5-10 Minutes)
Transfer your steak to a cutting board and let it rest for 5-10 minutes. During this time, residual heat continues to cook the interior (carryover cooking), raising the temperature another 5-10°F. Muscle fibers also relax, allowing juices to redistribute throughout the meat instead of running out when you cut into it.
Tent loosely with foil if you’re worried about the steak cooling too much, but avoid wrapping tightly—that traps steam and softens your hard-won crust.
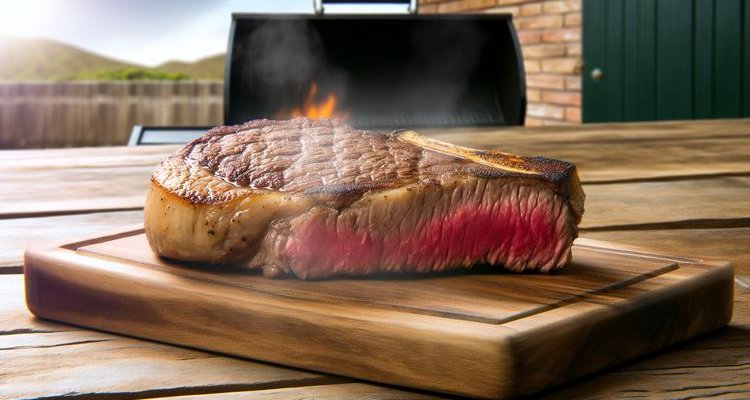
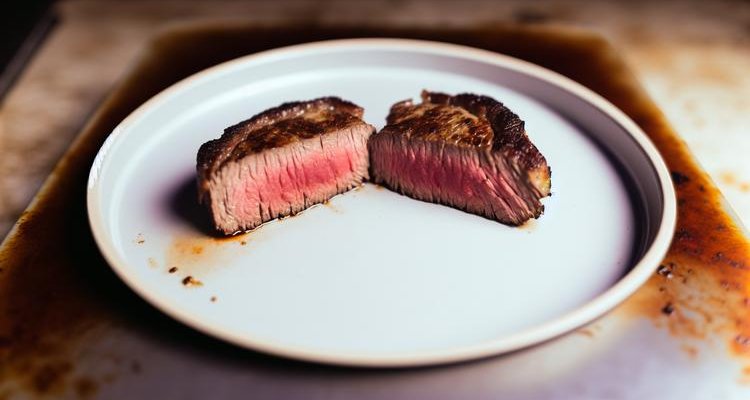
After resting, slice against the grain and serve immediately. The result should be a perfect medium-rare steak with edge-to-edge pink, a thin gray band (1-2mm instead of the typical 5-10mm), and a deeply caramelized crust.
Temperature Guide
Temperature control is the foundation of reverse searing success. Unlike traditional methods where timing and feel guide doneness, reverse searing demands precision thermometry. Here’s your complete temperature reference guide.
| Doneness Level | Pull Temp (Low Heat) | Pull Temp (After Sear) | Final Temp (After Rest) | Description |
|---|---|---|---|---|
| Rare | 110-115°F | 120-125°F | 125-130°F | Cool red center, very soft texture |
| Medium-Rare | 120-125°F | 130-135°F | 135-140°F | Warm red center, tender and juicy |
| Medium | 130-135°F | 140-145°F | 145-150°F | Warm pink center, firmer texture |
| Medium-Well | 140-145°F | 150-155°F | 155-160°F | Slightly pink center, quite firm |
| Well-Done | 150-155°F | 160-165°F | 165-170°F | No pink, firm throughout |
Understanding Carryover Cooking
Carryover cooking is the temperature rise that continues after you remove meat from heat. With reverse searing, you’ll experience carryover twice: once after the low-heat phase (minimal, usually 2-5°F) and again after the high-heat sear (more substantial, typically 5-10°F).
This is why you must pull your steak well before your target final temperature. For medium-rare (final target 135-140°F), you’ll pull from the oven at 120-125°F, sear to 130-135°F, then rest to final 135-140°F. Each phase adds heat, so pulling early is essential.
Thermometer Placement Technique
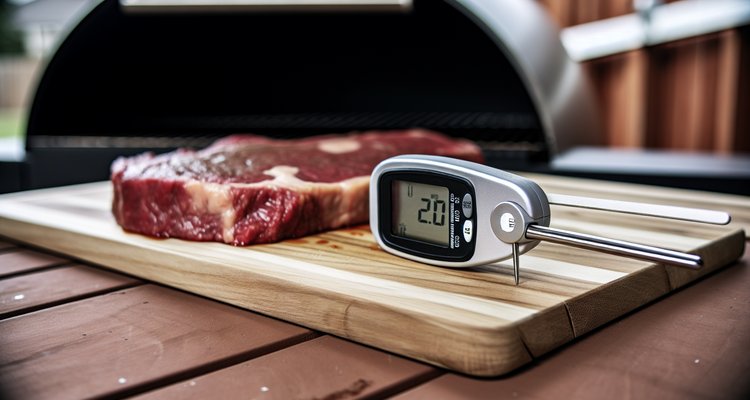
Proper thermometer placement ensures accurate readings. Insert your probe into the thickest part of the steak, angled toward the center. Avoid fat pockets (they read hotter than muscle) and bone (it conducts heat differently than meat). For bone-in cuts, take readings from both sides of the bone and average them.
With instant-read thermometers, insert horizontally through the side of the steak rather than vertically from the top. This allows the sensing area to sit in the center of the meat. Leave-in probe thermometers should be inserted before cooking begins, positioned so the probe tip sits in the geometric center of the steak.
Pro Tip: The Finger Test Doesn’t Work
Many guides suggest using finger pressure to judge doneness (comparing the firmness of meat to the flesh at the base of your thumb). With reverse searing, this method is unreliable because the gentle cooking creates a different texture than traditional methods. The surface feels softer than expected even at medium doneness. Always use a thermometer—it’s the only reliable way to ensure perfect results.
Common Mistakes & Troubleshooting
Even with a straightforward technique like reverse searing, several common pitfalls can sabotage your results. Here’s how to identify and avoid the most frequent mistakes.
Mistake #1: Using Too-Thin Steaks
The Problem: Steaks under 1.5 inches thick cook through too quickly during the low-heat phase, leaving no room for error during the sear. You’ll either undercook (trying to avoid temperature rise) or overcook (when the sear pushes you past your target).
The Solution: Only reverse sear steaks 1.5 inches or thicker. For thinner cuts (1 inch or less), stick with traditional high-heat methods like grilling or pan-searing. The reverse sear technique simply isn’t optimized for thin steaks.
Mistake #2: Skipping the Thermometer
The Problem: Guessing doneness by time or touch fails with reverse searing because cooking times vary wildly based on starting temperature, exact oven/grill temperature, steak thickness, and even humidity. A steak that needs 50 minutes one day might need 65 minutes the next.
The Solution: Invest in a quality instant-read or leave-in probe thermometer. This is non-negotiable for consistent results. Temperature is the only reliable indicator of doneness—everything else is guesswork.
Mistake #3: Pulling at Your Final Target Temperature
The Problem: If you pull your steak from the oven at 135°F hoping for medium-rare, the searing phase will push it to 140-145°F, and resting adds another 5-10°F. You’ll end up with medium to medium-well instead.
The Solution: Always pull 25-30°F below your final target. For medium-rare (final 135-140°F), pull from the oven at 120-125°F. Account for heat added during searing (5-10°F) and resting (5-10°F). Better to pull early and add a few more seconds of sear time than to overcook and ruin your steak.
Mistake #4: Not Drying the Surface Properly
The Problem: Wet surfaces steam instead of sear. If you skip the dry-aging step or pull your steak directly from packaging without patting dry, moisture will prevent proper Maillard browning during the sear.
The Solution: Always pat steaks thoroughly dry before seasoning. For optimal results, refrigerate uncovered for 2-24 hours after seasoning. This dry-aging effect removes surface moisture and concentrates flavors. Even if you’re short on time, 30 minutes of air-drying helps significantly.
Mistake #5: Searing at the Wrong Temperature
The Problem: If your pan isn’t hot enough (below 400°F), you’ll get pale, steamed meat instead of a brown crust. Too hot (above 500°F), and you’ll burn the exterior before developing complex Maillard flavors.
The Solution: Preheat your cast iron skillet for 5-7 minutes over high heat until it’s just starting to smoke. When you add oil, it should shimmer and lightly smoke within seconds. The steak should sizzle aggressively when it hits the pan—if you don’t hear an immediate sizzle, remove it and let the pan heat longer.
Mistake #6: Overcrowding the Pan
The Problem: Adding multiple steaks to one pan drops the temperature dramatically. The pan can’t recover heat fast enough, resulting in steaming rather than searing. Your crust will be pale and your steaks unevenly cooked.
The Solution: Use one 10-12 inch skillet per steak. If cooking multiple steaks, either sear them sequentially (keeping finished ones warm in a low oven) or use multiple pans simultaneously. Never crowd—proper searing requires room for heat circulation and moisture evaporation.
Mistake #7: Skipping the Final Rest
The Problem: Cutting into your steak immediately after searing causes all those carefully retained juices to flood out onto your cutting board. The meat contracts when heated, squeezing liquid into the center. Resting allows fibers to relax and juices to redistribute.
The Solution: Always rest for 5-10 minutes after the final sear. Larger steaks (over 2 inches) benefit from the full 10 minutes. Tent loosely with foil if needed, but don’t wrap tightly—trapped steam softens the crust you worked hard to create.
Pro Tips & Variations
Once you’ve mastered the basic reverse sear technique, these advanced tips will help you elevate your results even further.
Advanced Techniques for Restaurant-Quality Results
Dry-Brining (24-48 Hours): For the ultimate in flavor and texture, salt your steak and refrigerate uncovered for 24-48 hours before cooking. The salt draws moisture to the surface, dissolves, then reabsorbs into the meat along with the salt. This seasons the interior deeply while drying the surface for superior crust development. Use 1 teaspoon of coarse salt per pound of meat.
Butter Basting with Aromatics: During the final 30 seconds of searing, add butter, smashed garlic cloves, and hearty fresh herbs (thyme, rosemary, or sage) to your pan. Tilt the pan and continuously spoon the foaming butter over the steak. This technique, borrowed from French cooking, adds incredible flavor and helps darken the crust beautifully.
Multiple Flips During Searing: Instead of flipping once, some chefs flip every 15-30 seconds during the sear. This distributes heat more evenly and can create an even thicker crust. It’s especially useful for very thick steaks where you want maximum crust without overcooking the interior.
Rotating During Low-Heat Phase: For ultra-even cooking, rotate your steak 180 degrees halfway through the oven phase. This compensates for hot spots in your oven or grill, ensuring truly edge-to-edge doneness.
Seasonal & Heat Source Variations
Reverse searing adapts beautifully to different heat sources, each offering unique advantages. Here’s a comprehensive comparison to help you choose the best method for your situation:
| Heat Source | Low-Heat Setup | Searing Method | Flavor Profile | Best For |
|---|---|---|---|---|
| Oven | 225-275°F, wire rack over baking sheet | Cast iron on stovetop | Clean, pure beef flavor | Year-round consistency, beginners |
| Charcoal Grill | Two-zone fire, indirect at 225-275°F | Direct over hot coals | Subtle to strong smoke flavor | Best crust, outdoor entertaining |
| Pellet Grill | Smoke mode at 180-225°F with mild pellets | Max temp (500°F+) or cast iron | Consistent, light smoke | Set-and-forget convenience |
| Gas Grill | Burners one side only, indirect at 225-275°F | Move to hot burners or cast iron | Clean with slight char | Reliable heat control |
Summer Grilling Method: Set up a two-zone fire with coals or burners on one side only. Place steak on the cool side (indirect heat), close the lid, and maintain 225-275°F using your bottom and top vents. When ready to sear, move directly over the hot coals for 60-90 seconds per side. The grill adds subtle smoke flavor that complements beef beautifully.
Winter Oven-to-Stovetop Method: When outdoor grilling isn’t practical, this classic approach uses your oven for the low-heat phase and stovetop for searing. It’s the most controlled method for beginners and delivers consistent results year-round.
Flavor Enhancements and Finishing Touches
Compound Butter: Top your rested steak with a pat of compound butter (butter mixed with herbs, garlic, shallots, or blue cheese). As it melts, it creates an instant pan sauce. Make a large batch and freeze in logs for easy portioning.
Finishing Salts: A sprinkle of flaky sea salt (Maldon, fleur de sel) just before serving adds textural crunch and a burst of salinity that enhances the beef’s flavor. Apply this after resting, not before—large salt crystals shouldn’t go through the cooking process.
Pan Sauce from Drippings: After searing, pour off excess fat, deglaze the pan with red wine or beef stock, and reduce until syrupy. Add a pat of butter and fresh herbs for a simple yet elegant sauce.
Scaling for Multiple Steaks
When cooking for a crowd, reverse searing’s flexibility shines. Cook all steaks together during the low-heat phase (they can sit side-by-side on your wire rack), then sear them sequentially in batches. Keep finished steaks warm in a 150°F oven while you sear the rest. This lets you serve everyone simultaneously without compromising quality.
Non-Beef Applications
While this guide focuses on beef, reverse searing works beautifully with thick-cut pork chops (1.5+ inches), lamb chops, and even thick fish steaks like swordfish or tuna. Adjust your pull temperatures accordingly: pork to 135-140°F (final 145°F), lamb to 130-135°F for medium-rare, and tuna to 115-120°F for rare center. The technique’s precision makes it ideal for any protein where you want perfect doneness control.
How Reverse Sear Compares to Other Methods
Understanding how reverse searing stacks up against traditional techniques helps you choose the right method for your situation.
Reverse Sear vs. Traditional Sear-First
Temperature Gradient: Traditional searing creates a steep temperature gradient with significant gray banding (5-10mm of overcooked meat). Reverse searing produces minimal gray band (1-2mm), delivering edge-to-edge doneness.
Crust Quality: Reverse searing’s dry surface enables superior Maillard browning. Traditional methods often battle surface moisture, resulting in steaming before browning begins.
Ease and Control: Reverse searing offers far more control. You pull at exactly your target temperature, making it nearly impossible to overcook. Traditional methods require split-second timing and are much less forgiving.
Time Investment: Traditional searing is faster (15-20 minutes total vs. 60-90 minutes for reverse sear). For weeknight cooking, traditional methods win on speed.
Reverse Sear vs. Sous Vide
Equipment: Sous vide requires specialized immersion circulator and vacuum sealer. Reverse searing uses standard kitchen equipment most people already own.
Time: Sous vide typically takes 1-4 hours depending on thickness. Reverse searing usually finishes in 45-90 minutes, making it faster for thick steaks.
Crust Development: Both methods produce similar interior results, but reverse searing’s dry-heat phase creates a better foundation for crust. Sous vide produces a wet surface that requires extra-careful drying and sometimes torch-finishing for optimal crust.
When to Choose Each: Sous vide excels for precise meal timing (you can hold steaks at temperature for hours) and cooking many steaks simultaneously. Reverse sear wins for spontaneity, equipment simplicity, and slightly better crust development.
Reverse Sear vs. Direct Heat Grilling
Doneness Control: Direct grilling over high heat requires constant attention and experience to judge doneness. Reverse searing removes guesswork—your thermometer tells you exactly when to pull.
Flare-Up Issues: High-fat cuts like ribeye can cause flare-ups during direct grilling, leading to burnt exteriors. Reverse searing eliminates this problem by rendering fat slowly during the low-heat phase.
When Direct Grilling Works Better: Thin steaks (under 1 inch) actually benefit from quick, high-heat cooking. The rapid sear develops crust before the interior overcooks. For these cuts, reverse searing is overkill—stick with direct grilling for speed and simplicity.
Frequently Asked Questions
What is reverse searing and why should I try it?
Reverse searing is a two-phase cooking technique that starts with slow, low-heat cooking (225-275°F) followed by a brief high-heat sear. This produces edge-to-edge perfect doneness, superior tenderness from extended enzyme activity, and a deeply browned crust from optimal surface drying. It’s the most foolproof method for thick steaks and delivers restaurant-quality results at home.
What cuts of steak work best for reverse searing?
Thick, well-marbled cuts perform best. Ideal choices include ribeye, New York strip, filet mignon, porterhouse, and T-bone steaks that are at least 1.5 inches thick. Ribeye is most forgiving due to high marbling, while leaner cuts like filet require slightly lower pull temperatures. Avoid thin steaks (under 1.5 inches) and quick-cooking cuts like flank or skirt steak.
How thick should my steak be for reverse searing?
Minimum 1.5 inches, ideally 1.75 to 2 inches. Steaks thinner than 1.5 inches cook too quickly during the low-heat phase and don’t benefit from the technique. Steaks over 2.5 inches work but require extended cooking times (90+ minutes) and careful temperature monitoring. The sweet spot is 1.75-2 inches for most home cooks.
What temperature should I use for the low-heat phase?
Use 225-275°F depending on your priorities. 225°F maximizes tenderness and allows enzymes more time to work but takes longer (60-90 minutes for most steaks). 250°F is the middle ground offering excellent results in 45-60 minutes. 275°F is fastest (40-50 minutes) but provides slightly less tenderizing benefit. Most cooks find 250°F the best balance.
How long does reverse searing take?
Total time is 60-90 minutes for most steaks: 45-75 minutes for the low-heat phase plus 5-10 minutes for searing and resting. A 1.5-inch steak at 250°F typically needs 45-50 minutes, while a 2-inch steak requires 60-75 minutes. Always rely on internal temperature rather than time—thickness, starting temperature, and equipment variations all affect timing.
Can I reverse sear on a grill instead of an oven?
Absolutely! Set up a two-zone fire with all heat on one side. Place your steak on the cool side (indirect heat zone), close the lid, and maintain 225-275°F using your vents. When ready to sear, move directly over the hot coals or burners. Grilling adds subtle smoke flavor that many people prefer over oven-cooked steaks. Temperature control techniques for both oven and grill are fundamentally the same.
Do I need a special thermometer for reverse searing?
A reliable instant-read or leave-in probe thermometer is essential (not optional). Instant-read thermometers like ThermoWorks ThermoPop or Thermapen provide readings in 2-3 seconds. Leave-in probe thermometers let you monitor temperature continuously without opening your oven. Accuracy is critical—cheap thermometers can be off by 10-15°F, which ruins your results. Invest in quality.
What’s the difference between reverse sear and sous vide?
Both achieve precise doneness, but differ in execution. Sous vide uses water bath cooking at exact temperatures (requires immersion circulator and vacuum sealer). Reverse searing uses standard oven or grill equipment most people already own. Sous vide takes longer (1-4 hours) but allows holding steaks at temperature indefinitely. Reverse sear is faster and produces a slightly drier surface for better crust development. Both deliver exceptional results—choose based on equipment and timing needs.
Why does reverse searing make steak more tender?
Two reasons: enzyme activity and gentle cooking. Cathepsin enzymes that break down tough proteins are highly active below 122°F. Reverse searing keeps your steak in this “tenderizing zone” for 30-60 minutes (vs. just minutes with traditional methods). Additionally, slow heating produces minimal temperature gradient, so less of the steak overcooks and toughens. The result is noticeably more tender meat throughout.
Can I reverse sear multiple steaks at once?
Yes, with proper planning. During the low-heat phase, you can cook multiple steaks simultaneously on your wire rack—they don’t need to be separated. For searing, cook them sequentially in batches, keeping finished steaks warm in a 150°F oven while you sear the rest. Don’t overcrowd your pan during searing; use one 10-12 inch skillet per steak to maintain proper heat. This allows you to serve everyone simultaneously without compromising quality.
Should I bring my steak to room temperature first?
It’s not necessary and can even be counterproductive. A steak left at room temperature for 30-60 minutes only warms by 3-5°F at the surface while creating food safety concerns. With reverse searing, starting from refrigerator temperature is perfectly fine—your pull temperature accounts for the starting point. If you’re dry-aging in the fridge for 2-24 hours, pull directly from refrigeration and start cooking.
How do I know when my steak is done?
Use a thermometer—it’s the only reliable method. For the low-heat phase, pull when internal temperature reaches 25-30°F below your target final temperature. For medium-rare (final 135-140°F), pull at 120-125°F. After searing, check again; you should be at 130-135°F. After resting, carryover cooking brings you to 135-140°F. The finger test and timing methods don’t work reliably with reverse searing—invest in a quality thermometer and trust the numbers.
Conclusion
Reverse searing transforms thick steaks from unpredictable gambles into consistently perfect results. By understanding the science—gentle heat penetration, enzyme tenderization, optimal surface drying, and precise Maillard browning—you gain complete control over your steak’s final outcome.
The technique’s beauty lies in its simplicity: slow cooking followed by quick searing. No specialized equipment beyond a thermometer and heavy skillet. No complicated techniques requiring years of practice. Just patience, attention to temperature, and trust in the process.
Start with a quality ribeye or New York strip, 1.75 to 2 inches thick. Pat it dry, season generously, and refrigerate overnight if possible. Cook low at 225-250°F until it reaches 120-125°F for medium-rare (or adjust based on preference). Sear hard in a smoking-hot cast iron skillet for 60-90 seconds per side, basting with butter and aromatics. Rest for 5-10 minutes, then enjoy perfect edge-to-edge doneness with a deeply caramelized crust.
Remember the critical elements: thickness matters (minimum 1.5 inches), temperature is everything (invest in a good thermometer), pull early to account for carryover cooking (25-30°F below final target), and patience pays off (don’t rush the low-heat phase). Master these fundamentals, and you’ll never go back to traditional searing methods.
Once you’ve perfected the basic technique, explore other steak recipes and variations: dry-brining for 24-48 hours, experimenting with different heat sources, trying butter-basting with various aromatics, and adapting the technique to pork chops or lamb. The reverse sear opens up a world of possibilities for precise, restaurant-quality cooking at home.
Now it’s your turn. Grab a thick steak, fire up your oven or grill, and experience the difference that proper technique makes. Your perfectly cooked steak awaits.
Contents
- Quick Navigation
- What is Reverse Searing?
- The Science Behind Reverse Searing
- Best Cuts for Reverse Searing
- Equipment Needed for Reverse Searing
- Step-by-Step Reverse Searing Process
- Temperature Guide
- Common Mistakes & Troubleshooting
- Pro Tips & Variations
- How Reverse Sear Compares to Other Methods
- Frequently Asked Questions
- Conclusion

