Pork chops have a reputation for turning out dry and tough, but that does not have to be your reality. With a few straightforward techniques, you can make juicy, flavorful pork chops any night of the week. This guide covers everything from picking the right cut to mastering four simple cooking methods.
The 4 Keys to Easy, Juicy Pork Chops
Making easy, juicy pork chops comes down to four simple steps: choose a thick cut, season it properly, use a reliable cooking method, and cook to the correct internal temperature. Nail these four fundamentals and dry pork chops become a thing of the past.
- Choose a thick-cut pork chop (at least 1 inch) to prevent overcooking.
- Season generously with a simple brine or dry rub for moisture and flavor.
- Pick your method: pan-frying, baking, grilling, or air frying all deliver great results.
- Cook to temperature, not time — an instant-read thermometer is your most important tool.
Planning Your Perfect Pork Chop Meal
Before you preheat a pan, a few key decisions will set you up for success. Answering these questions upfront helps you choose the right cut, seasoning method, and cooking technique for your schedule and equipment.
Time and Equipment Considerations
A quick pan-fry is perfect for a 30-minute weeknight meal, while grilling is better suited for a weekend. Pan-searing can produce smoke, so good ventilation helps.
For an oven-bake method that starts on the stove, you need an oven-safe skillet. An air fryer requires minimal space and preheating time.
Choosing Your Cut and Seasoning Strategy
Your choice of a bone-in or boneless pork chop will influence cooking time and juiciness. If you’re short on time, a quick dry rub is effective. If you can plan ahead, a 30-minute brine makes a huge difference in moisture, ensuring a juicy result even if you’re a beginner.
Choosing the Right Pork Chop for Your Meal
For the easiest and juiciest results, select thick-cut pork chops that are at least 1 to 1.5 inches thick. Bone-in cuts like rib or loin chops offer more flavor and better moisture protection than boneless chops, making them a forgiving choice for cooks at any level.
Bone-In vs. Boneless Pork Chops
Bone-in chops, such as rib chops or center-cut loin chops, benefit from the bone acting as insulation during cooking. This slows heat transfer and helps the meat retain moisture, resulting in a juicier finished product even if you slightly overshoot your target temperature.
Boneless chops are leaner and cook faster, making them convenient for quick weeknight meals. However, that speed also means they dry out more easily.
If you go boneless, brining and careful temperature monitoring are crucial for a juicy result. Pull them from heat the moment your thermometer reads 145°F.
Why Thickness Matters
Thickness is the single most overlooked factor in pork chop success. Chops at least 1 inch thick give you enough time to develop a golden-brown crust on the outside without overcooking the interior. The ideal thickness is 1.5 inches for the best balance of sear and internal doneness.
Thin-cut chops under 3/4 inch cook through so quickly that they are nearly guaranteed to be dry. Save thin chops for braising or cooking in a sauce where the liquid provides the moisture.

How to Season Pork Chops for Maximum Flavor
The best way to season pork chops starts with proper salting through either a dry rub or a wet brine. A brine is the single most effective technique for locking in moisture, while a dry rub delivers a delicious crust with minimal effort.
The Quickest Method: A Simple Dry Rub
A go-to rub combines equal parts salt, black pepper, garlic powder, and smoked paprika. Pat the pork chops completely dry with a paper towel before applying. Sprinkle the rub generously on all sides and press it gently into the meat.
The Juiciness Secret: A Simple Pork Chop Brine
Brining is a game-changer for pork chop moisture retention. A simple brine consists of 4 cups of water, 1/4 cup of kosher salt, and optionally 2 tablespoons of sugar. Stir until dissolved, then submerge the chops.
Brine the pork chops for 30-60 minutes in the refrigerator. Do not exceed a few hours or the meat can become overly salty. After brining, rinse the chops, pat them completely dry, and season lightly with pepper and other spices before cooking.
Make-Ahead Brine Technique for Meal Planning
For easier weeknight cooking, you can brine your pork chops a day ahead. After the 30-60 minute brine, rinse the chops thoroughly and pat them completely dry with paper towels.
Place them on a wire rack set over a baking sheet and store them uncovered in the refrigerator overnight. This allows the surface to dry out perfectly for an exceptional sear the next day.
For Deeper Flavor: Easy Marinades
Marinades add both flavor and moisture through a combination of oil, acid, and aromatics. A basic marinade includes olive oil, lemon juice or vinegar, and garlic with fresh herbs. Marinate for at least 30 minutes or up to 4 hours for the best flavor penetration.

Four Easy Ways to Cook Pork Chops
Four reliable methods for cooking pork chops are pan-frying for a quick sear, oven-baking for hands-off cooking, grilling for smoky flavor, and air frying for a crispy finish. For every method, the goal is cooking the chop until it reaches an internal temperature of 145°F.
Method 1: Pan-Frying on the Stovetop
Pan-frying is the fastest route to a weeknight pork chop dinner, taking about 30 minutes from start to finish. A heavy-bottomed skillet — cast iron is ideal — provides even heat distribution and the best sear.
- Let seasoned chops rest at room temperature for 15-20 minutes.
- Heat a tablespoon of high-smoke-point oil (canola or avocado oil) in your skillet over medium-high heat.
- Place the pork chops in the hot pan and cook for 4-6 minutes per side until a deep golden-brown crust forms.
- Check the internal temperature and remove from the pan once it reaches 145°F.
For the best results when you pan-fry, avoid crowding the pan. Cook in batches if necessary to ensure each pork chop has enough space to sear properly rather than steam.

Method 2: Baking in the Oven
Oven-baking is the most hands-off approach and works especially well when you sear first. The combination of stovetop searing and oven finishing gives you a crusty exterior and a perfectly cooked interior.
- Preheat your oven to 400°F.
- Sear the pork chops in a hot, oven-safe skillet for 2-3 minutes per side.
- Transfer the entire skillet to the preheated oven.
- Bake for 10-15 minutes depending on thickness until a thermometer reads 145°F.
This sear-first oven-bake method is superior to simply baking the chops from raw. The initial high heat creates flavor through the Maillard reaction, which you wouldn’t achieve in the gentler heat of the oven alone.
Method 3: Grilling for Classic BBQ Flavor
Grilling adds smoky depth that no other indoor method can replicate. Preheat your grill to medium-high heat, around 400-450°F, and make sure the grates are clean and oiled.
- Place the pork chops on the grill and cook for 4-6 minutes per side with the lid closed.
- Avoid pressing down on the chops — this squeezes out juices and defeats the purpose of all your prep work.
- Remove from the grill once the internal temperature reaches 145°F.
Method 4: Using an Air Fryer
Air frying delivers a crispy exterior without the oil of traditional frying. The circulating hot air creates browning similar to a convection oven but in a more compact space.
- Preheat your air fryer to 380°F.
- Place seasoned pork chops in the basket in a single layer with no overlap.
- Cook for 12-15 minutes, flipping halfway through.
- Cooking times vary by appliance and chop thickness, so always confirm 145°F with a thermometer.
The key to a great air-fried pork chop is ensuring the surface is as dry as possible before cooking. Pat the chops thoroughly with paper towels after brining or marinating for the crispiest results.
Foolproof 30-Minute Recipe: One-Pan Pork Chops
This one-pan method delivers a juicy pork chop and a flavorful pan sauce in under 30 minutes. It combines a quick stovetop sear with a butter-basting finish, all in a single heavy-bottomed skillet with minimal cleanup.
Quick Facts:
- Prep time: 5 minutes
- Cook time: 15-20 minutes
- Total time: 20-25 minutes
- Servings: 2
Ingredients:
- 2 bone-in pork chops, 1 to 1.5 inches thick
- 1 tbsp avocado oil or other high-smoke-point oil
- 2 tbsp unsalted butter
- 2 cloves garlic, smashed
- 2 sprigs fresh thyme or rosemary
- Salt and freshly ground black pepper
Instructions:
- Pat the pork chops completely dry and season generously with salt and pepper.
- Heat the oil in a large cast-iron or stainless-steel skillet over medium-high heat until it shimmers.
- Place the pork chops in the skillet and cook 4-6 minutes until a deep golden-brown crust forms. Flip and cook 3-4 minutes more.
- Reduce heat to medium-low. Add butter, garlic, and thyme. Baste the chops with melted butter for 1-2 minutes.
- Remove chops at 145°F internal temperature. Rest on a cutting board 5 minutes before serving with pan sauce.
The Most Important Step: Nailing the Perfect Temperature
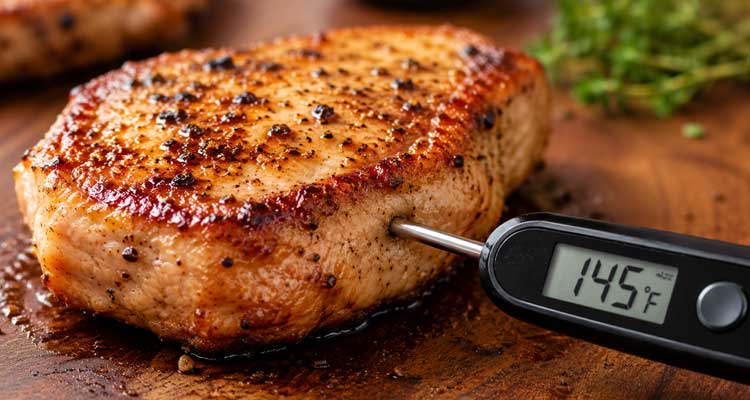
The single most important factor for juicy pork chops is removing them from heat at the correct safe internal temperature — no more, no less. Use an instant-read thermometer inserted into the thickest part of the chop, avoiding the bone. Pull the chop from heat the moment the thermometer reaches your target.
Once the chop reaches 145°F[USDA], let it rest on a cutting board for 3-5 minutes before slicing. This rest period allows the juices to redistribute throughout the meat. Cutting too early sends those juices running out onto your cutting board instead of staying in the chop.
Pork Chop Cooking Time and Temperature Chart
Cooking times for pork chops vary by thickness and method. A 1-inch thick chop typically takes 4-5 minutes per side when pan-frying, or about 12-16 minutes total when baking at 400°F. Always rely on an internal temperature of 145°F rather than the clock.
| Thickness | Pan-Fry (Med-High) | Oven-Bake (400°F) | Grill (Direct Heat) | Air Fryer (380°F) |
|---|---|---|---|---|
| 3/4 inch | 3-4 min per side | 10-12 min total | 3-5 min per side | 8-10 min total |
| 1 inch | 4-5 min per side | 12-16 min total | 4-6 min per side | 12-15 min total |
| 1.5 inches | 6-8 min per side | 18-22 min total | 7-9 min per side | 15-18 min total |
These times are estimates. An instant-read thermometer is the only reliable way to guarantee perfectly cooked pork chops.
Common Mistakes That Lead to Dry Pork Chops
The most common mistakes causing dry pork chops are overcooking, cooking them straight from the refrigerator, and skipping the resting period. Each of these errors is easy to fix once you know what to look for.
- Cooking cold meat: Placing a cold pork chop in a hot pan leads to uneven cooking. Let your chops sit on the counter for 15-20 minutes before cooking to take the chill off.
- Overcooking: This is the number one cause of dry pork. Trust your instant-read thermometer and pull the chops from heat the moment they hit 145°F.
- Skipping the rest: Cutting into a pork chop immediately after cooking causes its juices to spill out. A 3-5 minute rest lets those juices settle back into the meat, ensuring a moist result.
- Using thin-cut chops: As mentioned, chops under 1-inch thick are extremely difficult to cook without drying them out. Always opt for a thicker cut for methods like pan-frying or grilling.
What to Serve with Pork Chops
A perfectly cooked pork chop deserves an equally delicious side dish. Because pork has a mild, savory flavor, it pairs well with a wide range of accompaniments, from starchy and comforting to bright and acidic.
- Starches: Mashed potatoes, roasted potatoes, mac and cheese, or rice pilaf.
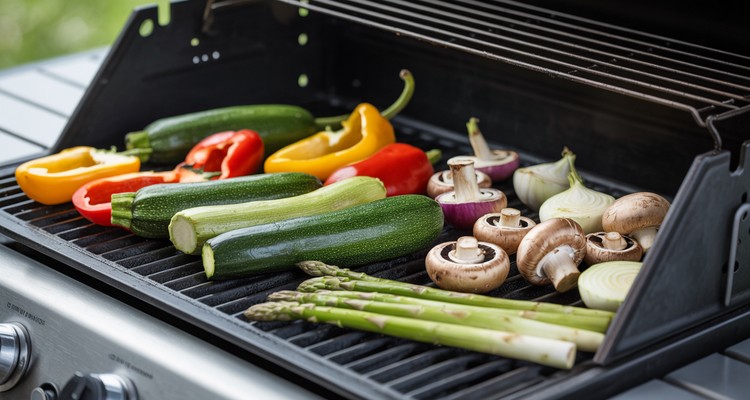
- Vegetables: Roasted broccoli, glazed carrots, sauteed green beans, or a fresh garden salad.
- Sweet and tangy: Applesauce, fruit chutney, or a fresh mango salsa.
Frequently Asked Questions
How do I know when pork chops are done without a thermometer?
Pierce the thickest part and observe the juices. If they run clear and the meat feels firm, it is likely cooked through. An instant-read thermometer is far more reliable and strongly recommended.
Can I cook pork chops from frozen?
Yes, but it takes about 50% longer and is not ideal for searing. Bake them in the oven at around 375°F to ensure even cooking without burning the outside.
What is the best oil for pan-frying pork chops?
Use an oil with a high smoke point. Avocado oil, canola oil, grapeseed oil, and clarified butter (ghee) are all excellent choices for medium-high heat.
How long can I store cooked pork chops in the refrigerator?
Properly stored in an airtight container, cooked pork chops last 3-4 days in the refrigerator[FSIS]. Reheat gently in a covered skillet with a splash of broth over low heat.
How do I keep pork chops from drying out?
Brine the chops for 30-60 minutes, use thick-cut chops (at least 1 inch), and cook to exactly 145°F with a thermometer. Let them rest 3-5 minutes after cooking.
Can I brine pork chops overnight?
Not recommended for a standard salt-water brine — the meat can become overly salty. Stick to 30-60 minutes. A dry brine (salting and refrigerating uncovered) can safely sit overnight.
What is the difference between a pork chop and a pork steak?
Pork chops come from the loin (leaner, more tender). Pork steaks come from the shoulder (more fat, more connective tissue). Steaks benefit from slower cooking while chops excel with quick, high-heat methods.
How do I reheat leftover pork chops without drying them out?
Use a covered skillet over low heat with a splash of chicken broth. You can also reheat at 275°F in the oven wrapped loosely in foil for 10-15 minutes.
Should I use bone-in or boneless pork chops?
Bone-in chops stay juicier because the bone insulates the meat. Boneless chops work for quick pan-frying but need more careful temperature monitoring.
Can I cook pork chops on a pellet grill or smoker?
Pellet grills work great. Set to 400-450°F for direct grilling, or reverse sear at 225°F until 120°F internal, then crank to 450°F for a quick sear on each side.
One-Pan Pork Chops
Equipment
- Cast iron or stainless-steel skillet (12-inch) heavy-bottomed for even heat and best sear
- Instant-read thermometer essential — pull chops at exactly 145°F
- Tongs for flipping and basting without piercing the meat
Ingredients
Pork Chops
- 2 bone-in pork chops 1 to 1.5 inches thick; rib chops or center-cut loin chops
- 1 tablespoon avocado oil or canola oil high smoke point oil
- 2 tablespoons unsalted butter
- 2 cloves garlic smashed
- 2 sprigs fresh thyme or rosemary
- salt and freshly ground black pepper to taste; season generously
Instructions
- Pat the pork chops completely dry with paper towels and season generously with salt and pepper on all sides. Let them sit at room temperature for 15-20 minutes before cooking — starting from room temperature promotes even cooking.
- Heat the oil in a large cast iron or stainless-steel skillet over medium-high heat until it shimmers.
- Place the pork chops in the skillet. Cook 4-6 minutes without moving them until a deep golden-brown crust forms on the bottom. Flip and cook 3-4 minutes more on the second side.
- Reduce heat to medium-low. Add the butter, smashed garlic, and thyme sprigs to the pan. As the butter melts, tilt the skillet and use a spoon or tongs to baste the chops with the flavored butter for 1-2 minutes.
- Check the internal temperature in the thickest part of the chop, away from the bone. Remove from heat the moment it reads 145°F. Transfer to a cutting board and rest for 5 minutes before serving — do not skip this step.
Notes
Contents
- The 4 Keys to Easy, Juicy Pork Chops
- Planning Your Perfect Pork Chop Meal
- Choosing the Right Pork Chop for Your Meal
- How to Season Pork Chops for Maximum Flavor
- Four Easy Ways to Cook Pork Chops
- Foolproof 30-Minute Recipe: One-Pan Pork Chops
- The Most Important Step: Nailing the Perfect Temperature
- Pork Chop Cooking Time and Temperature Chart
- Common Mistakes That Lead to Dry Pork Chops
- What to Serve with Pork Chops
- Frequently Asked Questions
- One-Pan Pork Chops