Smoked pork riblets deliver everything you love about a full rack of ribs — deep smoke flavor, sticky glaze, and fall-off-the-bone tenderness — in a fraction of the cook time. Because they are cut into smaller pieces, they develop bark faster and soak up smoke beautifully without hours of babysitting the pit.
These little cuts are also a budget-friendly secret at the butcher counter. They are easy to portion for a crowd and adapt to any smoker you own — pellet grill, offset, kettle, or electric. Once you smoke a batch, it is hard to go back to anything else for a backyard gathering.
This guide walks you through every step: what these cuts actually are, how to prep and season them, the exact smoking temperature and timeline, and how to finish them with a saucy glaze that will have everyone reaching for more.
Quick Summary
- Fast & Flavorful — Smoked pork riblets offer the rich taste and tenderness of full ribs in significantly less time, making them perfect for quick BBQ fixes.
- Three-Phase Process — Achieve perfect results with an initial open smoke for bark, a covered braise for moisture and tenderness, and a final glaze to set the sauce.
- Versatile & Budget-Friendly — These smaller cuts are economical, easy to portion for any gathering, and adapt well to all smoker types, from pellet grills to charcoal kettles.
- Probe for Tenderness — Don’t rely solely on internal temperature; riblets are done when a probe slides in with little to no resistance, typically between 195-205°F.
What Exactly Are Pork Riblets?
Pork riblets are small, bone-in pieces created by cutting a full rack of ribs — usually baby backs or St. Louis-style spare ribs — into shorter sections across the bone. The result is a bite-sized rib piece with plenty of surface area for bark and smoke penetration.
They cook faster than a full rack and are ideal for feeding a crowd as an appetizer or main dish.
Riblets vs. Rib Tips: A Quick Guide
These two cuts are often confused at the store, but they come from different parts of the pig and eat very differently. Knowing which one you have changes how you cook them.
Pork riblets are cut from a full rack of baby back or spare ribs by slicing the rack into shorter pieces across the bone. They are bone-in, meaty, and cook up like miniature full ribs. Expect clean bites with a solid bone structure.
Rib tips are the boneless or cartilaginous strip cut from the bottom of spare ribs when trimming them into a St. Louis-style rack. Rib tips are chewier, contain cartilage instead of solid bone, and have a different texture than riblets.
They benefit from longer, lower smoking and are delicious but require more patience.
Ingredients You Need
This recipe uses a straightforward pork dry rub that brings out the natural flavor of the meat without masking the smoke. You can use a store-bought rub or mix your own in about two minutes.
- 3-4 lbs pork riblets (bone-in, cut from a full rack)
- 2 tablespoons yellow mustard (binder)
- 3 tablespoons brown sugar
- 1 tablespoon kosher salt
- 1 tablespoon smoked paprika
- 1 teaspoon black pepper
- 1 teaspoon garlic powder
- 1 teaspoon onion powder
- 1/2 teaspoon cayenne pepper (optional, for heat)
- 1/2 cup apple juice or apple cider vinegar (for spritzing)
- 1/2 cup braising liquid (apple juice, beer, or chicken broth)
- 1/2 cup BBQ sauce (your favorite, for glazing)
How to Smoke Pork Riblets (Step-by-Step)
The process runs in three clear phases: an open smoke to build bark, a covered braise to lock in moisture, and a final uncovered glaze to set the sauce. Total cook time runs about 4 to 4.5 hours at a consistent 250°F.
Step 1: Prep and Season the Riblets

Pat the riblets dry with paper towels — moisture on the surface will steam rather than smoke, and you want bark, not steam. Trim off any loose fat flaps or thin membrane sections you can reach, though the membrane on riblets is often less of an issue than on a full rack.
Apply a thin coat of yellow mustard over all surfaces. The mustard acts as a binder to help the dry rub adhere during the first phase of smoking — you will not taste it in the finished product. Mix your dry rub ingredients together and apply a generous, even coat to all sides.
Let the seasoned riblets sit at room temperature for 15-30 minutes while the smoker preheats.
Step 2: Set Up Your Smoker
Preheat your smoker to a consistent 250°F before you place the riblets on the grate. Stability matters more than speed — wide temperature swings will create uneven cooking and make it harder to hit tenderness without drying the outside.
For wood choice, mild fruit woods complement pork without overpowering it. Apple wood is the classic pairing — it delivers a mild, slightly sweet smoke that works beautifully with pork. Cherry adds a deeper color and a touch more complexity.
Hickory is an option if you want a stronger smoke profile, but use it sparingly or blend it with apple to keep the flavor balanced.
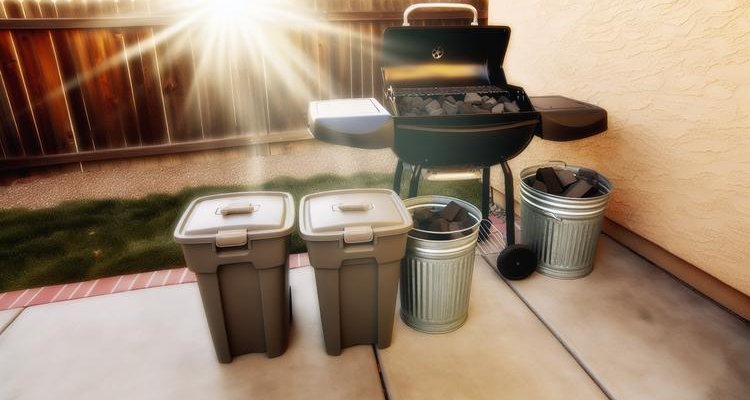
Smoker type does not matter much for this recipe. Pellet grills, electric smokers, offset smokers, and kettle grills set up for indirect heat all produce excellent results. For charcoal or offset smokers, use the snake method or a water pan to maintain steady temperatures at the 250°F mark.
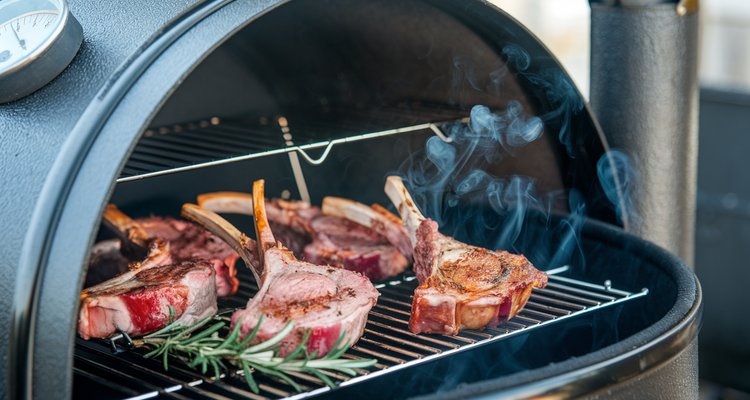
Step 3: The Initial Smoke (Building Bark)
Place the riblets directly on the smoker grates in a single layer, leaving a small gap between pieces for airflow. Close the lid and let them smoke undisturbed for the first 45 minutes to allow initial bark formation to begin.
After the first 45 minutes, you can begin spritzing every 45-60 minutes with apple juice or apple cider vinegar. A light spritz keeps the surface moist and helps the smoke cling, but go easy — too much spritz washes the rub and drops the smoking temperature inside the cooker.
After about 2 hours total, the riblets should have a mahogany color and a solid bark has formed.
Step 4: The Braise — The Foil Pan Method
This step is the key to achieving tender, juicy results. Transfer the riblets from the grates into a disposable aluminum foil pan. Pour in your braising liquid — about a half cup of apple juice, beer, or chicken broth.
The liquid creates steam inside the covered pan, which breaks down the connective tissue and makes the riblets probe-tender.
Cover the pan tightly with a sheet of heavy-duty aluminum foil, crimping the edges to seal completely. Return the covered pan to the smoker and continue at 250°F for another 1.5 to 2 hours. Check doneness by inserting a probe or toothpick into the thickest section of meat — it should slide in with little to no resistance.
While pork is safe to eat at an internal temperature of 145°F[USDA], riblets only become tender when they reach 195-205°F. At this higher temperature, the tough collagen fully converts to gelatin.
For this reason, do not pull the riblets just because a thermometer reads safe. Instead, rely on feel by probing the meat — it should slide in with almost no resistance.
Step 5: Sauce and Set the Glaze
Carefully remove the foil cover from the pan — steam will escape and it is hot. Brush a generous layer of your favorite BBQ sauce over all surfaces of the riblets. Leave the pan uncovered and return it to the smoker for another 15-20 minutes to let the sauce thicken and caramelize into a sticky, glossy glaze.
Remove from the smoker and allow the riblets to rest for 10 minutes before serving. The short rest lets the juices redistribute through the meat, giving you the juiciest possible bite.

Smoked Pork Riblets Timeline and Temperature Guide
Doneness for pork riblets is determined by feel — probe-tender, not a strict internal temperature. Pork is safe to eat at 145°F, but collagen and connective tissue require higher temperatures and more time to break down into the gelatin that makes them fall-off-the-bone tender. Use this table as your cook guide.
| Phase | Smoker Temp | Target Internal Temp | Estimated Time | Notes |
|---|---|---|---|---|
| 1. Initial Smoke | 250°F | N/A | 2 hours | Build bark and mahogany color. Spritz every 45-60 min if desired. |
| 2. Braise (Covered) | 250°F | 195-205°F | 1.5-2 hours | Foil pan with braising liquid, sealed tight. Probe for tenderness — not strict temp. |
| 3. Glaze | 250°F | N/A | 15-20 min | Uncover, brush BBQ sauce, let it caramelize into a sticky glaze. |
| 4. Rest | N/A | N/A | 10 min | Allow juices to redistribute before serving. |
Wood Choice and Smoker Options
Wood choice has a direct impact on the final flavor profile. Mild options like apple and cherry are the most popular because they add a gentle sweetness without overwhelming the pork. Peach and pecan are also excellent choices that pair naturally with the meat.
Hickory delivers a more assertive, classic BBQ smoke flavor. It works well with riblets but can become bitter if overused. A common approach is to blend one hickory chunk with two or three apple wood chunks — you get the depth of hickory without the harsh edge.
Avoid mesquite for a long cook like this, as it tends to turn acrid over extended smoking times.
On a pellet grill, select a competition blend or a straight apple or cherry pellet. On a charcoal smoker, use chunks rather than chips — chunks burn slower and produce more consistent smoke over the 2-hour initial phase. Electric smokers maintain precise temperature control, which is especially helpful for beginners tackling this cook.
Sauce and Glaze Options
The BBQ sauce you choose matters, but the timing matters just as much. Apply sauce only during the final 15-20 minutes of the cook — adding it too early causes the sugars to burn before the riblets finish cooking. The goal is caramelization, not charring.
A classic Kansas City-style sauce — thick, tomato-based, and mildly sweet — clings well and creates a beautiful glaze. If you prefer something tangier, a vinegar-based Carolina sauce cuts through the richness of the pork and adds brightness. Honey-based glazes are another option and create an especially sticky, lacquered finish that photographs well and tastes even better.
You can also skip the sauce entirely and serve them dry with extra dry rub on the side. Properly smoked riblets with a strong bark do not need sauce — the bark carries enough flavor on its own. Offer sauce on the side for dipping so everyone can customize their plate.
How to Serve Your Smoked Pork Riblets
These riblets are flexible enough to serve as either a crowd-pleasing appetizer or a full main course. Because the pieces are already bite-sized, they are easy to grab and eat without a lot of knife work — perfect for a backyard cookout or game day spread.
As a Crowd-Pleasing Appetizer
Arrange the glazed riblets on a large platter with a small bowl of sauce for dipping. Garnish with fresh parsley or sliced green onions for color. They hold well at room temperature for 20-30 minutes, making them easy to set out before the main meal hits the table.
For a party, pair them with other small bites like smoked jalapeño poppers or grilled corn on the cob cut into rounds. The combination gives guests a variety of textures and flavors while keeping the prep manageable.
As a Hearty Main Course
Serve a generous portion alongside classic BBQ sides. Creamy coleslaw provides a cool, crunchy contrast to the rich, smoky riblets. Baked beans slow-cooked with a little smoked meat add depth.
Potato salad, cornbread, and pickled onions round out the plate and soak up any extra sauce.
Plan on about 1 pound of bone-in pork riblets per person as a main course. As an appetizer, 1/2 pound per person gives guests a satisfying portion before the main event.
Storing and Reheating Leftovers
Allow leftover riblets to cool before storing. Place them in an airtight container and refrigerate for up to 3-4 days. For longer storage, wrap individual portions in plastic wrap and then in foil before placing them in a freezer-safe bag — they freeze well for up to 3 months.
The most effective way to reheat leftover smoked riblets is in a covered baking dish in the oven at 300°F. Add a splash of apple juice or chicken broth to the bottom of the dish and cover it tightly with foil.
Heat for 20-25 minutes or until the riblets reach an internal temperature of 165°F[USDA].
Avoid microwaving if possible — the uneven heat tends to dry out the meat and can make the bark rubbery. If you are in a hurry, reheat individual pieces at 50% power in short 30-second bursts and cover with a damp paper towel to trap steam.
Tips for Different Smoker Types
The core technique of smoke, braise, and glaze works across any smoker type. However, the execution details for fuel management and temperature stability will vary. Understanding the quirks of your specific setup is key to success before you fire up the pit.
Pellet Grill (Traeger, Pit Boss, and Similar)
Pellet grills are the easiest path to great results here. Set your smoking temperature to 250°F and select a fruit wood pellet blend. The automated auger system maintains steady temperatures, so you can focus on the riblets rather than managing fuel.
Some pitmasters run the first 30 minutes on “smoke mode” (180-200°F) to maximize smoke absorption before ramping up to 250°F for the rest of the cook.
Electric Smoker
Electric smokers excel at temperature stability, which makes them a great match for this cook. Set the thermostat to 250°F and use wood chips in the chip tray — apple or cherry are excellent choices. Reload chips every 45-60 minutes during the initial smoke phase to keep consistent smoke flowing.
The covered-pan braise works exactly the same way inside an electric smoker.
Charcoal Smoker or Kettle
Set up your charcoal smoker for two-zone indirect cooking. For a kettle, bank coals to one side and place the riblets on the opposite side of the grate. Use the snake method for longer burns — arrange unlit briquettes in a C-shape and light one end to achieve a slow, steady burn at 250°F.
Add wood chunks directly on top of the charcoal for smoke.
Common Mistakes to Avoid
Even experienced pitmasters can make a few predictable mistakes when smoking pork riblets. Knowing what to watch for, from adding sauce too early to pulling the meat at the wrong temperature, is the key to avoiding a disappointing batch of dry or tough ribs.
- Skipping the braise: The covered-pan braise is not optional if you want fall-off-the-bone results. Smoking riblets uncovered the entire time often leaves them chewy and dry at the center.
- Adding sauce too early: BBQ sauce contains sugars that burn long before the riblets are done. Reserve it for the final 15-20 minutes only.
- Pulling at 145°F internal: That temperature is safe but not tender. Riblets need to reach 195-205°F internally for connective tissue to break down properly.
- Over-spritzing: A light mist keeps the surface moist — soaking the riblets drops smoker temperature and washes off the dry rub. Spritz lightly and infrequently.
- Packing the grate too tight: Leave space between pieces for smoke and heat to circulate. Crowded grates cause uneven cooking and reduce bark formation.
Smoked pork riblets offer a fantastic way to enjoy the rich flavors of smoked ribs with a significantly reduced cooking time. By following the three-phase process of initial smoke, covered braise, and final glaze, you can achieve incredibly tender, juicy, and flavorful results.
These versatile cuts are perfect for any gathering, providing a delicious and manageable BBQ experience for both novice and experienced pitmasters.
Frequently Asked Questions
How long do you smoke pork riblets at 250°F?
Total cook time at 250°F is typically 4 to 4.5 hours. This breaks down as roughly 2 hours of initial open smoke to build bark, 1.5-2 hours in a covered pan with braising liquid, and a final 15-20 minutes uncovered to caramelize the glaze. Rest for 10 minutes before serving.
Are pork riblets the same as rib tips?
No, they are different cuts. Riblets are bone-in pieces created by cutting a full rack of ribs into shorter sections. Rib tips are the boneless or cartilaginous strips removed from the bottom of spare ribs when trimming them into a St.
Louis-style rack. Rib tips are chewier and contain cartilage; riblets have a solid bone structure and eat more like a miniature rib.
How do you keep pork riblets moist while smoking?
The two-stage method — smoke then braise — is the most reliable approach. After the initial 2 hours of open smoke, transfer the riblets to a sealed pan with a half cup of braising liquid. The covered environment keeps the meat juicy while the connective tissue breaks down and the pieces become fully tender.
Should you wrap pork riblets in foil?
Yes, for the most tender and juicy results. A sealed pan with braising liquid during the second half of the cook is the most effective method for achieving juicy, well-cooked riblets. You can skip the wrap and smoke them uncovered the entire time, but the results are less consistent — especially on thicker pieces.
What is the ideal temperature for smoked pork riblets?
A smoking temperature of 250°F is the sweet spot for pork riblets. It is high enough to build bark and render fat efficiently, but low enough to keep the meat from drying out during the extended cook.
Temperatures below 225°F can extend cook time significantly; above 275°F, smaller riblet pieces may dry out before the connective tissue breaks down.
When should you add BBQ sauce to smoked riblets?
Add sauce during the final 15-20 minutes of the cook, after removing the cover from the braise. Adding it earlier causes the sugar to burn before the riblets finish cooking. The final uncovered phase at 250°F caramelizes it into a sticky glaze without scorching.
Can you smoke boneless pork riblets?
Yes, boneless pork riblets smoke well but cook faster than bone-in versions. Because there is no bone to conduct heat, boneless pieces tend to become fully tender about 30-45 minutes sooner. Watch them closely during the braise phase and start probing at the 1-hour mark rather than waiting the full 1.5-2 hours.
How do you store and reheat leftover smoked riblets?
Store leftovers in an airtight container in the refrigerator for up to 3-4 days.
To reheat, place the riblets in a covered baking dish with a splash of apple juice or broth. Warm them in a 300°F oven for 20-25 minutes, ensuring they reach an internal temperature of 165°F[USDA].
Freeze for up to 3 months if you want to save them longer.
Take Home Message
Smoked pork riblets are a fantastic way to enjoy the rich flavors of smoked ribs with a significantly reduced cooking time. The three-phase process of initial smoke, covered braise, and final glaze gives you tender, juicy, and flavorful results.
These versatile cuts are perfect for gatherings, providing a manageable BBQ experience for both novice and experienced pitmasters.
Smoked Pork Riblets
Equipment
- Smoker
- Disposable aluminum foil pan
- Heavy-duty aluminum foil
- Meat thermometer
- Spray bottle
Ingredients
Riblets
- 3-4 lbs pork riblets, bone-in, cut from a full rack
Dry Rub
- 2 tablespoons 2 tablespoons yellow mustard (binder) acts as binder; will not taste in finished product
- 3 tablespoons 3 tablespoons brown sugar
- 1 tablespoon 1 tablespoon kosher salt
- 1 tablespoon 1 tablespoon smoked paprika
- 1 teaspoon 1 teaspoon black pepper
- 1 teaspoon 1 teaspoon garlic powder
- 1 teaspoon 1 teaspoon onion powder
- 1/2 teaspoon 1/2 teaspoon cayenne pepper optional, for heat
Spritz and Braise
- 1/2 cup 1/2 cup apple juice or apple cider vinegar (for spritzing) for spritzing during initial smoke phase
- 1/2 cup 1/2 cup braising liquid (apple juice, beer, or chicken broth) used in covered foil pan braise
Glaze
- 1/2 cup 1/2 cup BBQ sauce your favorite brand or homemade
Instructions
- Prep and Season
- Pat the riblets dry with paper towels. Trim off any loose fat flaps or thin membrane sections.
- Apply a thin coat of yellow mustard over all surfaces as a binder. Mix the dry rub ingredients together and apply a generous, even coat to all sides.
- Let the seasoned riblets rest at room temperature for 15-30 minutes while the smoker preheats.
- Set Up Your Smoker
- Preheat your smoker to a consistent 250°F. Add apple or cherry wood chunks or chips for smoke. Fill a water pan and place it in the smoker to add humidity during the first phase.
- Initial Smoke (2 Hours)
- Place riblets directly on the smoker grates in a single layer with small gaps between pieces. Close the lid and smoke undisturbed for the first 45 minutes.
- After the first 45 minutes, spritz lightly every 45-60 minutes with apple juice or apple cider vinegar. Continue smoking for about 2 hours total until the riblets have a mahogany color and solid bark.
- Braise (1.5-2 Hours)
- Transfer the riblets to a disposable aluminum foil pan. Pour in 1/2 cup of braising liquid — apple juice, beer, or chicken broth.
- Cover the pan tightly with heavy-duty aluminum foil, crimping the edges to seal completely. Return the covered pan to the smoker at 250°F for 1.5-2 hours.
- Check doneness by inserting a probe or toothpick into the thickest section of meat. It should slide in with little to no resistance (internal temperature 195-205°F).
- Glaze and Finish (15-20 Minutes)
- Carefully remove the foil cover from the pan. Brush a generous layer of BBQ sauce over all surfaces. Leave the pan uncovered and return to the smoker for 15-20 minutes to caramelize the glaze.
- For a deeper glaze, apply sauce in two thin layers: brush the first coat, let it set 10 minutes, then brush a second coat.
- Rest and Serve
- Remove from the smoker and allow the riblets to rest for 10 minutes before serving. The rest lets the juices redistribute through the meat.
Notes
Contents
- Quick Summary
- What Exactly Are Pork Riblets?
- Ingredients You Need
- How to Smoke Pork Riblets (Step-by-Step)
- Smoked Pork Riblets Timeline and Temperature Guide
- Wood Choice and Smoker Options
- Sauce and Glaze Options
- How to Serve Your Smoked Pork Riblets
- Storing and Reheating Leftovers
- Tips for Different Smoker Types
- Common Mistakes to Avoid
- Frequently Asked Questions
- Take Home Message
- Smoked Pork Riblets