A ham shank is one of the most underrated cuts you can bring home from the butcher. It is affordable, packed with flavor, and when cooked properly, delivers fall-off-the-bone tender meat that rivals any holiday centerpiece. This cut’s versatility makes it perfect for a Sunday dinner, a festive gathering, or even meal prep for the week.
This guide covers three proven methods for cooking a ham shank: oven roasting, braising, and slow cooking. You will learn how to select the right cut, nail the timing and temperature, and finish with a caramelized glaze that makes the whole thing shine. We’ll also cover troubleshooting, serving ideas, and what to do with those delicious leftovers.
Quick Summary
- Versatile Cut — A ham shank is an affordable, flavorful, and versatile cut from the lower pig leg, perfect for various cooking methods and occasions, from holiday meals to weekly meal prep.
- Three Cooking Methods — This guide details oven roasting for a classic presentation, braising for maximum moisture and tenderness, and slow cooking for a convenient, hands-off approach, ensuring fall-off-the-bone results.
- Temperature is Key — Achieving the correct internal temperature is crucial: 140°F for pre-cooked hams and 145°F for raw hams, always verified with an instant-read meat thermometer to prevent dryness.
- Perfect Glaze — Learn to create a balanced sweet, tangy, and savory glaze, applied only during the final 20-30 minutes of cooking to achieve a beautiful, caramelized crust without burning.
What Is a Ham Shank?
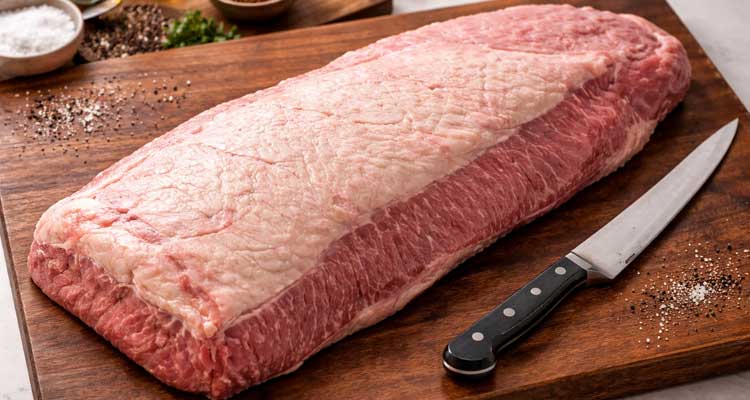
A ham shank is the lower, leaner portion of a pig’s leg, located just above the hock. It is a bone-in cut rich in connective tissue, specifically collagen, that breaks down during low-and-slow cooking. This process transforms the meat into an incredibly tender and flavorful dish.
Most ham shanks sold at grocery stores are cured and smoked, meaning they are already cooked and just need to be heated through and glazed. This makes them a convenient and impressive option for any meal.
Ham Shank vs. Ham Hock: What’s the Difference?
These two cuts come from the same leg but serve very different purposes in the kitchen. The shank is the meaty section above the joint, while the ham hock is the joint itself with less meat and more skin, tendons, and bone.
- Ham shank: more meat, ideal as a centerpiece roast or sliced main course
- Ham hock: less meat, primarily used to flavor soups, beans, and braised greens
Think of the shank as the star of the plate and the hock as a supporting player that builds a flavorful foundation in soups and stews. You wouldn’t serve a ham hock as a main course, but its smoky essence is indispensable in many classic recipes.
How to Choose a Quality Ham Shank
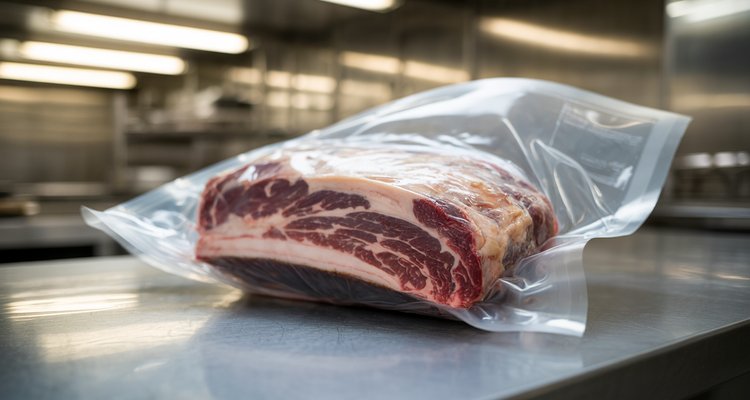
Selecting the right ham shank at the store is the first step toward a delicious meal. Look for one with a healthy pinkish-red color and a firm, white fat cap. Most shanks are pre-cooked (cured and smoked), which simplifies preparation considerably.
Always check the label to confirm whether it is fully cooked or requires cooking from raw.
Cured vs. Uncured (Fresh)
Cured and smoked ham shanks are the most common type at grocery stores. The curing process, which involves salt, sugar, and sometimes nitrates, preserves the meat and imparts the classic “ham” flavor. They are already cooked and just need to be heated through to a safe internal temperature.
Uncured or fresh ham shanks are raw pork and must be cooked thoroughly from scratch. They will not have the classic ham flavor until seasoned and slow-cooked. Fresh shanks give you more control over the final seasoning profile, allowing you to create your own brine or rub from the ground up.
Smoked vs. Unsmoked
Most cured hams are also smoked, which adds another layer of complex, savory flavor. The type of wood used for smoking (like hickory, applewood, or mesquite) can influence the final taste. Some hams are even labeled “double-smoked” for a more intense flavor.
Unsmoked hams, often just labeled as “cured” or “brined,” will have a saltier, purer pork flavor without the smoky notes. The choice between them is purely a matter of personal preference.
What to Look For at the Butcher Counter
When you’re at the store, look for a ham shank that feels heavy for its size and has a plump appearance with even fat distribution. The meat should be firm and moist, with no dry or discolored patches. Always check for intact packaging and a clear label stating “fully cooked” or “cook before eating” to avoid any confusion.
The Key to a Perfectly Cooked Ham Shank: Temperature and Time
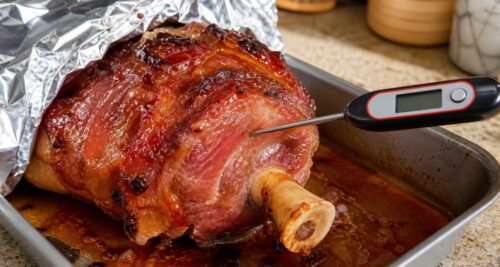
The most critical factor when cooking a ham shank is reaching the correct internal temperature without drying out the meat. For pre-cooked hams, the goal is to reheat it to 140°F. For raw (uncooked) hams, you must cook it to a minimum internal temperature of 145°F, followed by a three-minute rest for safety and quality.
A reliable instant-read meat thermometer is the only way to guarantee doneness without overcooking. Insert the probe into the thickest part of the meat, making sure to avoid contact with the bone, which can give an inaccurate reading.
A few tools that make cooking a ham shank easier:
- ThermoMaven Professional Digital Meat Thermometer — instant reading for accurate doneness check without overcooking
- TempPro TP19H Digital Meat Thermometer — 1-second read with backlit display for quick checks
- Cuisinart 16-Inch Stainless Steel Roasting Pan with Rack — elevates the shank for even oven heat circulation
- Cutluxe Brisket Knife 12 Inch — long, sharp blade for carving the cooked shank cleanly

Essential Equipment
- Roasting pan with a rack: For oven roasting, the rack elevates the ham, allowing hot air to circulate evenly for consistent cooking and a crispier exterior.
- Dutch oven: A heavy-bottomed Dutch oven is perfect for braising, as it holds and distributes heat evenly, preventing scorching.
- Slow cooker: A 6-quart or larger slow cooker is ideal for a hands-off approach that guarantees tender, fall-off-the-bone meat.
- Instant-read meat thermometer: This is non-negotiable for accurately checking the internal temperature and preventing over or undercooking.
- Basting brush: Essential for applying a smooth, even layer of glaze. Silicone brushes are easy to clean and work well.
- Carving knife and fork: A long, sharp knife and a sturdy fork will make carving and serving much easier.
Ham Shank Cooking Time Chart
| Cooking Method | Oven Temp | Time per Pound | Target Internal Temp | Notes |
|---|---|---|---|---|
| Oven Roasting (pre-cooked) | 325°F | 20 min | 140°F[USDA] | Uncovered for crispier skin |
| Oven Roasting (raw/fresh) | 325°F | 25-30 min | 145°F[USDA] | Tent with foil if browning too quickly |
| Braising | 300°F | 30-40 min | 145°F[USDA] | Cook covered in liquid until tender |
| Slow Cooker | Low setting | 6-8 hours total | 145°F[USDA] | Ideal for fall-off-the-bone texture |
How to Cook a Ham Shank: 3 Simple Methods
The three most effective methods for cooking a ham shank are oven roasting for a classic holiday presentation, braising in liquid for maximum moisture and tenderness, and using a slow cooker for a hands-off approach that yields incredibly soft meat. Choose based on your available time and desired outcome.
Method 1: Classic Oven-Roasted Ham Shank
This method is perfect for achieving a beautifully browned exterior and a juicy interior, making it a classic choice for special occasions.
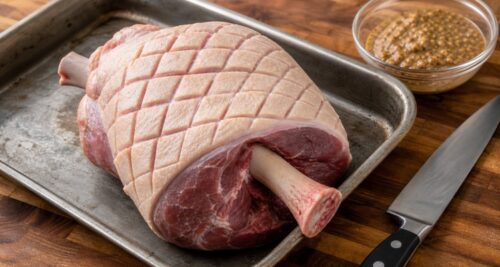
Step 1: Preparation
Preheat your oven to 325°F. Pat the ham shank dry with paper towels. With a sharp knife, score the fat cap in a diamond pattern, cutting on a stable surface about a quarter-inch deep without reaching the meat.
This helps the fat render and allows the glaze to penetrate deeply.

Step 2: Roasting
Place the ham shank on a rack in a roasting pan. Add about a cup of water, broth, or apple cider to the bottom of the pan to create steam and prevent drippings from burning. Roast uncovered, following the time chart above based on whether your ham is pre-cooked or raw.
Step 3: Glazing and Resting
During the last 30 minutes of cooking, brush the ham generously with your chosen glaze. Return it to the oven and continue cooking, basting every 10 minutes, until the glaze is caramelized and the ham reaches its target internal temperature. Let the ham rest for 10-15 minutes before carving to allow the juices to redistribute.
Method 2: Braising for Maximum Moisture
Braising is the most forgiving method and produces the most tender, succulent results by cooking the ham gently in liquid.
Step 1: Searing
Heat a tablespoon of oil in a large Dutch oven over medium-high heat. Sear the ham shank on all sides until golden brown. This step creates the Maillard reaction, which builds a deep, savory flavor base that will enrich the entire dish.
Step 2: Braising
Remove the ham and add aromatics like sliced onions, carrots, celery, and smashed garlic to the pot. Sauté for a few minutes, then add your braising liquid to come about one-third of the way up the shank. Apple cider, chicken stock, beer, or even a dry white wine all work well.
Return the ham to the pot, bring the liquid to a simmer, cover, and transfer to a 300°F oven. Cook until the meat is fork-tender.
Step 3: Finishing
Once tender, you can serve the ham as is or apply a glaze and broil it for a few minutes to get a caramelized crust. Use the strained braising liquid to make a delicious pan sauce while the ham rests.
Method 3: The Slow Cooker Ham Shank
For ultimate convenience, the slow cooker is your best friend. This method is perfect for a busy day, as it requires minimal attention and frees up your oven.
Step 1: Setup
Place a bed of sliced onions, apples, or potatoes in the bottom of your slow cooker. This elevates the ham shank and adds flavor to the cooking liquid. Set the shank on top and add about one cup of liquid—apple juice, stock, or even cola all work wonderfully.
Step 2: Slow Cooking
Cover and cook on the low setting for 6-8 hours, or on high for 3-4 hours. The ham is done when the meat is exceptionally tender and pulls easily away from the bone. The slow cooker does all the work, gently breaking down the connective tissues.
Step 3: Glazing (Optional)
For a glazed finish, carefully transfer the cooked ham to a foil-lined baking sheet. Brush on your glaze and place it under the broiler for 3-5 minutes until bubbly and caramelized. Watch it very carefully, as the high sugar content in the glaze can cause it to burn quickly.
How to Make a Simple and Delicious Ham Glaze
A great ham glaze balances sweet, tangy, and savory flavors. Classic combinations include brown sugar or honey for sweetness, Dijon mustard for tang, and warm spices like cloves or cinnamon. Apply the glaze only during the last 20-30 minutes of cooking to prevent it from burning.
Classic Brown Sugar and Mustard Glaze Recipe
- 1 cup packed brown sugar
- 1/4 cup Dijon mustard
- 2 tablespoons apple cider vinegar
- 1/4 teaspoon ground cloves
Whisk all ingredients together in a small bowl until smooth. The glaze should be thick enough to coat the back of a spoon without running off immediately. This recipe makes enough for one average-sized ham shank.
Glaze Variations to Try
- Maple Bourbon Glaze: Combine 1/2 cup maple syrup, 1/4 cup bourbon, 2 tablespoons brown sugar, and 1 tablespoon Dijon mustard.
- Spicy Honey-Sriracha Glaze: Mix 1/2 cup honey, 2-3 tablespoons sriracha (to taste), 1 tablespoon soy sauce, and 1 teaspoon minced garlic.
When and How to Apply the Glaze
Applying glaze too early is a common mistake that causes the sugar to burn before the ham is heated through. For best results, brush a generous layer over the surface during the final 20-30 minutes of cooking time.
Re-apply every 10 minutes for a thick, lacquered finish. Each layer caramelizes on top of the last, building a sticky-sweet crust that contrasts perfectly with the salty, smoky meat underneath.
Troubleshooting Common Ham Shank Problems
Even straightforward cuts like ham shank can go wrong if timing or temperature are off. The most common issues are dry, tough meat or a burned glaze. This guide will help you troubleshoot these problems and ensure a perfect result every time.
My Ham Is Dry
This is almost always caused by overcooking or roasting at too high a temperature. Always use a meat thermometer and pull the ham when it hits the target internal temperature. Tenting with foil during a long roast can also help retain moisture.
Braising is the most reliable method for avoiding dryness, since the ham cooks submerged in liquid throughout the process. If your oven-roasted ham is a bit dry, a generous serving of pan sauce can help.
The Meat Is Tough
Tough meat means the connective tissue has not had enough time to break down into gelatin. This is a sign of undercooking, not overcooking. Continue cooking at a low temperature until the meat is tender enough to pull away from the bone easily with a fork.
My Glaze Burned
Burned glaze happens when sugar is exposed to high heat for too long. Only apply the glaze during the last 20-30 minutes of cooking. If it starts darkening too quickly, tent the ham with foil and consider lowering the oven temperature by 25°F for the remainder of the cook time.
My Glaze Is Too Thin
If your glaze seems watery and won’t stick to the ham, it may have too much liquid. Pour the glaze into a small saucepan and simmer it over low heat for a few minutes. This will allow some of the water to evaporate and the sugars to concentrate, thickening it to the perfect consistency.
Serving and Storing Your Cooked Ham Shank
Proper serving and storage are key to enjoying every last bit of your delicious ham shank. After cooking, allowing the meat to rest for 10-15 minutes is a crucial, non-negotiable step that ensures the juices redistribute for a moist, tender result. This section covers carving techniques, side dish pairings, and safe storage for leftovers.
How to Carve a Ham Shank
After cooking, let your ham shank rest for 10-15 minutes before carving. Place the ham on a large cutting board. Use a carving fork to hold it steady and make a long vertical cut along the bone.
Then, make angled slices down to the bone, cutting away from your first slice. Finally, run your knife horizontally along the bone to release the slices.
Serving Suggestions
A beautifully cooked ham shank pairs well with a wide variety of side dishes. For starches, consider classic mashed or scalloped potatoes, or a hearty macaroni and cheese. For vegetables, roasted asparagus, glazed carrots, or simple green beans are excellent choices.
Don’t forget a basket of warm dinner rolls to complete the meal.
Creative Ways to Use Leftovers
Leftover ham is a gift that keeps on giving. Dice it for a classic ham and bean soup, or shred it for sandwiches, quesadillas, or sliders. You can also cube it and add it to scrambled eggs, omelets, or a breakfast casserole.
Most importantly, save the bone to make a rich, flavorful stock for future soups and stews.
Safe Storage and Reheating
Cool and refrigerate leftovers within two hours of cooking to prevent bacterial growth. Store in airtight containers for up to 4 days in the refrigerator or up to 2 months in the freezer[USDA].
Reheat slices gently in a skillet or in the oven wrapped in foil with a splash of stock or water. This method prevents the meat from drying out. Ensure the internal temperature reaches 165°F for safe consumption[USDA].
Avoid the microwave, which tends to make the texture rubbery and can heat the meat unevenly.
Take Home Message
Cooking a ham shank doesn’t have to be intimidating. By understanding the cut, choosing the right method, and paying attention to internal temperatures, you can achieve a tender, flavorful centerpiece every time. Whether you opt for oven roasting, braising, or slow cooking, a perfectly glazed ham shank is a rewarding dish that’s sure to impress.
Frequently Asked Questions
How long does it take to cook a ham shank?
Cooking time depends on method and whether the ham is pre-cooked. For a pre-cooked shank in a 325°F oven, plan on about 20 minutes per pound. For a raw shank, allow 25-30 minutes per pound.
A slow cooker takes 6-8 hours on low. Always use a meat thermometer for accuracy, as it is the only true indicator of doneness.
What is the most suitable cooking method for a ham shank?
It depends on your goal. Oven roasting creates a beautiful glazed exterior and is the classic holiday approach. Braising guarantees the most tender, moist meat and is very forgiving for beginners.
The slow cooker method is the easiest and most hands-off, perfect for a weeknight. All three produce excellent results when done correctly.
What is the difference between a shank-end and a butt-end ham?
A ham shank comes from the shank-end of the leg, which is the lower portion. The butt-end is the upper portion of the leg. The butt-end is generally fattier and more tender, while the shank-end is leaner and has a more classic “ham” shape with a single straight bone, making it easier to carve.
Can I use a ham hock instead of a ham shank in these recipes?
No, a ham hock is not a suitable substitute for a ham shank as a main course. A ham hock has very little meat and is primarily bone, skin, and connective tissue. It is best used as a flavoring agent for soups, beans, or greens, while the meaty ham shank is meant to be the centerpiece of a meal.
Do I need to boil a ham shank before baking?
No. Pre-boiling was common for older, heavily salted country hams to reduce saltiness. Modern commercially-cured ham shanks are processed to have a balanced flavor and are ready to go directly into the oven or slow cooker without a pre-boil step.
Can I cook a ham shank from frozen?
It is not recommended. A frozen ham shank cooks unevenly, with the outside becoming overdone before the center reaches a safe internal temperature. Always thaw completely in the refrigerator before cooking for the most consistent and safest results.
Thawing can take 24-48 hours depending on the size.
Oven-Roasted Ham Shank with Brown Sugar Glaze
Equipment
- Roasting pan with a rack Elevates the ham for even air circulation and a crispier exterior.
- Instant-read meat thermometer Essential for accurately checking the internal temperature.
- Basting Brush For applying an even layer of glaze.
- Carving knife and fork For easy slicing and serving.
Ingredients
For the Ham
- 1 pre-cooked, smoked ham shank about 3-4 pounds
- 1/2 cup water or chicken broth
For the Brown Sugar Glaze
- 1/2 cup packed brown sugar
- 2 tbsp Dijon mustard
- 1 tbsp apple cider vinegar
Instructions
- Preheat your oven to 325°F (163°C).
- Place the ham shank on a rack inside a roasting pan. Pour the water or broth into the bottom of the pan to create steam and prevent drying.
- Roast uncovered for approximately 20 minutes per pound, or until an instant-read thermometer inserted into the thickest part of the meat (avoiding the bone) registers about 120°F.
- While the ham is roasting, prepare the glaze. In a small bowl, whisk together the brown sugar, Dijon mustard, and apple cider vinegar until a smooth paste forms.
- During the last 20-30 minutes of cooking, remove the ham from the oven and brush a generous, even layer of the glaze over the entire surface.
- Return the ham to the oven and continue roasting until the glaze is caramelized and bubbly, and the internal temperature reaches the target of 140°F.
- Carefully remove the ham from the oven and transfer it to a carving board. Tent it loosely with foil and let it rest for 10-15 minutes to allow the juices to redistribute.
- Carve the ham against the grain and serve immediately.
Notes
Contents
- Quick Summary
- What Is a Ham Shank?
- How to Choose a Quality Ham Shank
- The Key to a Perfectly Cooked Ham Shank: Temperature and Time
- How to Cook a Ham Shank: 3 Simple Methods
- How to Make a Simple and Delicious Ham Glaze
- Troubleshooting Common Ham Shank Problems
- Serving and Storing Your Cooked Ham Shank
- Take Home Message
- Frequently Asked Questions
- Oven-Roasted Ham Shank with Brown Sugar Glaze