Fat side up or fat side down? It is one of the most debated questions in backyard BBQ, and the answer matters more than most people realize. Getting the orientation wrong can mean the difference between a pork butt with deep, crispy bark and one with a patchy, washed-out surface.
This guide settles the debate based on smoker type, bark formation science, and what actually happens when fat renders over a 10-12 hour cook. The short answer for most setups is fat side down, but the reasoning is what will make your next cook significantly better.
Quick Summary
- Fat Side Down is Best — For most smokers, especially pellet grills and offsets, smoking pork butt fat side down protects the meat from direct heat and allows for superior bark formation on the exposed top surface.
- “Self-Basting” is a Myth — The popular theory that fat side up self-bastes the meat is largely incorrect; rendered fat mostly runs off and can wash away your rub, hindering bark development.
- Smoker Type Matters — Always orient the fat cap towards the primary heat source. Since most smokers have a bottom-up heat source, fat side down is the optimal choice for heat protection and bark.
- Hybrid Method for Bark & Moisture — Consider starting fat side down for bark, then flipping to fat side up when wrapping at the stall (160-170°F) to braise the meat within the wrap.
The Verdict: Should You Smoke Pork Butt Fat Side Up or Down?
For most smokers, especially pellet grills and offsets, smoke your pork butt fat side down. The fat cap protects the meat from direct heat below while the exposed top surface develops a crispier, more even bark. The popular self-basting theory behind fat side up is largely a myth — most rendered fat simply runs off the sides.
Fat Side Down: The Overwhelming Consensus
Fat side down is the recommended orientation for pellet smokers, offset smokers, ugly drum smokers, and most kamado setups. The fat cap acts as a heat shield, protecting the meat from the primary heat source below the cooking grate.
The secondary benefit is superior bark formation. With the fat cap facing down, the top surface of the pork butt stays exposed to dry, smoky air. This is what allows the Maillard reaction and spice polymerization that create a dark, flavorful crust.
If you prioritize rendering fat directly over the meat surface and are less concerned about bark quality, fat side up can work. Just understand the trade-off: the flowing fat will wash away some of your rub.
When Fat Side Up Makes Sense
Fat side up is appropriate when using a smoker with a top-down heat source, which is very uncommon. Some pitmasters also flip to fat side up after wrapping the pork butt as a finishing technique.
Understanding the Pork Butt Fat Cap
The fat cap is the thick, hard layer of subcutaneous fat covering one side of the pork butt. It plays an important role during a long smoke by rendering slowly, providing flavor and moisture protection. Before cooking, trim it to about a quarter-inch thickness so it renders properly without blocking smoke and rub from reaching the meat.
What is the Pork Butt Fat Cap?
The fat cap is a dense layer of white fat that sits between the skin and the muscle on one side of the pork shoulder. On a typical pork butt, it can range from half an inch to over an inch thick. This is subcutaneous fat, different from the intramuscular fat, or marbling, found within the muscle itself.
While marbling melts and keeps the meat internally moist, the external fat cap’s primary value is as a protective barrier and surface flavor contributor. During a long smoke, this fat renders slowly, but it is too thick to penetrate deep into the muscle tissue.
How to Trim the Fat Cap for Smoking
Start with a cold pork butt straight from the refrigerator. Cold fat is firm and much easier to trim cleanly than room-temperature fat. This process should only take 5-10 minutes with a sharp knife.
Use a sharp, flexible boning knife for precision and safety.
A few tools worth having for this cook:
- ThermoMaven Professional Digital Meat Thermometer — check internal temperature when deciding whether to wrap at the stall
- Victorinox Fibrox Curved Boning Knife — flexible blade for trimming the fat cap cleanly without waste
- Bryco Goods Pink Butcher Paper Roll — wrap the pork butt at the stall to push through without softening the bark
Shave the fat cap down until it is about a quarter-inch thick across the entire surface. This thickness is the sweet spot; it’s enough to protect the meat but thin enough to render down nicely without creating a greasy layer.
Optional: Scoring the Fat Cap
Remove any hard, waxy pieces of fat or silver skin, as these will not render during the cook and can create an unpleasant texture. Optionally, score the remaining fat in a shallow diamond or crosshatch pattern. This increases the surface area, helps it render more evenly, and lets your rub penetrate slightly deeper.
 Pitmaster Tip: Save the fat trimmings. They can be rendered into lard for cooking or added to your sausage-making fat ratio. Nothing from a pork butt should go to waste.
The Case for Smoking Fat Side Up
The main argument for smoking a pork butt fat side up is the self-basting theory. As the fat cap renders, melted fat is supposed to flow downward over the meat, keeping it moist throughout the cook. In practice, this effect is minimal and comes with a significant trade-off.
The “Self-Basting” Theory
The traditional logic goes like this: position the fat cap on top, and as it melts during the smoke, gravity pulls the liquid fat down through the meat. This should theoretically keep every bite juicy from top to bottom.
The Reality: Does It Really Baste the Meat?
Meat is primarily water, and fat is oil. They do not mix well due to their different chemical properties. The dense muscle tissue of a pork butt is largely impermeable to external fat, meaning it cannot absorb much of the rendering fat.
In reality, most of the rendered fat simply runs off the exterior of the pork butt and drips into the drip pan below. The actual moisture in pulled pork comes from the breakdown of internal collagen into gelatin, not from fat dripping over the top.
The Downside: Washing Away Your Rub
As fat renders and flows downward, it acts like a solvent, washing away the carefully applied spice rub. This leads to patchy, uneven bark and significantly less flavor on the surface of the finished pork butt. The rub is what creates bark, and without it, you lose the foundation of bark formation entirely.
 Quick Facts: The “self-basting” effect of smoking fat side up is largely a myth, as rendered fat does not significantly penetrate the meat and often washes away the rub, hindering bark development.
The Case for Smoking Fat Side Down
Smoking a pork butt fat side down is the preferred method for two critical reasons. The fat cap acts as a heat shield, protecting the meat from direct heat that rises from below in most smokers. It also leaves the top surface free to develop the deep, crispy bark that defines great pulled pork.
Protecting the Meat from the Heat Source
Most popular smokers, including pellet grills and offsets, generate heat from below the cooking grate. Over a 10-12 hour cook at 225-250°F, the bottom of the pork butt takes the most punishment.
The fat cap serves as a natural insulator in this position. It absorbs and deflects the most intense heat, preventing the bottom from drying out or developing a tough, overcooked layer. This ensures the entire cut cooks more evenly.
Building a Superior Bark
Bark formation is a complex chemical process that requires a relatively dry surface. It’s the result of two key reactions: the Maillard reaction and the polymerization of spices from your rub. Both need direct exposure to dry, smoky air to occur properly.
With the fat cap facing down, the top surface — the “money side” — stays exposed and relatively dry. The rub remains undisturbed, allowing it to form a crust. The result is a dark, crisp bark packed with concentrated flavor, which is the biggest practical advantage of the fat side down method.
How Your Smoker Type Changes the Game
Your smoker’s heat source location is the single biggest factor in deciding fat cap orientation. The general rule is simple: position the fat cap toward the primary heat source. For most smokers, that means fat side down.
Match Fat Cap Orientation to Your Smoker’s Heat Flow
Always smoke fat side down on a pellet smoker or offset smoker. The heat source — the fire pot in a pellet grill, the firebox in an offset — sits directly below or feeds heat upward beneath the cooking grate. The fat cap is a necessary shield in this configuration.
The convection airflow in these smokers also helps to dry the top surface of the meat, further enhancing bark formation when it’s unobstructed. This applies to brands like Traeger, Pit Boss, Camp Chef, and any stick burner. Fat side down, every time.
Kamado and Vertical Smokers (Radiant/Indirect Heat)
Fat side down is still preferred for kamado and vertical smokers, though it is less critical for heat protection. These smokers typically use a heat deflector plate or a water pan that creates more even, indirect heat throughout the cooking chamber.
Even with this diffused heat, the primary thermal current is still upward. The bark formation benefit remains the main reason to go fat side down. Keeping the top surface dry and exposed produces a far better crust than the self-basting approach of fat side up.
The Hybrid Method: Flipping Your Pork Butt
The hybrid method starts the pork butt fat side down to establish bark during the unwrapped phase, then flips to fat side up after wrapping. This aims to combine the bark benefits of fat side down with a final rendering phase. Most pitmasters flip at the wrap, when the internal temperature hits 160-170°F.
The Strategy: Best of Both Worlds?
Phase 1 runs fat side down for the first 4-6 hours. This is the unwrapped bark-building phase where surface dryness and rub adhesion matter most.
Phase 2 begins when you wrap the pork butt in foil or butcher paper. At this point, flip it so the fat side faces up. Inside the wrap, the rendering fat can braise the meat in a contained environment rather than running off into the drip pan, potentially adding some richness to the braising liquid.
When to Flip
The ideal time to flip is when you wrap the pork butt. This is typically when the internal temperature stalls, usually between 160°F and 170°F. By this point, the bark has set on the top surface.
A “set” bark is firm to the touch and won’t smudge or tear off when handled, making it durable enough for the moist environment inside the wrap. Do not flip an unwrapped pork butt mid-cook, as this risks ruining the crust.
Quick Facts: The hybrid method involves smoking fat side down initially for bark development, then flipping to fat side up when wrapping at the stall (160-170°F) to allow the fat to braise the meat within the wrap.Step-by-Step Smoked Pork Butt Recipe
This step-by-step recipe applies the fat-side-down principles for a perfect result on any smoker with bottom-up heat. We’ll guide you through trimming, seasoning, smoking to the stall, wrapping, and the crucial resting phase for tender, shreddable pulled pork. Plan for a total time of 10-14 hours from prep to pulling.
Step 1: Preparation and Seasoning
Start with a cold 8-10 lb bone-in pork butt and trim the fat cap to a uniform 1/4-inch thickness. Apply a thin layer of a binder like yellow mustard or olive oil. Coat all sides generously with your favorite pork rub.
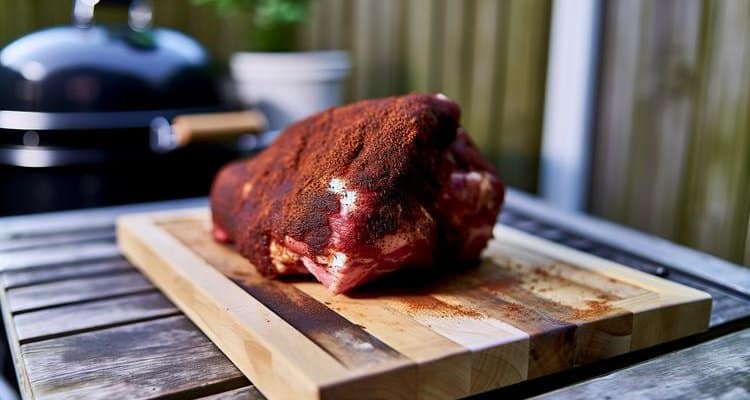
Let the seasoned butt sit for 15-30 minutes while your smoker comes to temperature, which can take another 15-25 minutes.
Step 2: Smoking and Bark Formation
Preheat your smoker to 225-250°F using a mild wood like apple, cherry, or hickory. Place the pork butt directly on the grate, fat side down. Let it smoke undisturbed for the first 3-4 hours.
This allows the bark to begin setting properly without interruption. Check your smoker temperature every 45-60 minutes to ensure it remains stable.
Step 3: The Stall and The Wrap
After about 5-7 hours, the internal temperature will likely stall around 165°F due to evaporative cooling. This phase can last anywhere from 2 to 6 hours. Once the bark is a deep mahogany color and firm to the touch, it’s time to wrap.
You can use aluminum foil for a faster cook and softer bark, or use butcher paper to better preserve the bark’s texture.
Step 4: Finishing the Cook
Place the wrapped pork butt back in the smoker. Continue cooking until the internal temperature reaches 195-205°F. While this higher temperature is for tenderness, always confirm the pork has reached a food-safe minimum of 145°F[USDA] during the cook.
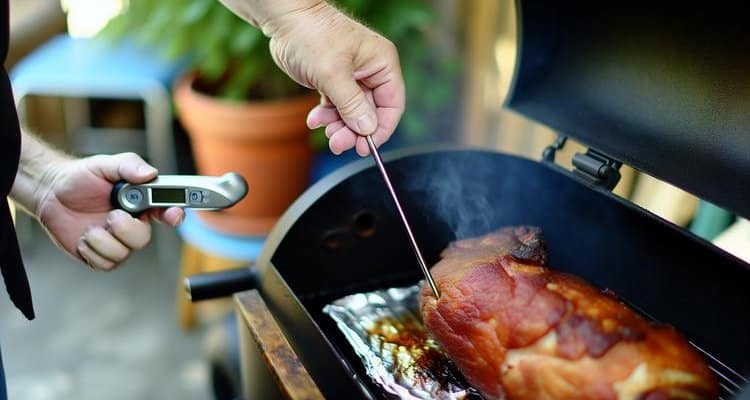
The most important indicator of doneness is probe tenderness. A thermometer probe should slide into the thickest part of the meat with almost no resistance, like going into warm butter. This final stage can take another 2 to 4 hours.
Step 5: The Crucial Rest
This step is non-negotiable. Remove the pork butt from the smoker and let it rest, still wrapped, in a dry cooler or an oven that is turned off. Rest for at least one hour, and ideally 2-4 hours.
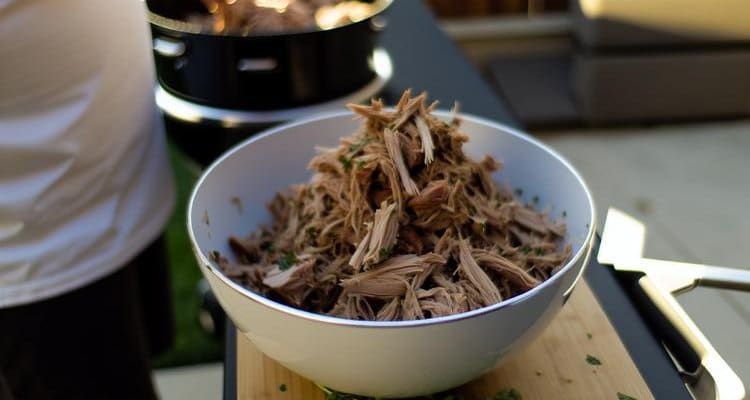
This allows the muscle fibers to relax and reabsorb juices, resulting in a much moister final product. The pork will stay safely hot in a cooler for up to 4 hours.
Smoked Pork Butt Timeline and Temperature Chart
| Stage | Smoker Temp | Target Internal Temp | Estimated Time | Notes |
|---|---|---|---|---|
| Smoking (unwrapped) | 225-250°F | 165°F (the stall) | 5-7 hours | Place fat side down. Do not spritz for the first 3-4 hours to allow bark to set. |
| Smoking (wrapped) | 225-250°F | 195-205°F (probe tender) | 2-4 hours | Wrap in foil or butcher paper. Optional: flip to fat side up inside the wrap. |
| Resting | N/A (in cooler) | Allow temp to drop to 150-160°F | 1-4 hours | Keep wrapped in a dry cooler or turned-off oven. Do not skip this step. |
What Is the Best Wood for Smoking Pork Butt?
Mild to medium woods work best for pork butt. Apple, cherry, and pecan offer a subtle sweetness that complements the pork without overpowering it, while hickory and oak provide a more classic, robust smoke flavor. Avoid strong woods like mesquite, which can be too intense for a long cook.
How Long Should You Rest a Pork Butt?
Resting is crucial for juicy pulled pork. A minimum of one hour is required, but resting for 2-4 hours is ideal as it allows the muscle fibers to relax and reabsorb moisture. Keep the wrapped pork butt in a dry cooler to maintain a safe holding temperature.
What Is the Ideal Internal Temperature for Pulled Pork?
The target internal temperature for pulled pork is between 195°F and 205°F. While the pork is food-safe at 145°F, it won’t be tender enough to shred until the connective tissues break down into gelatin. This happens at these higher temperatures, so always prioritize probe tenderness over a specific number.
Take Home Message
The debate over fat side up or down for smoking pork butt is settled: fat side down is superior for most smokers. This orientation protects the meat from direct heat and promotes the best bark formation.
While the “self-basting” theory of fat side up is largely a myth, a hybrid approach can be used by flipping the butt fat side up after wrapping to enhance moisture within the foil or butcher paper.
Printable Smoked Pork Butt Recipe
Smoked Pork Butt Fat Side Down
Equipment
- Smoker Pellet grill, offset, or kamado style
- Boning Knife For trimming the fat cap
- Instant-read thermometer Essential for monitoring internal temperature
- Foil or Butcher Paper For wrapping the pork butt during the stall
Ingredients
The Pork
- 1 bone-in pork butt (Boston butt) 8-10 lbs
The Rub & Binder
- 2 tbsp yellow mustard as a binder (optional)
- 1/2 cup BBQ pork rub your favorite store-bought or homemade blend
Instructions
- Start with a cold pork butt. Using a sharp boning knife, trim the fat cap down to an even quarter-inch thickness. Optionally, score the fat in a shallow diamond pattern to help it render.
- Apply a thin layer of yellow mustard over the entire surface of the pork butt to act as a binder for the rub. Season generously on all sides with your BBQ pork rub.
- Preheat your smoker to 225-250°F. Place the pork butt directly on the smoker grate with the fat side down.
- Smoke for 4-6 hours, or until a dark, mahogany bark has formed and the internal temperature reaches 160-170°F. This is the unwrapped phase where bark development is critical.
- Once the bark is set, wrap the pork butt tightly in two layers of heavy-duty foil or butcher paper. If using the hybrid method, you can flip it fat side up at this stage.
- Return the wrapped pork butt to the smoker and continue cooking until the internal temperature reaches 203-205°F and a probe slides in with no resistance. This can take another 3-6 hours.
- Remove the pork butt from the smoker and let it rest, still wrapped, in a dry cooler or on a countertop for at least 1 hour. Do not skip this step, as it allows the juices to redistribute.
- After resting, unwrap the pork butt, remove the bone (it should slide out cleanly), and shred the meat using forks or meat claws. Serve immediately.
Notes