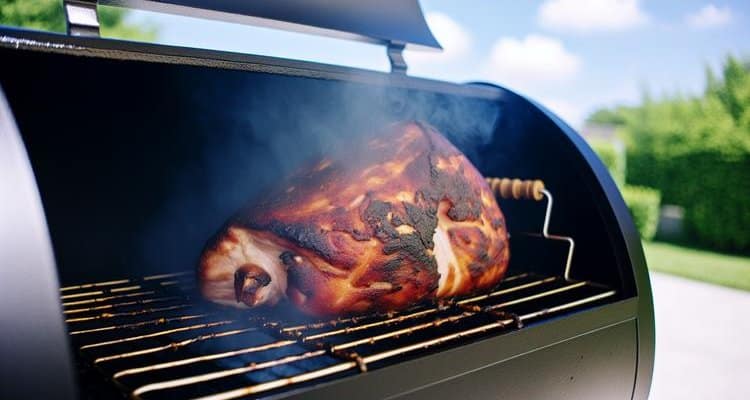
Perfectly smoked beef short ribs represent one of the most rewarding achievements in backyard barbecue. When done right, these massive cuts transform into tender, fall-off-the-bone masterpieces with a beautiful mahogany bark and a pronounced smoke ring that rivals even the best brisket.
This comprehensive guide will walk you through every step of smoking beef short ribs, from understanding the different cuts available to mastering the probe-tender test that ensures perfect doneness. Whether you’re a complete beginner or an experienced pitmaster looking to refine your technique, you’ll learn the WHY behind each step—not just the how.
Smoking beef short ribs requires patience (expect a 6-8 hour cook), but the process is surprisingly forgiving for beginners. Unlike some cuts that demand precision timing, beef ribs signal their doneness through texture rather than strict temperature, making them an excellent choice for learning low-and-slow smoking techniques.
Beginner Tip: Don’t let the long cook time intimidate you. Most of this is hands-off time where the smoker does the work. You’ll spend more time waiting than actively managing the cook.
Quick Reference
- Prep Time: 20 minutes
- Cook Time: 6-8 hours
- Smoker Temp: 250-275°F
- Internal Temp: 205-210°F
- Wood Choice: Oak, Pecan, Mesquite
- Skill Level: Beginner-Friendly
Understanding Beef Ribs: A Guide to the Different Cuts
Before you head to the butcher, it’s crucial to understand that “beef ribs” is a broad category with several distinct cuts. Choosing the right cut dramatically affects your final results, cooking time, and even your budget.
What Are Beef Short Ribs?
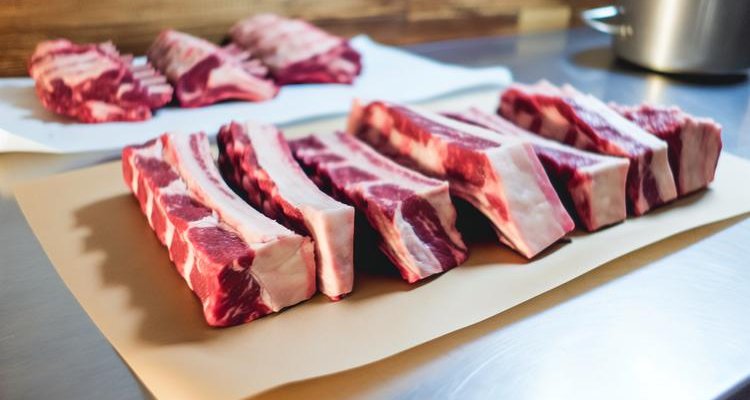
Beef short ribs come from the lower section of the cow’s rib cage, where the rib bones connect to the brisket. Unlike beef back ribs (which are stripped from prime rib roasts and have minimal meat), short ribs boast thick meat coverage that makes them ideal for low-and-slow smoking.
The meat on beef short ribs is heavily marbled with intramuscular fat and contains substantial connective tissue. This is exactly why they excel in the smoker—the long, slow cooking process breaks down that tough collagen into gelatin, creating an incredibly tender, juicy final product with flavor that rivals brisket.
Plate Short Ribs (The “Dino Ribs”)
These are the show-stoppers you’ve seen at barbecue competitions and high-end BBQ restaurants. Plate short ribs (also called beef plate ribs) come from ribs 6-8 in the lower rib section. They feature massive bones covered in 3-5 inches of thick, heavily marbled meat.
Why they’re ideal for smoking: The thick meat coverage means they stay moist throughout extended cooking times, and the abundant marbling melts into the meat, creating unmatched flavor and texture. These are what most pitmasters mean when they talk about smoking beef short ribs.
Where to find them: You’ll rarely find these pre-cut at grocery stores. Ask your butcher specifically for “beef plate ribs” or “dino ribs.” Expect to pay premium prices ($8-12 per pound), but the results justify the investment.
Chuck Short Ribs
These come from the chuck section (ribs 1-5) higher up on the cow. They’re shorter than plate ribs with slightly less meat coverage, but they still feature excellent marbling that makes them well-suited for smoking.
Chuck short ribs are easier to find than plate ribs and typically cost less ($6-9 per pound). While they don’t have the dramatic presentation of plate ribs, they deliver exceptional flavor and tenderness when smoked properly. They’re an excellent choice for your first attempt at smoking beef ribs.
Beef Back Ribs
Back ribs come from the upper rib cage where the ribeye roast is cut. When the ribeye is removed, these long bones are left with minimal meat coverage—think of them as the skeleton left behind after the prize cut is taken.
Why we don’t recommend them for smoking: The thin meat coverage dries out easily during long smokes. Back ribs are better suited for faster cooking methods like grilling. If someone offers you beef ribs cheaply, they’re likely back ribs—save your smoking efforts for short ribs instead.
| Cut Type | Location | Meat Coverage | Best Use | Average Price |
|---|---|---|---|---|
| Plate Short Ribs | Ribs 6-8 (lower section) | Very thick (3-5 inches) | Smoking, Competition BBQ | $8-12/lb |
| Chuck Short Ribs | Ribs 1-5 (chuck section) | Thick (2-3 inches) | Smoking, Braising | $6-9/lb |
| Beef Back Ribs | Upper rib cage | Thin (minimal) | Grilling, Roasting | $4-7/lb |
Pro Insight: For your first smoke, chuck short ribs offer the best balance of availability, price, and forgiving cooking characteristics. Once you’ve mastered the technique, upgrade to plate ribs for competition-quality results.
Selecting and Preparing Beef Short Ribs
Buying Guide: Where to Find Quality Beef Short Ribs
Finding beef short ribs—especially plate ribs—requires more effort than grabbing a pack of pork ribs from the grocery store.
Butcher Shops vs. Grocery Stores
Local Butcher Shops: Your best bet for plate short ribs. Call ahead and ask them to cut beef plate ribs (ribs 6-8) or “dino ribs.” Many butchers keep these cuts in back and will prepare them to order. Build a relationship with your butcher—they’ll save premium cuts for regular customers.
Grocery Stores: You’re more likely to find chuck short ribs here, usually cut into individual bones or English-style (parallel to the bone). These work fine for smoking, though they lack the dramatic presentation of plate ribs. Warehouse stores like Costco occasionally carry plate ribs, especially during summer grilling season.
What to ask for: Be specific: “beef plate short ribs, ribs 6-8, with the bones attached.” If you ask for just “short ribs,” you might get English-cut or flanken-style (cut across the bones), which aren’t ideal for smoking.
Quality Indicators
Look for these signs of quality when selecting beef ribs:
- Thick meat coverage: You want at least 2 inches of meat on top of the bones, ideally 3-4 inches for plate ribs.
- Good marbling: Visible white fat streaks throughout the red meat indicate flavor and moisture.
- Bright red color: Fresh beef should be cherry red, not brown or gray.
- Minimal external fat: A thin fat cap (1/4 inch) is fine, but excessive exterior fat should be trimmed.
Understanding USDA beef grades helps you make informed selections. Choice grade offers excellent value with good marbling, while Prime grade (if budget allows) delivers maximum marbling and tenderness.
Quantity Per Person
Plan on 1-1.5 pounds of raw beef short ribs per person. These massive ribs shrink significantly during the long cook as fat renders and moisture escapes, but the bones are heavy. A full rack of 3 plate ribs (6-9 pounds) comfortably feeds 4-6 people with leftovers.
Preparation Steps
Step 1: Trimming
Proper trimming ensures even cooking and better bark formation. You’ll need a sharp boning knife for this task.
Remove Excess Fat from the Meaty Side: Trim the thick fat cap down to about 1/4 inch. Here’s why this matters: fat doesn’t render fully during smoking like it does with brisket. Thick exterior fat prevents smoke penetration and your rub from adhering to the meat. It also doesn’t add moisture to the final product—the intramuscular marbling handles that job.
Use your knife to remove any hard chunks of fat while preserving the thin, even fat cap that will protect the meat during the cook.
Remove the Membrane from the Bone Side: Flip the ribs over and you’ll see a shiny, tough membrane covering the bones (similar to pork ribs). This membrane acts as a barrier that prevents seasoning penetration and smoke absorption, plus it turns rubbery when cooked.
To remove it: Slide a butter knife or your finger under the membrane at one end to loosen it, then grip it with a paper towel for traction and peel it off in one sheet. It should come away relatively easily—if it doesn’t, the ribs might be too cold. Let them warm up a bit and try again.
Step 2: Bringing to Room Temperature
Let your trimmed ribs sit at room temperature for 30-45 minutes before seasoning and smoking. This step isn’t just tradition—it has real benefits:
- Even cooking: Cold meat from the refrigerator creates temperature gradients. The outside cooks faster than the frigid interior, leading to uneven doneness.
- Better smoke absorption: Room-temperature meat develops a sticky surface (called a pellicle) that holds smoke better than cold, wet surfaces.
- Faster initial cook: Starting closer to smoking temperature means less time getting up to temp and more consistent results.
Food safety note: 30-45 minutes at room temperature is perfectly safe for whole cuts of meat. The USDA’s danger zone concerns apply primarily to ground meat and longer time periods (2+ hours).
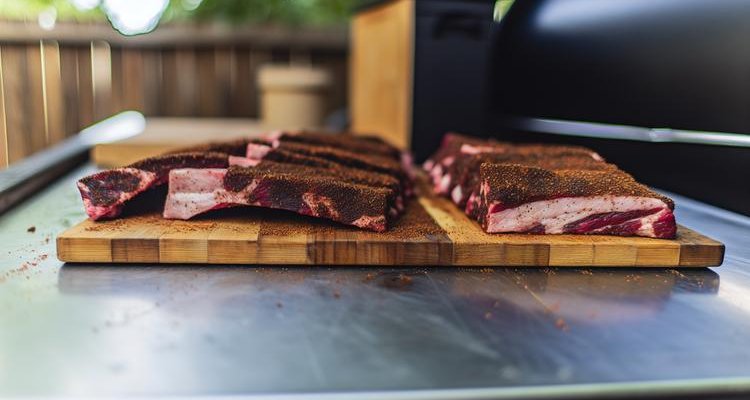
Step 3: Applying Binder and Seasoning
The Binder: Before applying your rub, coat the ribs with a thin layer of binder. Common choices include yellow mustard, hot sauce, worcestershire, or olive oil. The binder serves two purposes: it helps the rub stick to the meat, and mustard/hot sauce adds a subtle flavor layer (don’t worry—you won’t taste mustard in the final product).
The SPG Rub (Salt, Pepper, Garlic): For your first cook, we recommend keeping it simple with a classic SPG rub. This minimal seasoning lets the beef flavor shine through while the salt enhances the meat’s natural taste and aids in bark formation.
Simple SPG Recipe:
- 1 part coarse black pepper (freshly ground)
- 1 part coarse kosher salt
- 1/2 part granulated garlic (not garlic salt)
Mix thoroughly and apply liberally to all sides of the ribs. Don’t be shy—the thick meat can handle aggressive seasoning. Press the rub into the meat so it adheres well.
Alternative seasoning profiles: Once you’ve mastered the basics, experiment with coffee rubs (adds earthy depth), Korean-inspired gochujang glazes, or herb-crusted variations. But SPG is the foundation that every pitmaster should master first.
Dry Brining (Optional): For next-level results, apply the SPG rub and refrigerate uncovered overnight. This dry brine allows salt to penetrate deep into the meat while the surface dries out slightly, promoting better bark formation. If you try this method, remember to bring the ribs to room temp before smoking.
Pro Insight: The simplicity of SPG isn’t boring—it’s strategic. Complex rubs can become bitter during 6-8 hour cooks, while salt, pepper, and garlic develop deeper, more complex flavors over time.
Essential Equipment for Smoking Beef Short Ribs
You don’t need an arsenal of expensive gear to smoke exceptional beef ribs, but having the right tools makes the 6-8 hour process significantly easier and more reliable.
Choosing Your Smoker
The good news: beef short ribs are forgiving enough that they’ll turn out well on virtually any smoker. The key is maintaining steady temperatures in the 250-275°F range for extended periods.
Offset Smokers
Best for: Traditional smoke flavor and learning fire management. The separate firebox allows you to add fuel without disturbing the meat, and they excel at producing clean smoke. However, they require more attention to maintain consistent temps during an 8-hour cook.
Pellet Grills
Best for: Set-it-and-forget-it convenience. Digital temperature control makes maintaining 250°F effortless, freeing you up for other tasks. The trade-off is slightly less intense smoke flavor compared to stick burners, though the results are still excellent.
Kamado Grills (Big Green Egg, Kamado Joe)
Best for: Fuel efficiency and temperature stability. These ceramic cookers hold steady temps for hours on minimal charcoal. They’re particularly good for overnight cooks, though the smaller cooking surface limits how many rib racks you can fit.
Kettle Grills
Best for: Budget-conscious pitmasters. A basic Weber kettle using the snake method or two-zone setup can absolutely produce competition-quality beef ribs. You’ll need to tend the fire more frequently, but the results prove you don’t need expensive equipment for great barbecue.
Required Tools
Meat Thermometer (Critical): You need both instant-read and leave-in probe capabilities. Wireless meat thermometers let you monitor internal temp without opening the smoker, preventing heat loss during the long cook. Budget at least $30-50 for a reliable thermometer—this is not the place to cheap out.
Why both types matter: The leave-in probe tracks temp trends throughout the cook, while the instant-read lets you check multiple spots when testing for doneness. Temperature monitoring is how you’ll know when to wrap, when to unwrap, and when the ribs are truly finished.
Sharp Boning Knife: Essential for trimming excess fat from the meaty side and removing the membrane from the bone side. A dull knife makes these tasks frustrating and dangerous.
Aluminum Foil or Butcher Paper: For the optional Texas Crutch wrap that powers through the stall (more on this in the smoking process section). Butcher paper allows some moisture to escape while still speeding up the cook, while foil creates a completely sealed environment.
Spray Bottle: Fill with apple cider vinegar, beef broth, or water for spritzing the ribs during the cook. This adds flavor, helps bark formation, and keeps the surface moist.
Heat-Resistant Gloves: For handling hot meat during wrapping, unwrapping, and final prep. Silicone gloves work better than cloth ones for grip and cleanup.
Wood Selection
Wood choice dramatically affects your final flavor profile. For beef ribs, you want woods that complement rather than overpower the rich, beefy flavor.
Best Primary Woods:
- Oak: The classic choice for Texas-style beef ribs. Provides steady, medium smoke flavor that lets the beef shine through. Burns long and clean.
- Pecan: Similar to hickory but slightly milder and sweeter. Excellent balance for beef without becoming bitter during long cooks.
- Mesquite: Bold and intense—use sparingly or blend with milder woods. Pure mesquite can become acrid over 6+ hours, but small amounts add distinctive Southwestern character.
Accent Woods (Use Sparingly):
- Cherry or Apple: Add a subtle fruity sweetness and enhance the mahogany color of the bark. Use as 20-30% of your total wood, not as the primary smoke source.
For comprehensive guidance on matching woods to different meats and flavor profiles, see our complete wood selection guide.
How much wood you’ll need: For a 6-8 hour cook, plan on 4-6 chunks (fist-sized pieces) for most smokers. You want thin, blue smoke—not thick white billows. Add wood primarily in the first 3-4 hours when the meat absorbs smoke most readily.
Beginner Tip: Start with oak or a oak-cherry blend for foolproof results. You can always experiment with bolder woods like mesquite once you’ve dialed in your technique.
Smoking Temperature and Time Guidelines
The Science Behind Low and Slow
Understanding WHY beef short ribs need extended cooking times transforms you from following recipes to truly understanding barbecue.
Beef short ribs contain abundant connective tissue (collagen) that makes them initially tough. This collagen only breaks down into gelatin—creating that melt-in-your-mouth texture—when held at temperatures above 160°F for extended periods. Rush the cook with high heat, and you’ll end up with tough, chewy ribs regardless of internal temperature.
The “low and slow” method (250-275°F for 6-8 hours) gives collagen time to dissolve gradually while rendering intramuscular fat. This simultaneous breakdown creates ribs that are probe-tender, juicy, and deeply flavorful. It’s chemistry, not magic—but the results feel magical.
Temperature Guidelines
Your smoker temperature choice affects both cook time and final texture. Here’s how different temperature ranges perform:
| Smoker Temp | Cook Time Estimate | Best For | Fuel Consumption |
|---|---|---|---|
| 225°F | 8-10 hours | Maximum tenderness, deepest smoke | Low |
| 250°F (Recommended) | 6-8 hours | Best balance of time and results | Medium |
| 275°F | 5-6 hours | Faster cook, still excellent quality | High |
Our recommendation: 250°F hits the sweet spot. It’s fast enough that you can start in the morning and eat by dinner, yet slow enough for full collagen breakdown and smoke absorption. Lower temps (225°F) produce marginally better results but add 2+ hours to the cook. Higher temps (275°F) work fine but leave less margin for error.
Internal Temperature Targets
Here’s the crucial truth: internal temperature alone doesn’t tell you when beef ribs are done. You must combine temp monitoring with the probe-tender test (explained below). Here’s what’s happening at each temperature milestone:
| Internal Temp | Stage | What’s Happening | Action |
|---|---|---|---|
| 145°F | Early Cook | Proteins coagulating, moisture loss beginning | Monitor and maintain smoker temp |
| 160-170°F | The Stall | Evaporative cooling plateaus temp, collagen starts breaking down | Patience or wrap (optional) |
| 195°F | Approaching Done | Collagen rapidly converting to gelatin | Start probe testing every 15-20 mins |
| 205-210°F | Target Range | Full tenderness achieved, maximum gelatin conversion | Perform probe-tender test |
The “Probe Tender” Test
This is the skill that separates mediocre from exceptional beef ribs. Temperature tells you when to START testing for doneness—the probe test tells you when they’re actually finished.
How to test properly: Insert your instant-read thermometer or a thin skewer into the thickest part of the meat between bones. When the ribs are truly done, the probe should slide in and out with minimal resistance—literally “like butter.” You should feel no tug or fiber resistance, just smooth entry and exit.
What “butter” texture feels like: If you’ve ever stuck a probe into room-temperature butter or warm cream cheese, that’s the exact sensation you’re looking for. Compare this to probing raw meat (lots of resistance) or medium-rare steak (some resistance)—done beef ribs offer almost none.
Check multiple spots: Test 3-4 different locations between bones. Thick cuts cook unevenly, so one probe-tender spot doesn’t guarantee the whole rack is finished. Every test location should feel buttery before you pull the ribs.
Beginner Tip: Your first few cooks, you might pull ribs too early because you’re uncertain about the probe test. If in doubt, give them another 20-30 minutes. It’s nearly impossible to overcook beef short ribs if you’re staying at 250°F—the worst that happens is they become slightly MORE tender.
The Complete Smoking Process: Step by Step
Phase 1: Preparation (30-45 minutes before)
Step 1: Preheat Your Smoker
Start your smoker and bring it to a stable 250°F at least 30 minutes before adding meat. Stabilizing temperature is crucial—many smokers take time to settle into their target range.
Why preheating matters: Adding meat to a still-climbing smoker means the ribs experience temperature fluctuations during the critical first hour when they absorb the most smoke. A stable environment from the start ensures even cooking and consistent results.
Wood placement: For stick burners and charcoal smokers, add your wood chunks to the coals once you hit 225°F. For pellet grills, ensure your hopper is full. The first 3-4 hours are when ribs absorb the most smoke, so heavy smoke early makes the biggest impact.
Water pan setup: If your smoker has a water pan, fill it with hot water. This serves dual purposes: moderating temperature swings and adding humidity that helps smoke adhere to the meat. Some pitmasters skip the water pan for crustier bark—both approaches work.
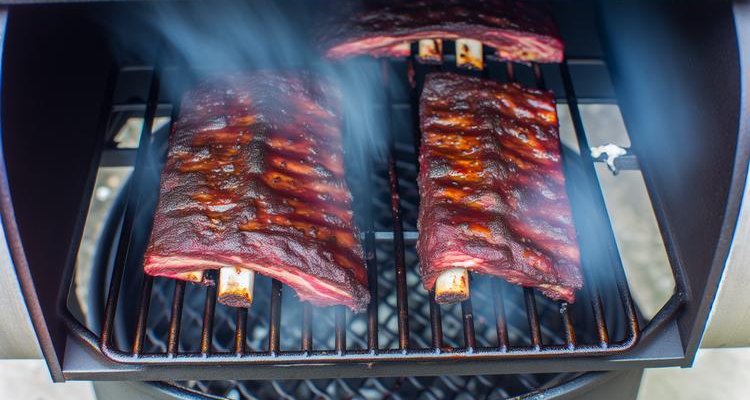
Step 2: Place Ribs on Smoker
Meat side up placement: Position your seasoned ribs meat-side up on the grate. This orientation allows fat to render down through the meat rather than dripping away, while the bones protect the bottom from direct heat.
Spacing for airflow: Leave 1-2 inches between rib racks if smoking multiple pieces. Crowding restricts airflow and creates temperature variations. Good smoke flow around all sides ensures even cooking and bark development.
Insert probe thermometer: Place your leave-in probe in the thickest part of the meat, avoiding bone contact (bone conducts heat differently than meat, giving false readings). Position the probe so you can read the display without opening the smoker.
Phase 2: The Initial Smoke (Hours 1-3)
Step 3: Building the Bark
The first 2-3 hours are critical for smoke absorption and bark formation. Here’s what’s happening and why these hours matter most:
Smoke development: Cold, moist meat surfaces absorb smoke compounds readily. As the exterior dries and forms a pellicle (that tacky surface layer), smoke adheres even better. This is when your ribs develop that signature smoke ring just under the surface.
Bark formation begins: The rub’s salt draws moisture to the surface where it evaporates, leaving concentrated seasoning behind. This creates the foundation for bark—that dark, flavorful crust that defines great barbecue.
Resist opening the lid: Every time you open the smoker, you lose heat and smoke. Temperature drops of 30-50°F reset your progress and extend cook time. “If you’re lookin’, you ain’t cookin'” is BBQ wisdom for a reason. Trust your temperature probes and leave the lid closed.
What the ribs should look like: By hour 3, expect a dark reddish-brown exterior with a dry, slightly tacky surface. The meat will have darkened significantly from its raw state, and you might see the first hints of a dark crust forming.
Phase 3: The Stall (Hours 3-5)
Step 4: Managing the Stall
Around 160-170°F internal temperature, your ribs will hit “the stall”—a frustrating plateau where temperature stops rising for 1-2 hours despite consistent smoker temp. Understanding the stall prevents panic and poor decisions.
What is the stall and why it happens: As moisture evaporates from the meat’s surface, it creates evaporative cooling—the same effect that makes you feel cold when wet. This cooling effect exactly counterbalances the heat you’re applying, causing temperature to plateau. It’s physics, not a problem with your smoker.
The stall is actually beneficial: During this period, collagen breakdown accelerates while bark continues developing. Don’t view the stall as wasted time—critical tenderization is happening even when temperature isn’t climbing.
Spritzing Technique (Optional)
Many pitmasters spritz ribs every 45-60 minutes during the stall to keep the surface moist and add flavor. Fill a spray bottle with apple cider vinegar, beef broth, or a 50/50 mix of both.
Benefits of spritzing: Adds moisture that helps smoke particles stick, contributes subtle flavor, and can slightly speed up the cook by adding liquid that needs to evaporate. The acidity in vinegar also helps tenderize the exterior.
Downside: Opening the smoker to spritz releases heat. If you spritz, be quick—open, spray, close in under 10 seconds.
Step 5: Wrapping Technique (Optional)
The Texas Crutch—wrapping ribs in foil or butcher paper—powers through the stall by eliminating evaporative cooling. It’s optional but cuts 1-2 hours off your cook time.
When to wrap: Once you’ve achieved good bark development (usually at 165-170°F after 4-5 hours), you can wrap. Don’t wrap earlier or you’ll sacrifice bark quality. The meat has absorbed most of its smoke by this point, so wrapping doesn’t cost you smoke flavor.
Foil vs. butcher paper comparison:
- Aluminum foil: Creates a completely sealed, moist environment. Speeds up the cook most dramatically but can soften bark. Add 1/2 cup of beef broth or the drippings from your drip pan when wrapping for extra moisture and flavor.
- Butcher paper: Allows some moisture to escape while still breaking the stall. Preserves bark texture better than foil while still speeding up the cook. This is the competition BBQ standard.
For detailed guidance on wrapping techniques, temperatures, and timing, see our comprehensive guide on wrapping methods for barbecue.
How to wrap properly: Lay out two long sheets of foil or paper in a cross pattern. Place ribs meat-side up in the center, add liquid if using foil, then fold tightly to seal. Return to the smoker and continue cooking until probe-tender.
Pro Insight: Beginners often wrap too early trying to save time, which costs them bark quality. Wait until you see a dark, set crust before wrapping—that crust won’t improve after wrapping, so make sure it’s where you want it first.
Phase 4: Final Push to Tenderness (Hours 5-8)
Step 6: Cooking to Probe Tender
After the stall (whether you wrapped or powered through unwrapped), temperature will start climbing again. This final phase is where patience pays off.
Continuing past the stall: If you wrapped, the temperature climbs quickly now—sometimes 10-15°F per 30 minutes. If you went unwrapped, it climbs more slowly but still progresses steadily.
Monitoring internal temperature: Watch for that 195°F mark—that’s your signal to start active monitoring and probe testing. Don’t rely solely on time estimates; every rack of ribs is different based on thickness, marbling, and initial temp.
Beginning probe tests at 195°F: Once you hit 195°F, start checking for probe tenderness every 15-20 minutes. Insert your probe in multiple spots between bones. You’re looking for that butter-smooth glide with zero resistance.
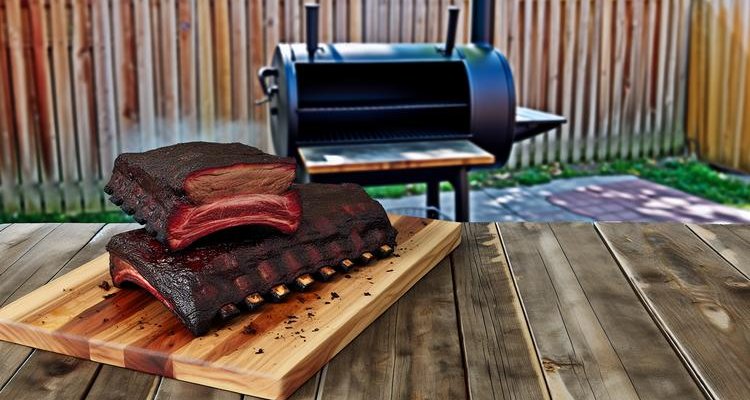
How to know they’re truly done: When every probe location between bones slides in effortlessly, and the meat has pulled back from the bones by 1/4 to 1/2 inch, your ribs are finished. The target temp is usually 205-210°F, but some racks achieve probe tenderness at 203°F while others need 212°F. Trust the probe test over the thermometer.

Phase 5: Resting and Serving
Step 7: The Critical Rest Period
You’ve invested 6-8 hours smoking these ribs—don’t sabotage your work by skipping the rest. Resting is not optional; it’s when the magic happens.
Why resting matters: During the long cook, moisture has been driven toward the center of the meat as the exterior heated up. Resting allows those juices to redistribute evenly throughout the meat. Cut immediately and juice flows out onto your cutting board instead of staying in the meat.
Additionally, the meat’s proteins are tightly contracted from heat. Resting lets them relax, resulting in more tender, juicier bites.
How to rest properly: If you wrapped, keep the ribs wrapped. If unwrapped, wrap loosely in foil now. Place the wrapped ribs in a dry cooler (no ice) or an unheated oven. This insulated environment maintains temperature while the internal juices redistribute.
Minimum rest time: 30 minutes—this is acceptable and much better than no rest, but not ideal.
Ideal rest time: 1 hour—this is the sweet spot where juice redistribution is complete and the meat is still hot enough to serve.
You can rest beef ribs for up to 2 hours in a cooler without significant temperature loss. They’ll still be steaming hot when you unwrap them.
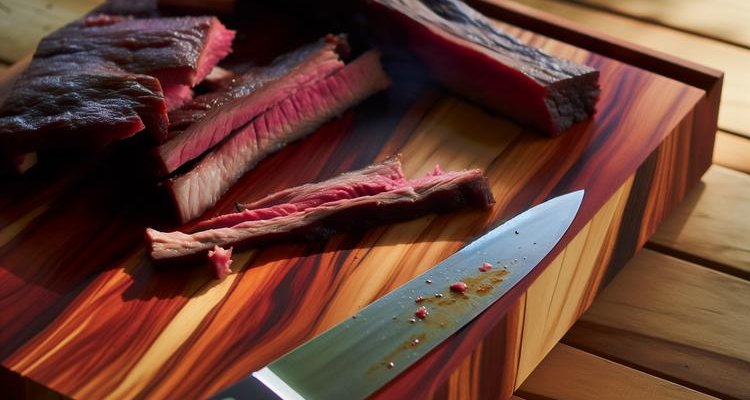
Step 8: Slicing and Serving
How to slice between bones: Beef short ribs are typically served as individual bones rather than sliced like brisket. Use a sharp knife to cut between each bone, following the natural divisions. The meat should be so tender that minimal sawing is required.
For plate ribs with massive bones, you can also slice the meat off the bones in thick slices, then portion it out—similar to how you’d serve prime rib.
Serving suggestions: Beef ribs are rich and substantial, so they pair well with lighter sides that provide contrast. Classic choices include creamy coleslaw, tangy pickles, simple white bread (for soaking up drippings), or grilled vegetables. Mac and cheese and baked beans work too, though they’re equally rich.
Sauce recommendations (optional): Honestly, properly smoked beef ribs don’t need sauce—the bark and smoke provide all the flavor you need. If you must sauce, serve it on the side rather than drowning the ribs. A thin, vinegar-based sauce or a simple au jus made from the drippings complements without overpowering.
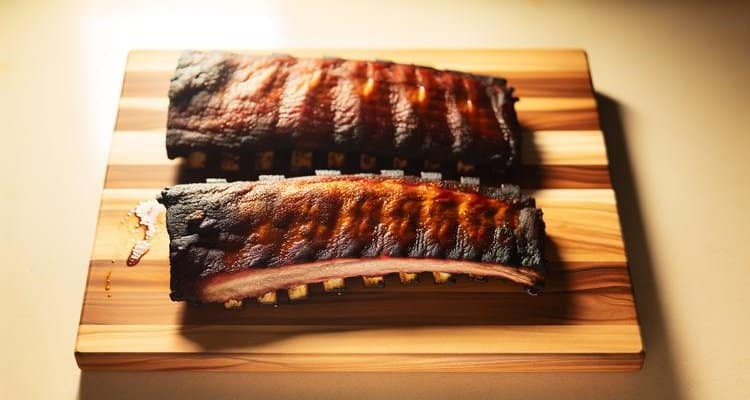
Presentation tips: Arrange individual ribs bones-up on a large cutting board or platter. The visual impact of properly smoked beef ribs with dark bark and visible smoke rings speaks for itself—no garnish needed beyond maybe some fresh herbs.
Advanced Techniques and Flavor Variations
Once you’ve mastered the basic method, these advanced techniques let you customize your beef ribs and explore different flavor profiles.
Competition-Style Techniques
Hot and Fast Method: Some competition teams smoke beef ribs at 300-325°F for 4-5 hours instead of the traditional low-and-slow approach. This requires more attention to prevent drying out, but it can produce excellent results with a thicker, crunchier bark. Wrapping becomes essential with this method to retain moisture.
Advanced wrapping with butter and honey: When wrapping at 170°F, add 2-3 tablespoons of butter, 1-2 tablespoons of honey, and a few tablespoons of beef broth to the foil packet. This creates a rich braising liquid that bastes the meat, adding another layer of flavor and ensuring maximum moisture.
Glaze applications: Unwrap the ribs at 200°F, brush with a sticky glaze (beef tallow mixed with honey and worcestershire works beautifully), then return to the smoker unwrapped for the final 15-20 minutes. This sets the glaze into a beautiful mahogany finish.
Flavor Profile Variations
Korean-Inspired Gochujang Glaze: Mix gochujang paste, honey, soy sauce, rice vinegar, and sesame oil into a thick glaze. Apply during the last 30 minutes of cooking for sweet-spicy-savory complexity that plays beautifully with smoke.
Coffee Rub Variation: Add finely ground coffee to your SPG rub (1/4 part coffee to the standard ratios). Coffee adds earthy depth and bittersweet notes that complement beef’s richness while enhancing bark color.
Herb-Crusted Style: Combine fresh rosemary, thyme, and sage with your standard rub for an herbal, almost prime-rib-like flavor profile. Add herbs during the last hour to prevent burning.
Regional BBQ Styles: Adapt your ribs to regional BBQ traditions—a Carolina-style vinegar mop sauce, Kansas City sweet and sticky glaze, or Memphis dry rub approach all work excellently with beef ribs.
Wood Smoke Pairing
Matching wood to flavor profiles: If you’re using bold seasonings like gochujang, pair with milder fruit woods. For simple SPG rubs, you can be more aggressive with strong woods like mesquite.
Blending woods: Combine 70% oak with 30% cherry for balanced smoke with enhanced color, or mix pecan and apple for sweeter, milder smoke.
Avoiding bitter smoke: Bitter smoke results from smoldering (incomplete combustion) rather than wood choice. Ensure clean-burning fire with thin, blue smoke—not thick white billows.
Pro Insight: The advanced techniques above are fun to explore, but remember: perfect execution of the basic method beats fancy techniques done poorly. Master the fundamentals first, then experiment.
Troubleshooting Common Issues
Even experienced pitmasters encounter problems. Here’s how to identify and fix the most common beef rib smoking issues:
| Problem | Likely Cause | Solution |
|---|---|---|
| Ribs are tough and chewy | Undercooked – not truly probe tender | Continue cooking and test doneness by feel, not just temp. Beef ribs need 205-210°F AND probe tenderness |
| Bark won’t form or stays soft | Too much moisture or wrapped too early | Don’t wrap until solid bark has formed (4-5 hours). Skip spritzing or reduce frequency |
| Meat is dry despite high temp | Overcooked past 215°F or insufficient fat | Pull at 205-210°F max. Choose fattier cuts (plate ribs over back ribs) |
| Bitter smoke flavor | Too much wood or dirty smoke | Use less wood (4-6 chunks max). Ensure thin blue smoke, not thick white billows |
| Temperature won’t stabilize | Airflow issues or fuel problems | Check intake/exhaust vents. Add more fuel. Let smoker preheat fully before adding meat |
| Cook taking much longer than expected | Temperature too low or thick/cold meat | Verify smoker temp with separate thermometer. Bring meat to room temp before smoking |
Detailed Solutions for Common Problems
How to Save Tough Ribs
If your ribs hit 210°F but still feel tough when probed, don’t panic—they just need more time. Wrap them tightly in foil with 1/4 cup of beef broth, return to the smoker at 250°F, and cook another 30-60 minutes. Test again for probe tenderness. Sometimes thick cuts need 220°F to fully break down connective tissue.
As a last resort, you can salvage overcooked but tough ribs by braising them: Remove from smoker, place in a covered pan with 2 cups beef broth, cover tightly with foil, and braise in a 275°F oven for 1-2 hours until tender.
Preventing Dryness
Dry ribs usually result from overcooking past 215°F or choosing cuts with minimal marbling. Prevention strategies: pull at 205-210°F maximum, choose Prime or upper Choice grades, don’t trim fat too aggressively, and wrap during the cook to retain moisture. If ribs are drying out mid-cook, wrap immediately with added liquid.
Managing Smoke Quality
White, billowing smoke creates acrid, bitter flavors. You want thin, blue smoke that’s almost invisible. To achieve this: use properly seasoned (dry) wood, ensure adequate oxygen flow to your fire, and avoid smoldering. If you see thick white smoke, open vents to increase airflow and let the fire burn hotter/cleaner.
Temperature Control Tips
Consistent temperature is the foundation of good barbecue. Use a separate oven thermometer to verify your smoker’s built-in gauge is accurate (many read 25-50°F off). Learn your smoker’s hot and cold spots by running it empty with thermometers in different locations. Shield meat from direct heat sources with deflector plates or water pans. During long cooks, check and refuel every 2 hours to prevent temperature crashes.
Storing and Reheating Leftover Beef Short Ribs
Storage Guidelines
Refrigeration: Store cooled beef ribs in airtight containers or wrap tightly in foil. Properly stored, they’ll keep for up to 4 days in the refrigerator. Let ribs cool to room temperature (within 2 hours of cooking) before refrigerating to prevent condensation.
Freezing: Beef ribs freeze exceptionally well for up to 3 months. Wrap individual ribs tightly in plastic wrap, then place in freezer bags with air removed. Label with date and contents. For best quality, freeze ribs whole rather than sliced—the bones protect the meat from freezer burn.
Proper wrapping technique: Double-wrap for freezing: first layer of plastic wrap touching the meat to prevent air exposure, second layer of heavy-duty foil for protection. Vacuum sealing works even better if you have the equipment.
Reheating Methods
Oven Method (Best for Maintaining Texture)
Preheat oven to 250°F. Place ribs in a covered baking dish with 1/4 cup of beef broth or water to create steam. Cover tightly with foil and heat for 30-45 minutes until warmed through (internal temp 145-165°F). This gentle reheating preserves moisture and texture better than microwaving.
Sous Vide Method
For perfect reheating, vacuum-seal ribs and immerse in 140°F water bath for 45-60 minutes. This brings them to serving temperature without any additional cooking or moisture loss. Finish with a quick sear or torch on the exterior to re-crisp the bark if desired.
Microwave (Last Resort)
If you must microwave, do so at 50% power in 1-minute intervals, rotating between intervals. Place ribs on a microwave-safe plate with a damp paper towel over them to trap moisture. Microwaving at full power dries out and toughens the meat.
Adding Moisture During Reheating
Regardless of method, add liquid during reheating. Beef broth, au jus, or even water creates steam that prevents drying. The ribs will reabsorb some of this moisture, improving texture. For extra richness, add a tablespoon of butter to your reheating liquid.
Frequently Asked Questions About Smoking Beef Short Ribs
How long does it take to smoke beef short ribs?
6-8 hours at 250°F is typical, but cook to temperature (205-210°F) and tenderness—not time. Thick plate ribs may need the full 8 hours or more, while thinner chuck ribs might finish in 6 hours. Variables like smoker temperature, meat thickness, and whether you wrap all affect cook time. Always plan extra time and use a reliable thermometer rather than watching the clock.
What’s the best temperature for smoking beef short ribs?
250°F is the sweet spot—long enough for full collagen breakdown and smoke absorption, but not so slow that you’re smoking overnight. 225°F produces slightly better results but adds 2+ hours. 275°F works if you’re short on time. Avoid going above 300°F unless you’re experienced with hot-and-fast methods.
Should I wrap beef short ribs while smoking?
It’s optional. Wrapping at 165-170°F (once bark is set) powers through the stall and cuts 1-2 hours off cook time. Butcher paper preserves bark better than foil but both work. Many pitmasters prefer unwrapped for maximum bark crunch, accepting the longer cook time. There’s no wrong choice—it’s preference versus time.
What’s the difference between beef short ribs and back ribs?
Short ribs come from the lower rib cage (ribs 1-8) with thick meat coverage—3-5 inches on plate ribs. Back ribs come from the upper rib cage where prime rib is cut, leaving minimal meat on the bones. Short ribs are ideal for smoking; back ribs work better for grilling. If you’re smoking, always choose short ribs over back ribs.
How do I know when beef short ribs are done?
Internal temp of 205-210°F AND the probe-tender test. Insert a thermometer or skewer between bones—it should glide in and out like butter with zero resistance. Temperature alone isn’t enough; some ribs are probe-tender at 203°F while others need 212°F. Always trust the probe test over the number.
Why are my beef short ribs tough?
They’re undercooked. Beef ribs need to reach 205°F+ AND pass the probe-tender test for collagen to fully break down into gelatin. Pulling at 190-195°F leaves them tough despite seeming “done” by temp. Return to smoker, wrap if needed, and cook until truly probe-tender. You cannot overcook beef short ribs at 250°F—only undercook them.
What wood is best for smoking beef ribs?
Oak is the classic choice—medium smoke that complements beef without overpowering. Pecan and hickory work excellently too. Use mesquite sparingly (it can become bitter during long cooks) or blend it with milder woods. Fruit woods like apple or cherry add subtle sweetness and can be mixed 30/70 with oak. Avoid strong woods like mesquite as your only smoke source for 6+ hour cooks.
Can I smoke beef short ribs on a gas grill?
Yes, using indirect heat and a smoker box with wood chips. Set up two-zone cooking with burners on one side only, place ribs on the cool side, and position a smoker box over the lit burners. The challenge is maintaining consistent 250°F for 6-8 hours—gas grills often struggle with prolonged low temps. Monitor closely and be prepared to adjust burners frequently. A pellet grill or charcoal smoker makes this easier.
Do I need to remove the membrane from beef short ribs?
Yes, absolutely. Remove the thick membrane from the bone side for better seasoning penetration, smoke absorption, and bark formation. The membrane turns rubbery when cooked and acts as a barrier. Slide a knife under it at one end, grip with a paper towel, and peel it off in one sheet. It’s easier than removing membrane from pork ribs.
How much does a rack of beef short ribs cost?
Plate short ribs (the premium “dino ribs”) typically cost $8-12 per pound. A full 3-bone rack weighs 6-9 pounds, so expect $50-100+ depending on location and quality grade. Chuck short ribs are more affordable at $6-9 per pound. Prime grade costs more than Choice. Prices spike during summer grilling season. Build a relationship with your butcher for better pricing on special orders.
What should I serve with smoked beef short ribs?
Classic BBQ sides include creamy coleslaw (cuts the richness), mac and cheese, baked beans, cornbread, pickles, grilled vegetables, or simple white bread for soaking up drippings. Since beef ribs are extremely rich, lighter sides like simple salads or pickled vegetables provide good contrast. Traditional Texas style serves them with white bread, pickles, and onions—letting the meat shine.
Can I make beef short ribs ahead of time?
Yes—this actually works great. Smoke fully until probe-tender, let cool, wrap tightly, and refrigerate for up to 3 days or freeze for up to 3 months. To serve, reheat gently in a 250°F oven wrapped in foil with added liquid (beef broth) for 30-45 minutes. The ribs will be slightly more tender after resting overnight as juices redistribute fully. Many competition teams prep a day ahead.
Final Thoughts on Smoking Beef Short Ribs
Smoking beef short ribs represents both an achievement and a journey in your barbecue education. These massive cuts reward patience and attention to detail with unmatched flavor and tenderness that rivals even the best brisket.
Remember the key takeaways from this guide:
- Patience is essential—the 6-8 hour cook cannot be rushed without sacrificing quality
- Cook to temperature AND tenderness—the probe test is more important than any thermometer reading
- Proper resting makes a significant difference—don’t skip that final 30-60 minute rest
- Don’t fear the stall—it’s a natural part of the process where critical tenderization happens
- Choose the right cut—plate short ribs or chuck short ribs, never back ribs for smoking
Your first attempt might not be perfect—that’s expected. Each cook teaches you something about your smoker’s personality, how bark develops, and what true probe-tender feels like. By your third or fourth cook, you’ll be producing competition-quality ribs that make your friends question whether you secretly trained in Texas.
The beauty of beef short ribs is their forgiving nature for beginners combined with enough nuance to keep experienced pitmasters engaged. Start with the basic SPG rub and 250°F unwrapped method. Once you’ve mastered that foundation, experiment with wrapping, different woods, and flavor variations.
Most importantly: trust the process. When you’re four hours in and temperature seems stuck, resist the urge to crank the heat or panic. When the probe test says they need another 30 minutes despite hitting 210°F, believe the probe test. Barbecue rewards patience and punishes rushing.
Now fire up that smoker and give beef short ribs a try. The eight-hour investment pays dividends in incredibly tender, smoky, beefy perfection that you’ll want to make again and again.
Ready to explore similar smoking techniques? Check out our complete guide on smoking brisket, which uses many of the same principles for another classic low-and-slow BBQ cut.
Contents
- Quick Reference
- Understanding Beef Ribs: A Guide to the Different Cuts
- Selecting and Preparing Beef Short Ribs
- Essential Equipment for Smoking Beef Short Ribs
- Smoking Temperature and Time Guidelines
- The Complete Smoking Process: Step by Step
- Advanced Techniques and Flavor Variations
- Troubleshooting Common Issues
- Storing and Reheating Leftover Beef Short Ribs
- Frequently Asked Questions About Smoking Beef Short Ribs
- Final Thoughts on Smoking Beef Short Ribs